Introduction
Making your own jerky is surprisingly economical, costing a fraction of the price for those small store-bought bags. This budget-friendly beginner beef jerky turns one inexpensive roast into a huge batch of savory snacks. I remember the first time I tried it, feeling a little intimidated by the process. But after a few batches, I realized it’s one of the most forgiving and rewarding kitchen projects you can tackle. It’s about transforming simple ingredients into something deeply satisfying and packed with protein.
This guide is your simple map to homemade snack success. We’ll walk through every step together, from choosing the right cut of beef to mastering the perfect jerky drying time. Forget complicated equipment or mysterious techniques. This is about real food, made in your own kitchen, with flavors you control. Whether you’re packing lunches, planning a road trip, or just craving a wholesome bite, this beginner beef jerky recipe is your ticket to a pantry full of homemade goodness.
Table of Contents
PrintBeginner Beef Jerky

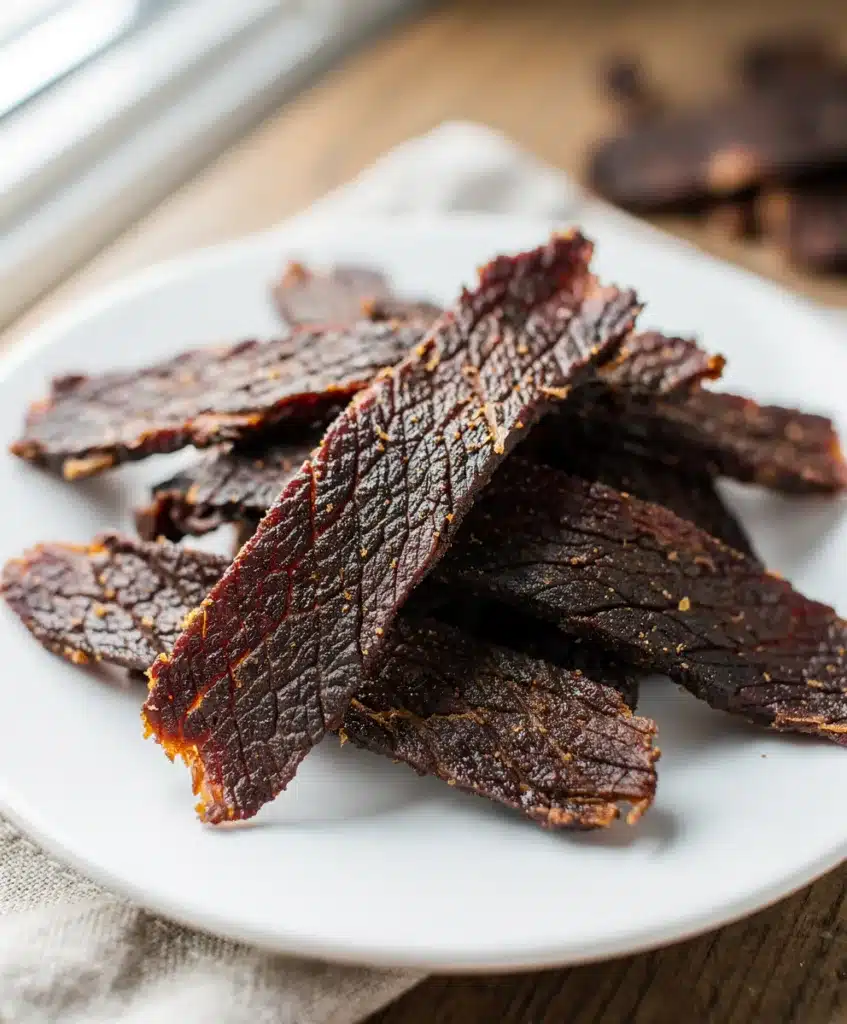
This is a simple, economical guide to making your own savory beef jerky at home. Using a lean roast and a flavorful marinade, you can create a huge batch of protein-packed snacks. The process is forgiving and results in a deeply satisfying homemade treat.
- Prep Time: 30min
- Cook Time: 6h
- Total Time: 12h 30min
- Yield: Approximately 12 ounces of jerky 1x
- Category: snack
- Method: dehydrating
- Cuisine: American
- Diet: Gluten Free Option
Ingredients
- 2 to 2.5 pounds lean beef roast (top round, bottom round, or eye of round)
- 3/4 cup soy sauce (or tamari for gluten-free)
- 1/4 cup Worcestershire sauce
- 2 tablespoons liquid smoke
- 2 tablespoons brown sugar or honey
- 1 tablespoon freshly cracked black pepper
- 2 teaspoons onion powder
- 2 teaspoons garlic powder
- 1 teaspoon smoked paprika
- 1/2 teaspoon red pepper flakes (optional)
Instructions
- Partially freeze the beef roast for 1-2 hours until firm. Slice across the grain into 1/4-inch thick strips.
- In a large bowl, whisk together soy sauce, Worcestershire, liquid smoke, brown sugar, black pepper, onion powder, garlic powder, smoked paprika, and red pepper flakes until sugar dissolves.
- Add beef strips to the marinade, ensuring they are fully coated. Cover and refrigerate for at least 8 hours, or ideally overnight.
- Remove beef from marinade and pat each strip thoroughly dry with paper towels. Discard the used marinade.
- Arrange the strips in a single layer on dehydrator trays or oven racks, ensuring no pieces are touching.
- Dry at 165°F (or your dehydrator’s meat setting) for 4-6 hours. If using an oven, set to the lowest temperature (ideally 175°F) with the door slightly ajar.
- Check for doneness starting at 4 hours. Jerky is done when it is dry to the touch, firm, and bends without breaking or feeling moist in the center.
Notes
For consistent slicing, a partially frozen roast is key. Patting the marinated meat completely dry before dehydrating is crucial for proper texture. Store cooled jerky in an airtight container at room temperature for 1-2 weeks, in the fridge for up to 2 months, or frozen for 6-12 months.
Nutrition
- Serving Size: 1
- Calories: 80
- Sugar: 1
- Sodium: 350
- Fat: 3
- Saturated Fat: 1
- Unsaturated Fat: 2
- Trans Fat: 0
- Carbohydrates: 2
- Fiber: 0
- Protein: 12
- Cholesterol: 25

Ingredients List
This beginner beef jerky starts with a short, flavor-packed ingredient list. You likely have most of these in your pantry right now, which makes this homemade beef jerky project even more appealing.
- 2 to 2.5 pounds lean beef roast (top round, bottom round, or eye of round)
- ¾ cup soy sauce (or tamari for gluten-free)
- ¼ cup Worcestershire sauce
- 2 tablespoons liquid smoke
- 2 tablespoons brown sugar or honey
- 1 tablespoon freshly cracked black pepper
- 2 teaspoons onion powder
- 2 teaspoons garlic powder
- 1 teaspoon smoked paprika
- ½ teaspoon red pepper flakes (optional, for a gentle kick)
Smart Swaps: For a gluten-free version, use tamari or coconut aminos instead of soy sauce. If you prefer a less sweet profile, reduce the brown sugar to 1 tablespoon. The liquid smoke is key for that classic smoky flavor without a smoker, but you can omit it for a more straightforward savory jerky.
Timing
Understanding the timeline is crucial for any jerky recipe guide. While active hands-on time is minimal, patience is your main ingredient.
- Prep Time: 30 minutes (plus 8-24 hours marinating)
- Cook/Dry Time: 4-6 hours
- Total Time: 12-30 hours (mostly hands-off)
Compared to store-bought options, this timeline gives you complete control over texture and flavor. Think of it like a slow-cooked project, similar to my favorite Slow Cooker Beef Stew, where time does the beautiful work of building deep, rich taste.
Step-by-Step Instructions
Follow these clear steps for your first successful batch of homemade beef jerky. The process is simple, but a few pro tips make all the difference.
- Slice the Meat. Partially freeze your beef roast for 1-2 hours until it’s firm but not solid. This makes slicing much easier. Using a very sharp knife, slice the meat across the grain into strips about ¼-inch thick. Consistent thickness is the secret to even drying, so take your time here.
- Make the Marinade. In a large bowl, whisk together the soy sauce, Worcestershire sauce, liquid smoke, brown sugar, and all the spices until the sugar is dissolved. This savory, smoky, slightly sweet blend is the soul of your beginner beef jerky.
- Marinate. Add the beef strips to the marinade, ensuring each piece is well coated. Cover the bowl and refrigerate. Let it marinate for at least 8 hours, or ideally overnight, for the deepest flavor penetration. This waiting period is where the magic happens.
- Prepare for Drying. Remove the beef from the marinade and pat each strip thoroughly dry with paper towels. This step is non-negotiable—excess moisture will steam the meat instead of drying it properly. Discard the used marinade.
- Dry the Jerky. Arrange the strips in a single layer on your drying racks, ensuring no pieces are touching or overlapping. This allows for proper air circulation. The jerky drying time will vary based on your method and strip thickness.
- Check for Doneness. After about 4 hours, start checking your jerky. It’s done when it is dry to the touch, firm, and bends without breaking. It should not be soft or moist in the center. A piece should crack slightly when bent but not snap in two.
Nutritional Information
A serving of this homemade beef jerky (about 1 ounce or 28 grams) is a powerful, protein-packed snack. Please note, nutritional values are approximate and can vary based on the specific cut of meat and exact ingredients used.
- Calories: ~80
- Protein: ~12g
- Fat: ~3g
- Carbohydrates: ~2g
- Sodium: ~350mg
This beginner beef jerky is an excellent source of high-quality protein, making it a fantastic fuel for active days. The lean beef provides iron and B vitamins, essential for energy. By making it yourself, you control the sodium and sugar levels, creating a snack that’s both satisfying and mindful.
Equipment Needed
You don’t need a professional dehydrator to make great jerky, though it is the most consistent tool. Here are your options for this beginner beef jerky project:
- Sharp Chef’s Knife: For slicing the partially frozen meat thinly and evenly.
- Large Mixing Bowl: For combining the marinade and beef.
- Racks for Drying: This is key. You can use:
- A food dehydrator with jerky trays.
- Oven racks placed over baking sheets (to catch drips).
- Wire cooling racks set on a sheet pan.
- Paper Towels: For patting the marinated beef completely dry before drying.
Why You’ll Love This Recipe
This beginner beef jerky recipe is about more than just a snack; it’s about reclaiming a simple, satisfying kitchen skill.
- Incredibly Cost-Effective. One affordable roast yields multiple bags worth of jerky for the price of one small store-bought bag.
- Total Flavor Control. You decide the salt, sugar, and spice levels. Love black pepper? Add more. Prefer a touch of heat? Boost the red pepper flakes.
- No Mystery Ingredients. Just real, whole foods you can pronounce. It’s a clean, wholesome protein source perfect for kids and adults alike.
- Meal Prep Hero. A batch made on the weekend fuels your week with easy, grab-and-go snacks for lunches, hikes, or afternoon cravings.
- Deeply Satisfying. There’s a unique pride that comes from pulling a batch of perfectly dried, flavorful homemade beef jerky from your own oven or dehydrator.

Healthier Alternatives for the Recipe
This jerky recipe guide is easily adaptable to fit various dietary preferences without sacrificing the classic savory taste.
- Lower Sodium: Use reduced-sodium soy sauce and omit the Worcestershire sauce, adding an extra teaspoon of smoked paprika and a splash of apple cider vinegar for complexity.
- Sugar-Free: Substitute the brown sugar with a sugar-free alternative like monk fruit sweetener, or omit it entirely for a more savory, less sweet profile.
- Paleo/Whole30: Use coconut aminos instead of soy sauce, ensure your Worcestershire sauce is compliant (or make your own), and replace the brown sugar with a date paste or omit it.
- Extra Protein: Choose the leanest cut possible, like eye of round, to maximize the protein-to-fat ratio in your final beginner beef jerky.
Serving Suggestions
Your freshly made beginner beef jerky is fantastic on its own, but it also plays well with others. Think of it as the ultimate savory component.
- Trail Mix Upgrade: Chop the jerky into small bits and mix with nuts, seeds, and a few dark chocolate chips for a high-energy trail mix.
- Charcuterie Board Star: Add a pile of homemade beef jerky to your next cheese and cracker board for a rustic, protein-packed element.
- Soup & Salad Topper: Crumble jerky over a hearty bowl of soup or a robust salad for a salty, chewy crunch. It would be amazing on a taco salad, much like the flavors in my One Pot Beef Taco Pasta.
- Camping & Travel Essential: Its non-perishable nature makes it the perfect companion for road trips, flights, or days spent outdoors.
Common Mistakes to Avoid
A few simple missteps can affect your jerky drying time and final texture. Here’s how to sidestep them for perfect results every time.
- Skipping the Partial Freeze. Trying to slice room-temperature meat into thin, even strips is a recipe for frustration and uneven pieces. The brief freeze is a game-changer.
- Not Drying the Meat Before Drying. If you place wet, marinade-dripping strips on the rack, they will steam and cook instead of dry, leading to a tough, less shelf-stable product. Pat them dry!
- Overcrowding the Racks. Pieces need space for air to circulate. If they touch or overlap, the moisture has nowhere to go, creating damp spots and uneven drying.
- Rushing the Jerky Drying Time. Jerky is done when it’s dry and leathery, not when the timer goes off. Start checking at the 4-hour mark, but be prepared for it to take longer. It’s done when it bends but doesn’t snap.
- Using Meat with Too Much Fat. Fat does not dry well and can become rancid. Always choose the leanest cuts you can find for your homemade beef jerky.

Storing Tips for the Recipe
Proper storage ensures your hard work pays off for weeks to come. This is where your beginner beef jerky becomes a true pantry staple.
- Cool Completely: Before storing, let the jerky cool to room temperature on the racks to prevent condensation.
- Airtight is Right: Store the jerky in an airtight container or a resealable plastic bag. A small piece of paper towel inside can help absorb any residual moisture.
- Counter or Pantry: Properly dried jerky will keep at room temperature in a cool, dark place for 1-2 weeks.
- For Longer Storage: For maximum shelf life, store it in the refrigerator for up to 2 months. You can also freeze jerky for 6-12 months in a freezer-safe bag. Thaw at room temperature.
- Check for Moisture: If you notice any softness or moisture in the container, you can briefly return the jerky to a dehydrator or a low oven (175°F) for an hour to re-dry it.
Conclusion
Mastering this beginner beef jerky recipe is a small victory with big rewards. You’ll fill your pantry with a wholesome, customizable snack that saves money and tastes infinitely better than anything from a convenience store. It’s a project that teaches patience and pays you back in flavor.
Remember, the first batch is a learning experience. Enjoy the process, trust the jerky drying time, and adjust the spices to make it your own. Once you get the hang of it, you might find yourself experimenting with different flavors, much like the creative twists you can put on classics like Slow Cooker BBQ Meatballs or a comforting Skillet Beef Stroganoff.
I’d love to hear how your homemade beef jerky turns out. What flavor variations did you try? Share your results in the comments below, and don’t forget to tag @HarmonyMeal if you share your snack success story. Happy drying.
FAQs about Beginner Beef Jerky
What is the easiest way to make beginner beef jerky?
The easiest way for beginners is to use thinly sliced lean beef, marinate it in a simple mixture of soy sauce, Worcestershire sauce, liquid smoke, and spices for at least 4 hours, then dehydrate it in a food dehydrator or an oven at low temperature until fully dry.
How long does it take to make beef jerky for beginners?
For beginners, the marinating process usually takes about 4 to 6 hours, and drying the beef jerky takes around 4 to 8 hours depending on thickness and drying method used.
What cut of beef is best for beginner beef jerky?
Top round, flank steak, or eye of round are the best cuts for beginner beef jerky because they are lean, affordable, and easy to slice thinly for drying.
Do I need special equipment to make beginner beef jerky?
No special equipment is required; beginners can use an oven with a low temperature setting or a simple food dehydrator to dry the beef jerky safely.
How should beginner beef jerky be stored?
Store finished beef jerky in an airtight container or vacuum-sealed bag in a cool, dry place. For longer shelf life, refrigerate or freeze it to maintain freshness.
Is homemade beginner beef jerky safe to eat?
Yes, homemade beef jerky is safe to eat if you use lean meat, marinate properly, and dehydrate it to the recommended internal temperature of 160°F (71°C) to kill bacteria.
💬 Let’s Stay Connected!
For daily recipes, kitchen tips, and exclusive content, follow me on:
👉 Facebook for behind-the-scenes & community fun
👉 Pinterest for visual inspiration & meal ideas
👉 X (Twitter) for quick tips & trending recipes
📲 Join the flavor journey, your next favorite recipe is just a follow away!