Introduction
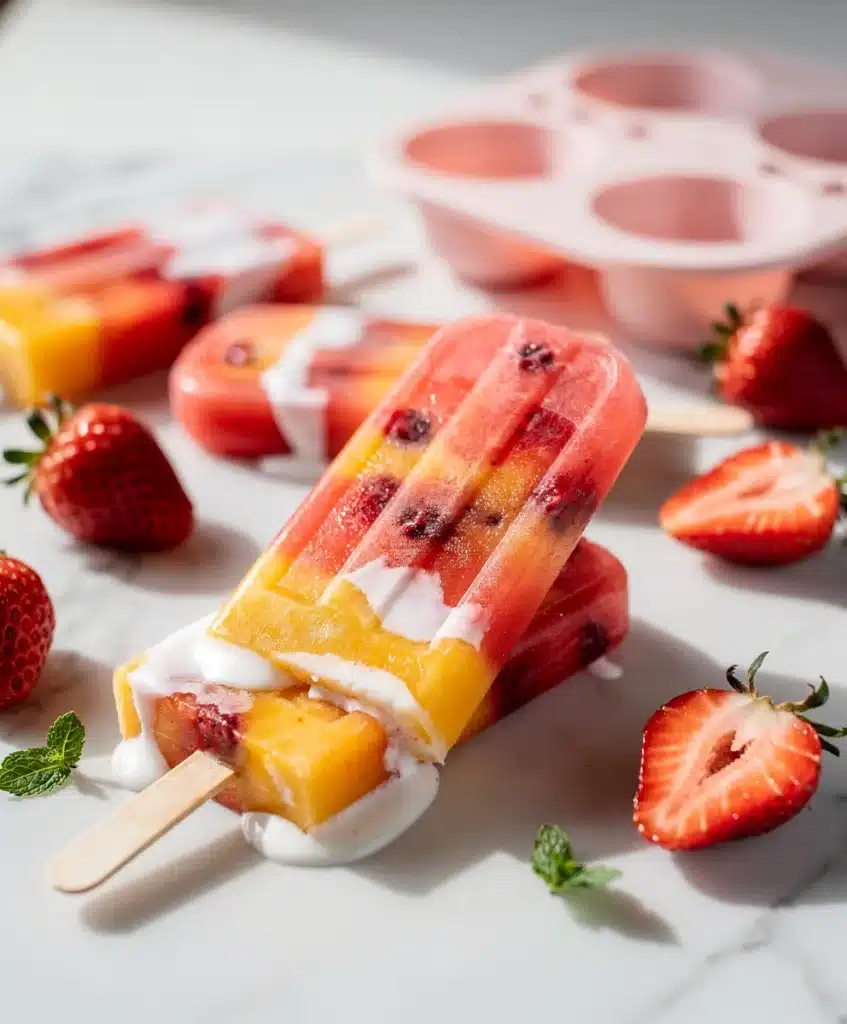
A single serving of these homemade fruit popsicles delivers a full portion of real fruit without any added sugar or preservatives. I remember the first time I made them for my kids on a sweltering July afternoon. We had a basket of overripe strawberries and mangoes sitting on the counter, and I just could not bear to toss them. So I grabbed my blender, poured in some yogurt, and froze the mixture in some old popsicle molds I had forgotten I owned. The look on my daughter's face when she took that first bite was pure joy, no artificial colors needed. That is the magic of homemade fruit popsicles. They turn simple, wholesome ingredients into a treat that feels like a celebration. Whether you are feeding picky eaters or just looking for a guilt-free way to beat the heat, these cool summer popsicles are about to become your new favorite kitchen hack. No fancy equipment, no complicated steps, just real fruit, a little patience, and a whole lot of flavor. For another fruit-forward treat, try our Crowd-Pleasing Strawberry Shortcake for summer gatherings.
Table of Contents
PrintHomemade Fruit Popsicles

A single serving of these homemade fruit popsicles delivers a full portion of real fruit without any added sugar or preservatives. They turn simple, wholesome ingredients into a treat that feels like a celebration. No fancy equipment, no complicated steps, just real fruit, a little patience, and a whole lot of flavor.
- Prep Time: 10min
- Cook Time: 0min
- Total Time: 6h10min
- Yield: 8 servings 1x
- Category: dessert
- Method: freezing
- Cuisine: American
- Diet: Gluten Free, Vegetarian
Ingredients
- 2 cups fresh strawberries, hulled
- 1/2 cup Greek yogurt
- 1 tablespoon honey or maple syrup
- 1 cup frozen mango chunks (for tropical version)
- 1/2 cup coconut milk (for tropical version)
Instructions
- Wash and chop your fruit into small pieces. For strawberries, remove stems. For mangoes, peel and cube them.
- Add your fruit, liquid base, and any sweetener to a blender. Blend on high until completely smooth. Taste and adjust sweetness if needed.
- Pour the mixture into popsicle molds, leaving about a quarter-inch of space at the top for expansion. Tap the molds gently on the counter to release any air bubbles.
- Insert the sticks, then place in the freezer for at least 4 to 6 hours, or overnight for best results.
- To remove, run the molds under warm water for about 10 seconds before pulling the popsicles out. Store in a zip-top bag or airtight container.
Notes
For a dairy-free option, use coconut yogurt or almond milk. For a sugar-free version, skip added sweetener and use ripe bananas or dates. For a protein boost, add a scoop of unflavored collagen or protein powder. Avoid overfilling molds and blend fruit until completely smooth for best texture.
Nutrition
- Serving Size: 8
- Calories: 70
- Sugar: 12
- Sodium: 20
- Fat: 1
- Saturated Fat: 0.5
- Unsaturated Fat: 0.5
- Trans Fat: 0
- Carbohydrates: 15
- Fiber: 2
- Protein: 1
- Cholesterol: 2
Why Homemade Fruit Popsicles Are a Summer Game-Changer
When the temperature climbs, we all crave something cold and sweet. But store-bought popsicles are often packed with high-fructose corn syrup, artificial flavors, and preservatives you cannot even pronounce. Homemade fruit popsicles flip that script completely. You control exactly what goes in, every single ingredient. That means you can use fresh seasonal fruit, adjust sweetness to your liking, and even sneak in some hidden veggies if you are feeling clever. Plus, they are incredibly budget-friendly. A single batch costs a fraction of what you would pay at the grocery store, and you can make a dozen at once. These fresh fruit frozen treats also freeze beautifully, so you always have a healthy cold dessert ready when the craving hits. And let us be honest, there is something deeply satisfying about pulling a homemade popsicle out of the freezer and knowing you made it with your own two hands.
The Simple Ingredients Behind These Cool Summer Popsicles
Homemade fruit popsicles start with the basics: fresh or frozen fruit, a liquid base, and maybe a touch of sweetener. For a classic strawberry version, you will need about two cups of strawberries, half a cup of Greek yogurt, and a tablespoon of honey or maple syrup. For a tropical twist, swap in mango and coconut milk. The beauty of these easy popsicle ideas is their flexibility. You can use any fruit you have on hand, berries, peaches, pineapple, kiwi, even watermelon. Just make sure your fruit is ripe and flavorful, because that is where all the sweetness comes from. If you are watching sugar intake, skip the added sweetener entirely and rely on naturally sweet fruit like bananas or dates. For a dairy-free option, use coconut yogurt or almond milk. And if you want to boost protein, add a scoop of unflavored collagen or protein powder. The possibilities are endless, and each batch is a little different depending on what is in season.

Timing Your Homemade Fruit Popsicles for Maximum Convenience
These homemade fruit popsicles come together in about 10 minutes of active prep time. The hard part is waiting for them to freeze. Plan on at least 4 to 6 hours, but overnight is best for a solid, easy-to-remove popsicle. Total time from start to frozen treat is about 6 hours and 10 minutes. That might sound like a long wait, but here is the trick: make a double batch on Sunday afternoon, and you will have healthy cold desserts ready all week. Compared to running to the store every time someone wants a treat, this is a huge time-saver. Plus, you can prep the mixture days ahead and keep it in the fridge, then just pour and freeze when you are ready. It is one of those easy popsicle ideas that fits perfectly into a busy schedule.
Step-by-Step Instructions for Perfect Homemade Fruit Popsicles
Step 1: Prep Your Fruit
Wash and chop your fruit into small pieces. If you are using strawberries, remove the stems. For mangoes, peel and cube them. For berries, just rinse and pat dry. The smaller the pieces, the smoother your puree will be. This is especially important if you are using a regular blender rather than a high-speed one. For the creamiest texture, freeze your fruit beforehand, this cuts down on ice crystals later.
Step 2: Blend the Base
Add your fruit, liquid base, and any sweetener to a blender. Blend on high until completely smooth. Taste and adjust sweetness if needed. If the mixture is too thick, add a splash more liquid. If it is too thin, add a handful of frozen fruit or a banana for creaminess. This is where you can get creative, add a pinch of cinnamon, a splash of vanilla, or a handful of fresh mint for a flavor twist. For a layered effect, pour in a thin layer of puree, freeze for 30 minutes, then add another layer. It takes longer but looks stunning.
Step 3: Pour and Freeze
Pour the mixture into popsicle molds, leaving about a quarter-inch of space at the top for expansion. Tap the molds gently on the counter to release any air bubbles. Insert the sticks, then place in the freezer. Do not skip the tap, air bubbles create icy pockets that ruin the texture. For easy removal later, run the molds under warm water for about 10 seconds before pulling the popsicles out. Store them in a zip-top bag or airtight container to prevent freezer burn.
Nutritional Information for Homemade Fruit Popsicles
Each serving of these homemade fruit popsicles (based on a strawberry yogurt version) contains roughly 60 to 80 calories, 1 gram of protein, 15 grams of carbs, and less than 1 gram of fat. They are naturally low in sugar compared to store-bought options, and they pack a solid dose of vitamin C from the strawberries. If you use Greek yogurt, you will also get a boost of calcium and probiotics. For a higher-protein version, add a tablespoon of hemp seeds or a scoop of collagen powder. These fresh fruit frozen treats are a smart choice for anyone watching their waistline or looking for kid friendly sweets that do not compromise nutrition.
Equipment Needed for Homemade Fruit Popsicles
You do not need much to make homemade fruit popsicles. A good blender is essential, it does not have to be fancy, but it should handle frozen fruit without struggling. Popsicle molds are a must, but you can also use small paper cups and wooden sticks in a pinch. Silicone molds are easiest to release, but plastic ones work fine too. You will also need a measuring cup for pouring, a spatula to scrape every last drop, and a freezer with enough flat space. That is it. No special gadgets, no expensive tools. These cool summer popsicles are truly a regular kitchen, regular time, great results kind of recipe.
Why You Will Love This Recipe for Homemade Fruit Popsicles
First, these homemade fruit popsicles are incredibly versatile. You can make them with whatever fruit is on sale or in season, so they never get boring. Second, they are naturally sweet and healthy, perfect for kids who love sweets but need real nutrition. Third, they are a fantastic way to reduce food waste. That sad banana on the counter? Perfect for popsicles. Fourth, they are make-ahead friendly. Prep a batch on Sunday, and you have snacks for the whole week. Fifth, they are fun to make with kids. Let them pick the fruit, press the blender button, and pour the mixture into molds. It is a kitchen activity that ends with a delicious reward. These easy popsicle ideas truly check every box.
Healthier Alternatives for Homemade Fruit Popsicles

For a low-carb version, use avocado as the creamy base instead of yogurt. Avocado blends into a silky puree that is rich in healthy fats and low in sugar. Pair it with lime and a pinch of stevia for a tangy, refreshing treat. For a dairy-free option, swap yogurt for full-fat coconut milk or almond milk. The coconut milk adds a natural creaminess that mimics ice cream. For a sugar-free version, skip the honey and use ripe bananas or dates as your sweetener. They add natural sweetness plus fiber. For a protein boost, blend in a scoop of vanilla protein powder or Greek yogurt. These swaps keep your homemade fruit popsicles delicious while fitting almost any dietary need.
Serving Suggestions for Homemade Fruit Popsicles
These homemade fruit popsicles are perfect on their own, but you can dress them up for special occasions. Dip the tops in melted dark chocolate and sprinkle with crushed nuts or shredded coconut before freezing. Serve them alongside a bowl of fresh berries for a pretty platter. For a party, arrange several flavors on a tray with labels so guests can choose their favorite. They also pair beautifully with a slice of our Make-Ahead Fruit Pizza Sugar Cookie for a full fruit-forward dessert spread. Or try them after a slice of Sweet Fruit Pizza for a double dose of summer sweetness. For a breakfast treat, serve a popsicle alongside a glass of our Favorite Strawberry Lemonade Smoothie. The options are endless, and each one feels special.
Common Mistakes to Avoid with Homemade Fruit Popsicles
One of the biggest mistakes people make with homemade fruit popsicles is not blending the fruit smooth enough. Chunky bits freeze into hard, icy lumps that are unpleasant to bite into. Always blend until completely silky. Another common error is overfilling the molds. Liquid expands as it freezes, so leave a little room at the top or your molds will crack. Third, do not skip the sweetener adjustment. Tart fruits like raspberries or kiwi need a little honey or maple syrup to balance the flavor. Taste your mixture before freezing, it should taste slightly sweeter than you want because cold dulls sweetness. Fourth, avoid using too much liquid. A watery base creates icy popsicles instead of creamy ones. Stick to a ratio of about 2 parts fruit to 1 part liquid. Finally, do not rush the freezing time. Popsicles need at least 4 to 6 hours to set properly. If you pull them too early, they will be slushy and fall off the stick.
Storing Tips for Homemade Fruit Popsicles

Once your homemade fruit popsicles are fully frozen, remove them from the molds and wrap each one individually in plastic wrap or parchment paper. Place them in a freezer-safe zip-top bag or airtight container. They will stay fresh for up to three months. For best texture, eat them within two weeks. If you notice ice crystals forming on the surface, that is freezer burn, it will not hurt you, but the texture will not be as creamy. To prevent this, press out as much air as possible from the storage bag. If you are making a big batch for a party, store them upright in a container so they do not stick together. And always label your bag with the date and flavor, trust me, you will not remember what is what after a month.
Conclusion
There is something genuinely joyful about pulling a homemade fruit popsicle out of the freezer on a hot afternoon and knowing exactly what is in it. No mystery ingredients, no guilt, just pure, simple flavor. These cool summer popsicles are proof that healthy cold desserts can be just as satisfying as anything from the store, maybe even more so. Whether you are making them for your kids, your friends, or just yourself, they deliver that perfect balance of sweet, cold, and refreshing. I would love to hear how yours turn out. Let me know in the comments which flavor combination you tried, and do not forget to tag @HarmonyMeal on Pinterest when you share your creations. For more fruit-forward desserts, check out our Lemon Blueberry Loaf Cake which is perfect for summer gatherings. Happy freezing, friends!
FAQs about Homemade Fruit Popsicles
How do you make homemade fruit popsicles?
To make homemade fruit popsicles, blend fresh or frozen fruit of your choice with a liquid base such as fruit juice, coconut milk, or yogurt. Add sweetener if desired, pour the mixture into popsicle molds, insert sticks, and freeze for at least 4–6 hours or overnight until completely solid. Unmold by running warm water over the outside of the mold for a few seconds.
How long do homemade fruit popsicles last in the freezer?
Homemade fruit popsicles last up to 6–8 weeks in the freezer when stored properly. Once unmolded, wrap each popsicle individually in plastic wrap or wax paper and place them in a zip-lock freezer bag to prevent freezer burn and preserve their fresh fruit flavor.
What fruit is best for making homemade popsicles?
The best fruits for homemade popsicles are those with high water content and bold flavors, such as strawberries, mangoes, watermelon, peaches, raspberries, and blueberries. These fruits blend smoothly and freeze well. You can also combine fruits for layered popsicles or mixed-flavor creations.
How do you keep homemade fruit popsicles from getting icy?
To prevent homemade fruit popsicles from becoming icy, add a creamy base like coconut milk, Greek yogurt, or condensed milk. A small amount of sugar or honey also helps, as sugar lowers the freezing point and improves texture. Blending the fruit thoroughly eliminates large ice crystals for a smoother result.
Do you need a popsicle mold to make homemade fruit popsicles?
No, you do not need a traditional popsicle mold. You can use small paper cups, ice cube trays, silicone molds, or even small plastic cups as alternatives. Cover the top with foil and insert wooden craft sticks or small spoons through the foil to hold them upright while freezing.
Are homemade fruit popsicles healthy?
Yes, homemade fruit popsicles are generally much healthier than store-bought versions. They are made with real fruit, contain no artificial colors or preservatives, and allow you to control the amount of added sugar. Using whole fruits provides natural vitamins, antioxidants, and fiber, making them a nutritious treat for both kids and adults.