The key to that ideal texture lies in the Maillard reaction, the beautiful browning that happens when proteins meet high, dry heat. Baking on a rack ensures each tender gets full exposure, resulting in consistently crispy baked chicken tenders. I think we can all agree there’s something deeply comforting about a perfectly cooked chicken tender. It’s the ultimate weeknight hero, a lunchbox superstar, and the answer to the eternal “what’s for dinner?” on a busy Tuesday. But let’s be honest, the drive-thru version, while tempting, often leaves us feeling a bit…meh. Greasy, overly salty, and frankly, not what we want to serve our families regularly.
That’s why this recipe for crispy baked chicken tenders has become my go-to. It’s the perfect marriage of that crave-worthy crunch and the wholesome satisfaction of knowing exactly what’s on your plate. This isn’t just another healthy chicken recipe; it’s a blueprint for a family favorite that’s both incredibly delicious and surprisingly simple. Using basic pantry staples and a straightforward method, we create a golden, crunchy exterior that gives way to juicy, tender chicken every single time. It’s the kind of cheap dinner for a family that feels like a treat, proving you don’t need a deep fryer or a complicated ingredient list to achieve that perfect bite. Let’s get that oven preheated and make some magic happen.
Table of Contents
Crispy Baked Chicken Tenders

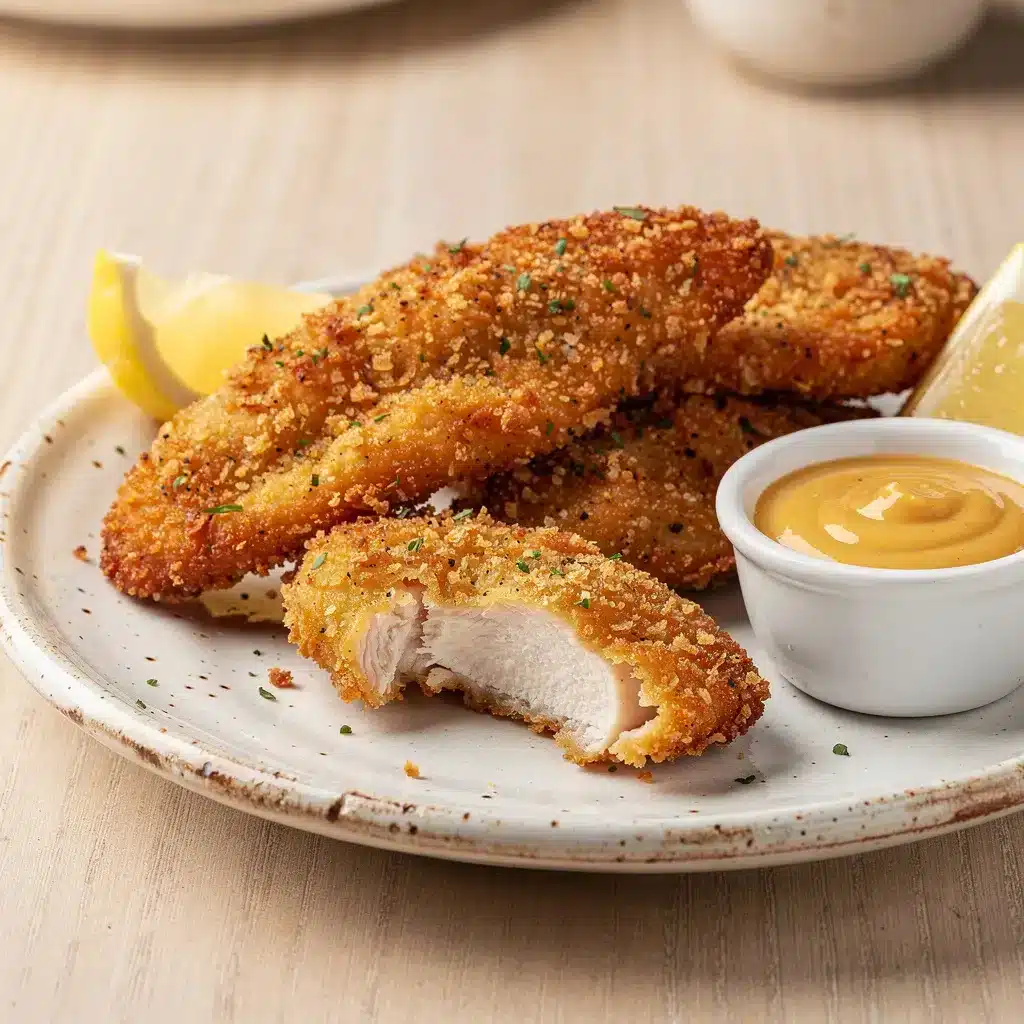
This recipe delivers perfectly golden, crunchy chicken tenders baked on a wire rack for maximum crispiness without frying. Using simple pantry staples, it’s a healthier, family-friendly weeknight meal that feels like a treat. The method ensures juicy chicken inside with a shatteringly crisp panko and Parmesan crust.
- Prep Time: 15min
- Cook Time: 20min
- Total Time: 35min
- Yield: 4 servings 1x
- Category: dinner
- Method: baking
- Cuisine: American
Ingredients
- 1.5 pounds chicken breast tenders
- 1 teaspoon kosher salt
- 0.5 teaspoon black pepper
- 1 teaspoon garlic powder
- 1 teaspoon paprika
- 1 cup all-purpose flour
- 2 large eggs
- 2 tablespoons milk or water
- 1.5 cups panko breadcrumbs
- 0.5 cup grated Parmesan cheese
- 1 teaspoon dried Italian seasoning
- 0.5 teaspoon onion powder
- Cooking spray or 2 tablespoons melted butter or olive oil
Instructions
- Preheat oven to 425°F (220°C). Place a wire rack on a rimmed baking sheet and spray lightly with cooking spray.
- Pat chicken tenders dry with paper towels. Mix salt, pepper, garlic powder, and paprika in a small bowl. Sprinkle seasoning evenly over all sides of the chicken.
- Set up a breading station with three shallow dishes. Place flour in the first dish. Whisk eggs and milk in the second dish. Combine panko, Parmesan, Italian seasoning, and onion powder in the third dish.
- Dredge one chicken tender in flour, shaking off excess. Dip in egg wash, letting excess drip off. Press firmly into panko mixture to coat all sides. Place on prepared wire rack. Repeat with remaining tenders.
- Lightly spray tops of breaded tenders with cooking spray or brush with melted butter/oil.
- Bake for 18-22 minutes, until coating is deep golden brown and chicken internal temperature reaches 165°F.
Notes
For gluten-free version, use gluten-free flour and panko. Omit Parmesan for dairy-free. A wire rack is essential for crispiness. Do not overcrowd the rack. Reheat leftovers in oven or air fryer to maintain crunch.
Nutrition
- Serving Size: 4
- Calories: 320
- Sugar: 1
- Sodium: 700
- Fat: 10
- Saturated Fat: 3
- Unsaturated Fat: 5
- Trans Fat: 0
- Carbohydrates: 22
- Fiber: 1
- Protein: 35
- Cholesterol: 150
Ingredients List
Crispy baked chicken tenders start with simple, quality ingredients you likely already have on hand. This is one of those beautiful chicken breast dinner ideas that transforms humble basics into something spectacular.
For the Chicken:
- 1.5 pounds chicken breast tenders (or boneless, skinless chicken breasts, sliced into 1-inch strips)
- 1 teaspoon kosher salt
- ½ teaspoon black pepper
- 1 teaspoon garlic powder
- 1 teaspoon paprika (smoked or sweet)
For the Breading Station:
- 1 cup all-purpose flour
- 2 large eggs, beaten with 2 tablespoons milk or water
- 1.5 cups panko breadcrumbs (for maximum crunch!)
- ½ cup grated Parmesan cheese (optional, but highly recommended for flavor)
- 1 teaspoon dried Italian seasoning
- ½ teaspoon onion powder
- Cooking spray or 2 tablespoons melted butter or olive oil
Smart Swaps & Dietary Notes:
- Gluten-Free: Use a 1:1 gluten-free flour blend and gluten-free panko-style breadcrumbs.
- Dairy-Free: Omit the Parmesan cheese. You can add a tablespoon of nutritional yeast to the breadcrumbs for a cheesy flavor, or simply rely on the herbs and spices.
- Panko Substitute: Regular breadcrumbs work, but they won’t be quite as shatteringly crisp.
- Spice Level: Add ¼ to ½ teaspoon of cayenne pepper to the flour or breadcrumb mixture for a little kick.
Timing
- Prep Time: 15 minutes
- Cook Time: 18-22 minutes
- Total Time: About 35 minutes
That’s nearly half the time it would take to pack everyone into the car for takeout, and the results are infinitely better. These crispy baked chicken tenders are a true weeknight win.
Step-by-Step Instructions
Follow these simple steps for fail-proof, crunchy tenders every time. The method is key for achieving that ideal texture without any frying.
Prep and Season. Preheat your oven to 425°F (220°C). Place a wire cooling rack inside a large, rimmed baking sheet and spray it lightly with cooking spray. This setup is non-negotiable for airflow and crispiness. Pat your chicken tenders completely dry with paper towels—this helps the coating stick. In a small bowl, mix the salt, pepper, garlic powder, and paprika. Sprinkle this seasoning blend evenly over all sides of the chicken.
Set Up Your Breading Station. You’ll need three shallow dishes (pie plates or wide bowls work perfectly). In the first, place the flour. In the second, whisk together the eggs and milk. In the third, combine the panko breadcrumbs, Parmesan cheese (if using), Italian seasoning, and onion powder. This assembly line makes the process quick and clean.
Bread the Tenders. Working with one piece at a time, dredge a seasoned chicken tender in the flour, shaking off any excess. Next, dip it fully into the egg wash, letting any extra drip off. Finally, press it firmly into the panko mixture, coating all sides and pressing gently so the crumbs adhere. Place the breaded tender on the prepared wire rack. Repeat with all pieces, leaving a little space between each on the rack.
Bake to Perfection. Lightly spray the tops of the breaded crispy baked chicken tenders with cooking spray or brush them with melted butter/oil. This promotes even browning. Bake for 18-22 minutes, or until the coating is deep golden brown and the internal temperature of the chicken reaches 165°F. You won’t need to flip them thanks to the rack!
Nutritional Information
Per serving (approx. 3 tenders): Calories: ~320 | Protein: 35g | Carbohydrates: 22g | Fat: 10g | Fiber: 1g. Chicken breast is an excellent lean protein source, supporting muscle maintenance and keeping you full. Baking instead of frying significantly reduces the fat content, making this a balanced choice for a satisfying meal.
Equipment Needed
You don’t need any fancy gadgets for these crispy baked chicken tenders. A few kitchen basics will do the trick:
- Rimmed baking sheet
- Wire cooling rack (the most important tool for crispiness!)
- Three shallow dishes for breading
- Tongs or clean hands
- Meat thermometer (for perfect doneness)
Why You’ll Love This Recipe
This recipe checks every box for a reliable family meal.
- Healthier & Happier: All the satisfaction of fried chicken tenders with a fraction of the oil and grease.
- Family-Friendly Winner: Even the pickiest eaters devour these. They’re perfect for dipping and a guaranteed crowd-pleaser.
- Meal Prep Hero: Make a double batch! These reheat beautifully for quick lunches or easy dinners later in the week.
- Versatile Canvas: Enjoy them plain, with your favorite dip, sliced over a salad, or tucked into a sandwich.
- Budget-Friendly: Chicken breast and pantry staples make this one of the most reliable cheap dinners for a family.
Healthier Alternatives for the Recipe

You can easily tweak this crispy baked chicken tenders recipe to fit different dietary needs without sacrificing flavor or texture.
- Gluten-Free: As mentioned, use certified gluten-free flour and breadcrumbs.
- Lower-Carb/High-Protein: Swap the panko for crushed pork rinds or almond flour mixed with Parmesan for a keto-friendly crust.
- Dairy-Free: Skip the Parmesan. For extra flavor, add a bit more garlic powder, onion powder, and a pinch of smoked paprika to the breadcrumb mix.
- Egg-Free: Use a “flax egg” (1 tbsp ground flaxseed mixed with 2.5 tbsp water per egg, let sit 5 mins) or buttermilk as your wet binder.
Serving Suggestions
The beauty of these crispy baked chicken tenders is their versatility. Serve them as the main event with classic sides like creamy mashed potatoes and roasted green beans. For a lighter take, chop them over a big garden salad. They are the ultimate dipper—offer a variety of sauces like honey mustard, barbecue, ranch, or a quick sriracha mayo. For a fun “build-your-own” dinner, set out the tenders with slider buns, lettuce, tomato, and pickles. If you love the baked chicken concept, you might also enjoy my Oven Baked Chicken Tenders for a slightly different take, or my Baked Honey Mustard Chicken for a sweet and tangy alternative.
Common Mistakes to Avoid
A few simple tips will guarantee perfect crispy baked chicken tenders every time.
- Skipping the Wire Rack: Baking directly on a sheet pan steams the bottom crust. The rack is essential for airflow and all-around crunch.
- Not Drying the Chicken: Any surface moisture will make the coating slide right off. Pat those tenders thoroughly dry.
- Overcrowding the Pan: Give each tender space on the rack. Crowding creates steam and leads to a soggy crust.
- Underseasoning: Season the chicken directly, not just the breading. This builds flavor from the inside out.
- Not Pressing the Coating: Gently press the chicken into the panko mixture to ensure a good, thick layer of crumbs adheres for maximum texture.
Storing Tips for the Recipe

- Refrigerating: Store leftover crispy baked chicken tenders in an airtight container in the fridge for up to 3-4 days.
- Freezing: After baking and cooling completely, freeze the tenders in a single layer on a parchment-lined sheet. Once solid, transfer to a freezer bag. They’ll keep for 2-3 months. Reheat from frozen.
- Reheating: To restore the crunch, reheat in a 375°F oven or air fryer for 5-10 minutes until hot and crisp. Avoid the microwave, as it will make the coating soft.
Conclusion
At the end of a long day, there’s nothing quite like the sound of happy chatter around the table, with a plate of golden, crispy baked chicken tenders at the center of it all. This recipe proves that wholesome, delicious comfort food doesn’t have to be complicated or time-consuming. It’s a testament to the power of simple ingredients, a good technique, and the warmth of a home-cooked meal. I hope this becomes a new staple in your rotation of easy chicken breast dinner ideas. Give it a try this week, and let me know how your family likes it in the comments below! Don’t forget to tag @HarmonyMeal on Pinterest so I can see your beautiful creations. If you’re looking for more cozy chicken dinners, try my Lemon Garlic Chicken Thighs for a juicy, flavorful option, or my Air Fryer Lemon Pepper Chicken for another crispy, zesty favorite. Happy cooking.
FAQs about Crispy Baked Chicken Tenders
How do you keep chicken tenders crispy when baking?
To keep chicken tenders crispy when baking, use a coating with panko breadcrumbs, ensure the chicken is dry before coating, bake on a wire rack to allow air circulation, and avoid overcrowding the baking sheet.
What temperature is best for baking chicken tenders?
The best temperature for baking chicken tenders is 400-425°F (200-220°C). This higher temperature helps the breading crisp up nicely without drying out the chicken.
How do you make breading stick to chicken tenders?
To make breading stick to chicken tenders, first dredge the chicken in flour, then dip it in an egg wash (beaten eggs), and finally coat it thoroughly with breadcrumbs. Press the breadcrumbs onto the chicken to ensure they adhere well.
How long should you bake chicken tenders at 400?
Bake chicken tenders at 400°F (200°C) for approximately 18-22 minutes, or until the internal temperature reaches 165°F (74°C).
How do you keep breaded chicken from getting soggy in the oven?
To prevent breaded chicken from getting soggy in the oven, bake it on a wire rack set inside a baking sheet. This allows air to circulate around the chicken, promoting even crisping. Avoid overcrowding the pan, as this traps moisture.
What is the secret to crispy chicken?
The secret to crispy chicken lies in a few key steps: ensuring the chicken is dry before breading, using a double coating of breadcrumbs (especially panko), baking at a high temperature, and utilizing a wire rack for optimal air circulation during baking.
💬 Let’s Stay Connected!
For daily recipes, kitchen tips, and exclusive content, follow me on:
👉 Facebook for behind-the-scenes & community fun
👉 Pinterest for visual inspiration & meal ideas
👉 X (Twitter) for quick tips & trending recipes
📲 Join the flavor journey, your next favorite recipe is just a follow away!