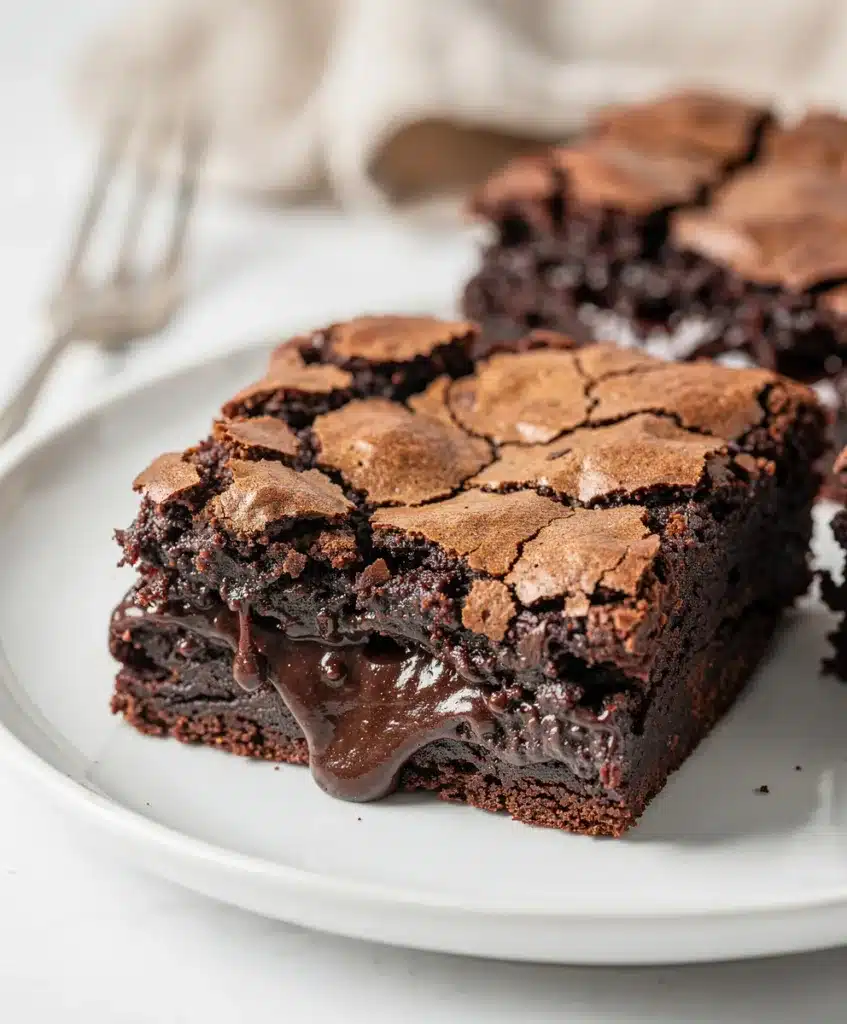
The type of cocoa powder you choose isn’t just a minor detail—it’s the soul of your bake. Using a high-quality Dutch-process cocoa is the non-negotiable key to these brownies’ deep, dark flavor and signature fudge-like texture. It’s the difference between a good chocolate dessert and the kind of classic fudgy brownies that make you close your eyes and sigh. You know the ones. The kind with a crackly top, a dense, almost gooey center, and a rich chocolate flavor that feels like a warm hug.
I’ve been chasing that perfect brownie for years, testing countless recipes that promised the world but delivered cakey squares or overly sweet bricks. This recipe is the happy ending to that story. It’s my ultimate, no-fuss, one-bowl wonder that delivers consistent, soul-satisfying results every single time. Whether you’re a baking novice or a seasoned pro, these classic fudgy brownies are your ticket to dessert heaven. They’re the ultimate comfort food, made easy, and proof that the best things in life are often the simplest.
Table of Contents
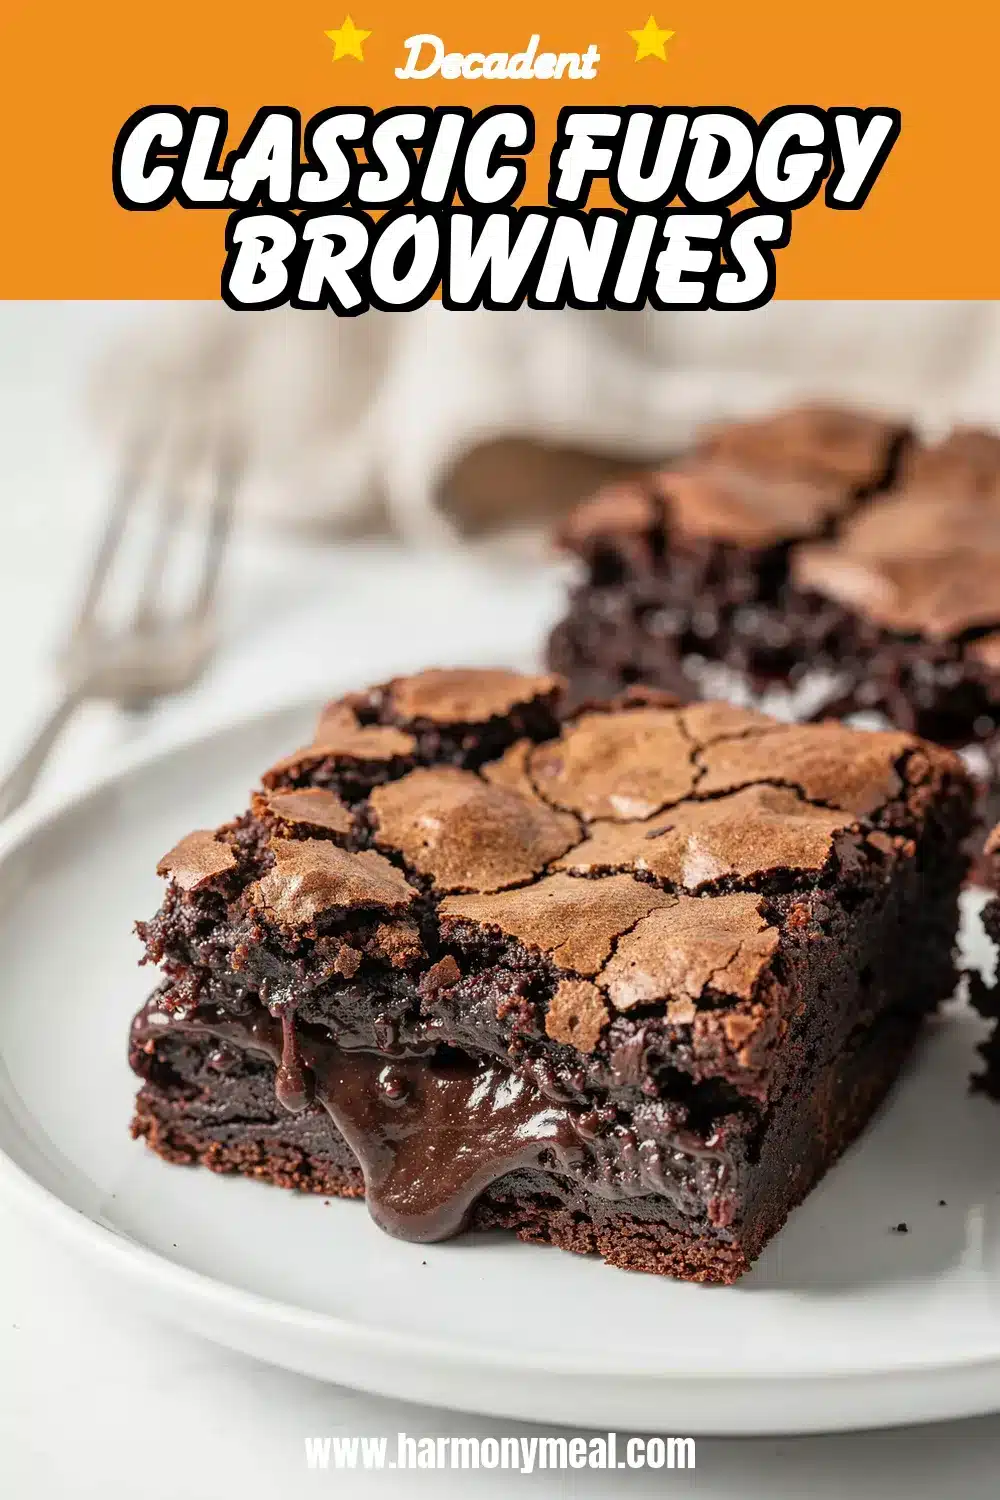
Classic Fudgy Brownies

These are the ultimate one-bowl brownies, featuring a deep chocolate flavor and a dense, fudgy texture with a signature crackly top. The key is using Dutch-process cocoa powder for that rich, soul-satisfying result every time.
- Prep Time: 10min
- Cook Time: 35min
- Total Time: 45min
- Yield: 16 brownies 1x
- Category: Dessert
- Method: Baking
- Cuisine: American
Ingredients
- 1 cup (2 sticks) unsalted butter
- 2 cups granulated sugar
- 4 large eggs, at room temperature
- 1 tablespoon pure vanilla extract
- 1 cup all-purpose flour
- 1 cup Dutch-process cocoa powder
- 1/2 teaspoon salt
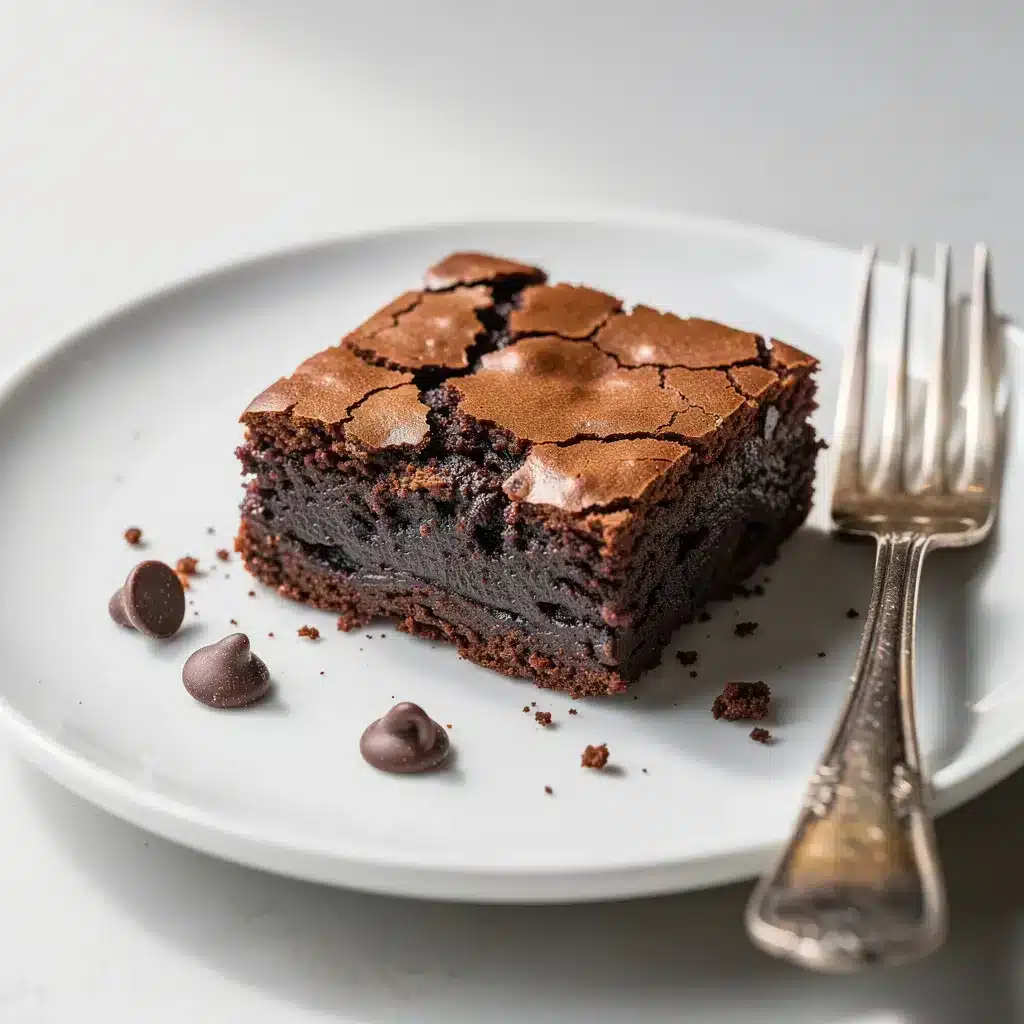
- 1 cup semi-sweet chocolate chips or chunks
Instructions
- Preheat oven to 350°F (175°C). Line an 8×8 or 9×9 inch baking pan with parchment paper, leaving an overhang for easy removal.
- In a large, microwave-safe bowl, melt the butter. Stir in the sugar until combined. The mixture will look gritty.
- Let the butter-sugar mixture cool for a minute. Add the eggs one at a time, whisking vigorously after each addition until the mixture is smooth, glossy, and slightly thickened. Whisk in the vanilla extract.
- Sift the flour, Dutch-process cocoa powder, and salt directly into the wet ingredients. Use a spatula to fold everything together gently until just combined. Do not overmix.
- Gently fold in the chocolate chips or chunks.
- Pour the thick batter into the prepared pan and smooth the top.
- Bake for 30-35 minutes, or until a toothpick inserted into the center comes out with a few moist crumbs clinging to it.
- Let the pan cool completely on a wire rack for at least 1-2 hours before slicing into squares.
Notes
For the classic fudgy texture, Dutch-process cocoa is crucial. Do not overmix the batter once the flour is added, and do not overbake. The brownies are done when a toothpick has moist crumbs, not when it comes out clean. Let them cool completely to set properly.
Nutrition
- Serving Size: 1
- Calories: 320
- Sugar: 30
- Sodium: 90
- Fat: 18
- Saturated Fat: 11
- Unsaturated Fat: 6
- Trans Fat: 0
- Carbohydrates: 40
- Fiber: 3
- Protein: 4
- Cholesterol: 75
Ingredients List
Classic fudgy brownies start with a short list of simple, high-quality ingredients. This is where flavor is built, so choose wisely. You’ll need:
- 1 cup (2 sticks) unsalted butter
- 2 cups granulated sugar
- 4 large eggs, at room temperature
- 1 tablespoon pure vanilla extract
- 1 cup all-purpose flour
- 1 cup Dutch-process cocoa powder (this is crucial for that deep flavor)
- ½ teaspoon salt
- 1 cup semi-sweet chocolate chips or chunks
Smart Swaps & Notes:
- Butter: Salted butter works fine; just omit the added salt in the recipe.
- Cocoa: If you only have natural cocoa powder, the brownies will be slightly more cakey and have a sharper chocolate tang. They’ll still be delicious, but for that true fudgy soul, Dutch-process is king.
- Flour: For a gluten-free version, use a 1:1 gluten-free all-purpose flour blend. I’ve had great success with several brands.
- Add-ins: Swap chocolate chips for walnuts, pecans, or a swirl of peanut butter. For a truly decadent twist, fold in some chopped dark chocolate alongside the chips.
Timing
One of the best things about this recipe is how quickly it comes together. From pantry to oven in under 15 minutes is totally doable.
- Prep Time: 10 minutes
- Cook Time: 30-35 minutes
- Total Time: About 45 minutes, plus cooling
That’s faster than running to the store for a boxed mix, and the homemade flavor is worlds apart. These easy dessert recipes are designed for real life.
Step-by-Step Instructions
Follow these simple steps for perfect classic fudgy brownies every time. I recommend using a large mixing bowl and a sturdy whisk or spatula.
1. Melt the Butter & Sugar: Preheat your oven to 350°F (175°C). Line an 8×8 or 9×9 inch baking pan with parchment paper, leaving an overhang for easy removal. In a large, microwave-safe bowl, melt the butter. Stir in the sugar until well combined. The mixture will look gritty and separated—that’s perfect.
2. Incorporate Eggs & Vanilla: Let the butter-sugar mixture cool for a minute so you don’t scramble the eggs. Add the eggs one at a time, whisking vigorously after each addition until the mixture is smooth, glossy, and slightly thickened. This step incorporates air and helps create that shiny, crackly top. Whisk in the vanilla extract.
3. Add Dry Ingredients: Sift the flour, Dutch-process cocoa powder, and salt directly into the wet ingredients. This prevents lumps and ensures even distribution. Use a spatula to fold everything together gently. Stop as soon as the flour disappears. Overmixing is the enemy of fudgy texture!
4. Fold in Chocolate: Gently fold in the chocolate chips or chunks. This adds pockets of molten chocolate throughout your classic fudgy brownies.
5. Bake to Perfection: Pour the thick batter into your prepared pan and smooth the top. Bake for 30-35 minutes. The key is to pull them out when a toothpick inserted into the center comes out with a few moist crumbs clinging to it, not clean. A clean toothpick means overbaked, cakey brownies.
6. Cool Completely: This is the hardest part! Let the pan cool on a wire rack for at least 1-2 hours before slicing. The brownies continue to set as they cool, developing that ideal fudgy, dense center.
Nutritional Information
(Per serving, based on 16 brownies)
- Calories: ~320
- Total Fat: 18g
- Saturated Fat: 11g
- Cholesterol: 75mg
- Sodium: 90mg
- Total Carbohydrates: 40g
- Dietary Fiber: 3g
- Sugars: 30g
- Protein: 4g
While these are a treat, using high-quality cocoa provides antioxidants. For those looking for healthier dessert recipes, see the swaps section below for ideas on reducing sugar or incorporating whole grains.
Equipment Needed
You don’t need any fancy gadgets for these classic fudgy brownies. A regular kitchen with basic tools is all you need:
- 8×8 or 9×9 inch square baking pan
- Parchment paper
- Large mixing bowl
- Whisk and spatula
- Measuring cups and spoons
- Wire cooling rack
- Sifter or fine-mesh sieve (optional, but helpful for lump-free cocoa)
Why You’ll Love This Recipe
These aren’t just any brownies. Here’s why this recipe earns a permanent spot in your dessert rotation:
- One-Bowl Wonder: Minimal dishes mean maximum joy. You mix everything in the same bowl you melt the butter in.
- Foolproof Fudgy Texture: The specific ratio of fat to flour and the use of Dutch-process cocoa guarantee a dense, moist, and gooey center—exactly what you crave in a classic fudgy brownie.
- Pantry-Staple Friendly: No special trips to the store. If you have butter, eggs, sugar, flour, and cocoa, you’re 95% of the way there.
- Endlessly Adaptable: This is a perfect base recipe. Add nuts, swirls, different chips, or even a sprinkle of sea salt on top to make it your own.
- Crowd-Pleasing Comfort: From lunchbox treats to potlucks to a quiet night in, these brownies are universally loved. They’re the definition of food that feels like home.
Healthier Alternatives for the Recipe
Want to enjoy these classic fudgy brownies with a few tweaks? Here are some simple swaps that keep the spirit (and deliciousness) intact:
- Gluten-Free: Substitute the all-purpose flour with an equal amount of a trusted gluten-free 1:1 baking blend.
- Dairy-Free: Use a high-quality vegan butter stick and ensure your chocolate chips are dairy-free.
- Reduced Sugar: You can reduce the granulated sugar by ¼ cup. The texture will be slightly denser, but still wonderfully fudgy. Alternatively, swap half the sugar for coconut sugar.
- Whole Grain: Replace half of the all-purpose flour with whole wheat pastry flour for added fiber without a heavy texture.
- Protein Boost: Stir in ½ cup of your favorite plain or vanilla protein powder, reducing the flour by ¼ cup to compensate for the added dry ingredients.
Remember, the goal is a satisfying treat. These healthier dessert recipes adjustments help you tailor the classic fudgy brownies to your needs without sacrificing the joy of a homemade bake.
Serving Suggestions
A warm square of classic fudgy brownie is a masterpiece on its own, but a little embellishment never hurts.
- A La Mode: The ultimate pairing. Serve warm with a scoop of vanilla bean ice cream for a hot-cold contrast that’s pure magic.
- Sauce It Up: Drizzle with homemade caramel sauce, hot fudge, or a simple raspberry coulis.
- Gourmet Touch: A flaky sea salt sprinkle just before serving heightens the chocolate flavor beautifully.
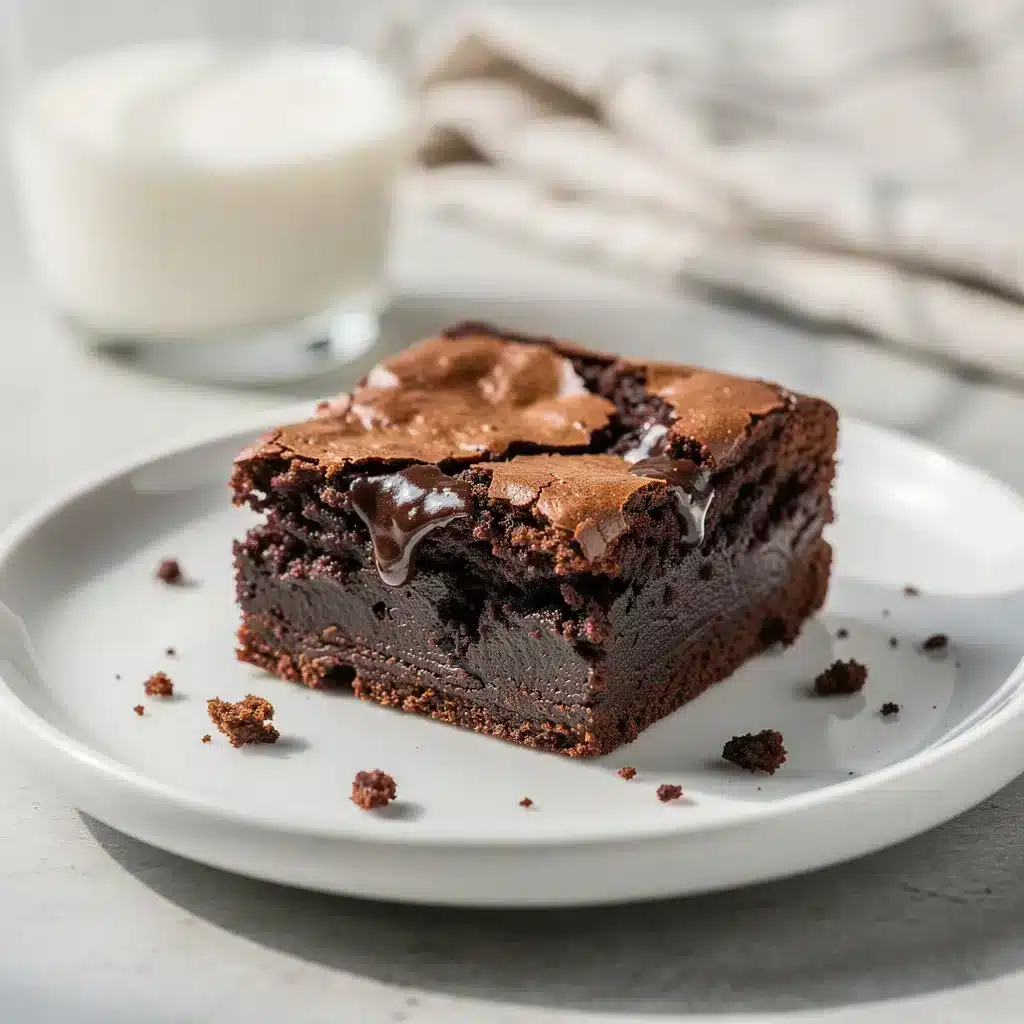
- For a Crowd: Cut into small squares and stack on a platter for a party. They pair wonderfully with a pot of coffee or a glass of cold milk.
- Next-Level Dessert: Crumble a brownie over a bowl of my creamy Baileys Chocolate Mousse for an unbelievable texture and flavor combination. Or, use a brownie square as the base for a scoop of ice cream instead of a cone.
Common Mistakes to Avoid
Even the simplest recipes have pitfalls. Avoid these to guarantee perfect classic fudgy brownies:
- Using the Wrong Cocoa: As stated upfront, natural cocoa will yield a cakier, lighter-colored brownie. For deep, dark, fudgy results, Dutch-process is non-negotiable.
- Overmixing the Batter: Once you add the flour, mix just until combined. Overworking the gluten in the flour leads to tough, chewy brownies instead of tender, fudgy ones.
- Overbaking: This is the #1 reason for dry brownies. Pull them out when the toothpick has a few sticky crumbs. They will set further as they cool. Remember, you’re aiming for a gooey center.
- Skipping the Cooling Time: Cutting into warm brownies is tempting but tragic. They will fall apart and seem underbaked. Patience allows them to set into perfect, clean-cut squares.
- Not Lining the Pan: Parchment paper with overhangs is your best friend. It guarantees easy, clean removal and perfect edges on every single classic fudgy brownie.
Storing Tips for the Recipe
Proper storage keeps your classic fudgy brownies tasting fresh and delicious.
- Room Temperature: Once completely cooled, store brownies in an airtight container at room temperature for up to 4 days. A slice of bread in the container can help keep them moist.
- Refrigerator: For a firmer, extra-fudge-like texture, you can refrigerate them for up to a week. Let them come to room temperature before serving for the best flavor and texture.
- Freezer: These brownies freeze beautifully. Wrap individual squares or the whole slab tightly in plastic wrap, then place in a freezer bag. They will keep for up to 3 months. Thaw at room temperature or warm briefly in the microwave.
- Reheating: For that fresh-from-the-oven feel, warm a square in the microwave for 10-15 seconds. It will revive the gooey center perfectly.
Conclusion
At the end of the day, a perfect pan of classic fudgy brownies is about more than just dessert. It’s about the simple pleasure of stirring a bowl of dark batter, the anticipation as your kitchen fills with the smell of chocolate, and the shared smiles when you finally cut into that glossy, crackly top. This recipe is my love letter to that process—simple ingredients, warm memories, and a result that never fails to delight.
I hope this becomes your new go-to, the recipe you scribble on a notecard and pass down. It’s comfort food, made easy, for your regular kitchen and your regular time. Now, go preheat that oven and get baking.
I’d love to hear how your classic fudgy brownies turn out! Leave a comment below and tell me what add-ins you used. And don’t forget to tag @HarmonyMeal on Pinterest so I can see your beautiful creations.
If you’re on a chocolate kick, try my Fudgy Brownie Cookies for a portable treat, or my decadent Chocolate Peanut Butter Pie for your next special occasion. And for more easy, crowd-pleasing ideas, check out my roundup of Easy Super Bowl Desserts.
FAQs about Classic Fudgy Brownies
Why are my brownies cakey instead of fudgy?
Cakey brownies often result from too much flour or over-baking. Ensure you measure flour accurately (spoon and level method) and avoid over-baking. Fudgy brownies should be slightly underbaked for a moist center.
What makes brownies fudgy?
Fudgy brownies have a higher fat-to-flour ratio than cakey brownies. Using melted chocolate in addition to cocoa powder, and using more butter or oil, contributes to their dense, fudgy texture.
How do you know when fudgy brownies are done?
Fudgy brownies are done when the edges are set, and the center still looks slightly moist. A toothpick inserted into the center should come out with a few moist crumbs clinging to it. Avoid a clean toothpick, as this indicates over-baking.
What is the secret to moist brownies?
The secret to moist brownies lies in using enough fat (butter, oil, or chocolate), avoiding over-baking, and using ingredients at room temperature. Also, adding a touch of moisture like sour cream or yogurt can help.
What’s the difference between fudgy and chewy brownies?
Fudgy brownies are dense and moist, with a rich chocolate flavor. Chewy brownies have a slightly firmer texture with a bit of ‘bite’ to them, often achieved by using brown sugar and beating the batter well to develop gluten.
Should brownies be refrigerated?
Brownies can be stored at room temperature for up to 3-4 days in an airtight container. Refrigerating them can dry them out, but they can be stored in the fridge for up to a week if properly sealed. Bring to room temperature before serving for the best texture.
💬 Let’s Stay Connected!
For daily recipes, kitchen tips, and exclusive content, follow me on:
👉 Facebook for behind-the-scenes & community fun
👉 Pinterest for visual inspiration & meal ideas
👉 X (Twitter) for quick tips & trending recipes
📲 Join the flavor journey, your next favorite recipe is just a follow away!