The magic of a great lemon raspberry bar lies in using fresh lemon juice and zest—their essential oils provide an irreplaceable fragrance and punch that bottled juice simply can’t match. This focus on a key ingredient makes all the difference in the final flavor. I learned this the hard way, years ago, when I tried to whip up a quick batch of lemon bars for a last-minute potluck. I grabbed the bottled lemon juice from the fridge door, thinking it would be fine. The bars were… fine. They were sweet and tart, but they lacked soul. They didn’t have that bright, sunny spark that makes you close your eyes for a second after the first bite. It was a lesson in not cutting corners on the heart of a recipe.
That’s why these Lemon Raspberry Bars are a celebration of that essential, vibrant flavor. They’re my kitchen apology for that lackluster batch, perfected over time. This recipe isn’t just another dessert; it’s a little square of joy that balances a buttery shortbread crust with a luscious, tangy lemon filling, all swirled with sweet-tart raspberry jam. It’s the kind of treat that feels fancy but is built for a regular kitchen, regular time, and delivers great results every single time. Whether you’re looking for a stunning finish to a family dinner or a portable sweet for a picnic, these bars are your answer. Simple ingredients, warm memories, all baked into one perfect pan.
Table of Contents
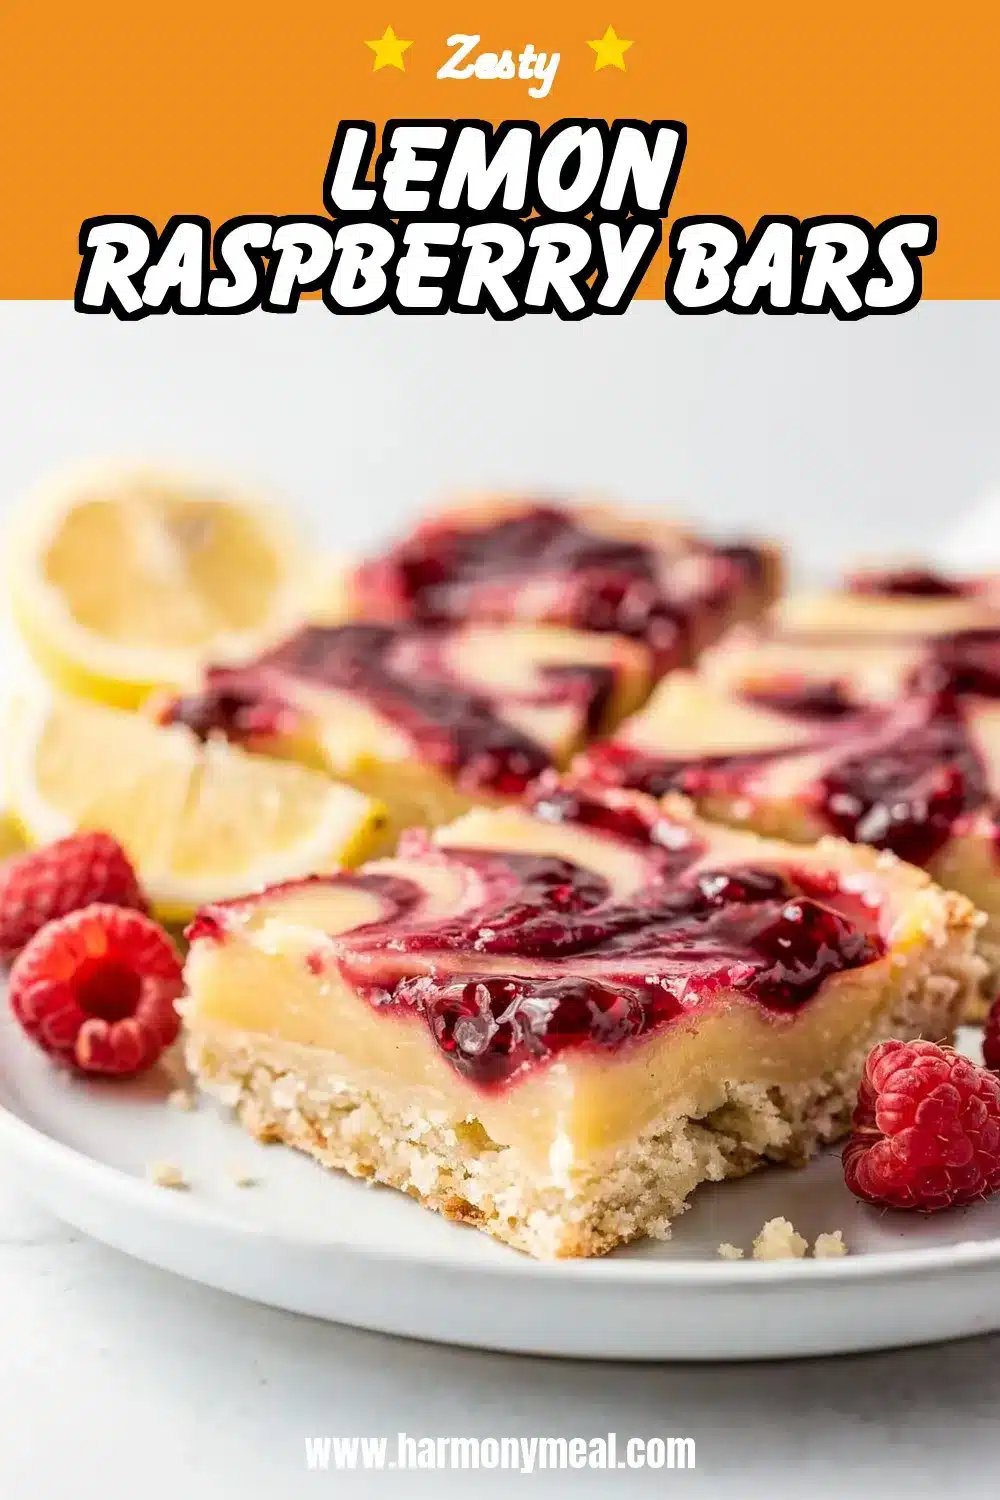
Lemon Raspberry Bars

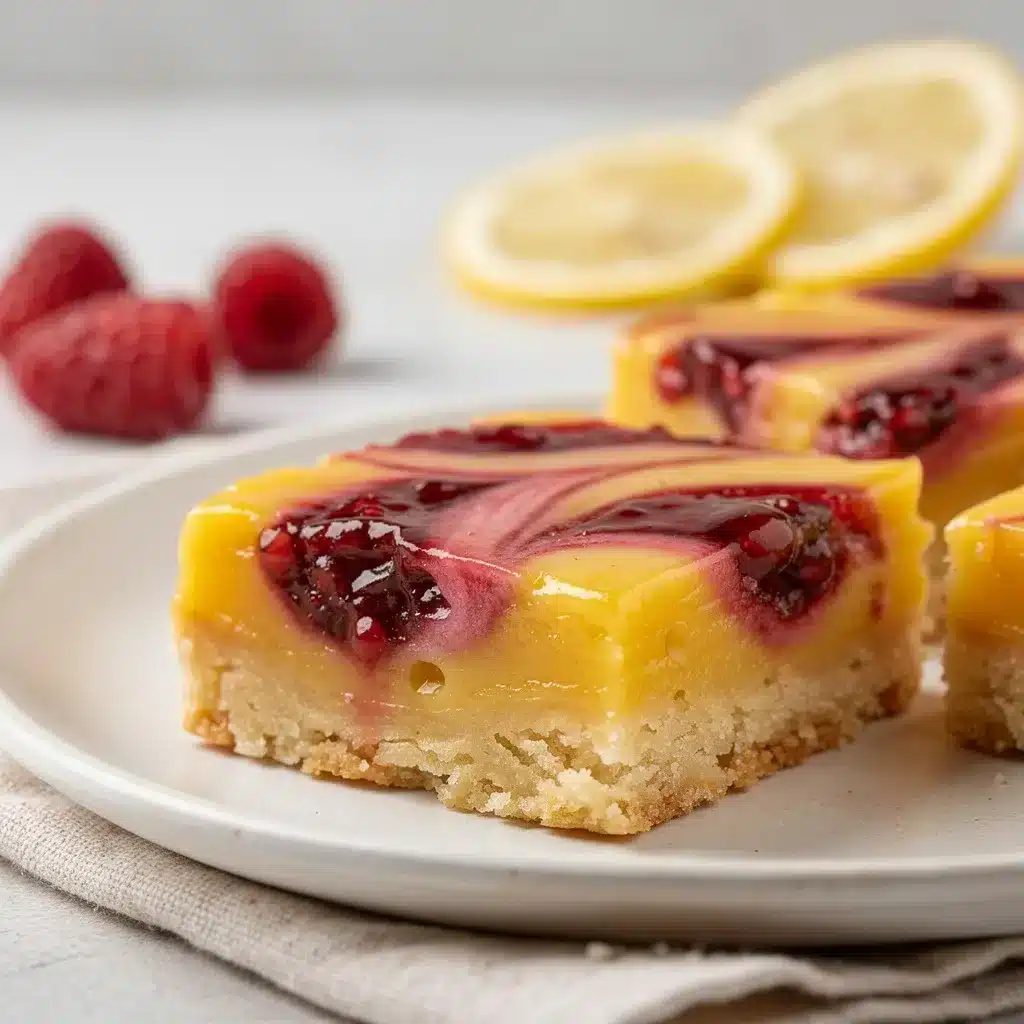
These bars feature a buttery shortbread crust, a vibrant and tangy fresh lemon filling, and a sweet-tart raspberry swirl. They are a perfect balance of flavors and textures, ideal for any occasion from family dinners to picnics. The recipe emphasizes using fresh lemon juice and zest for the best possible flavor.
- Prep Time: 20min
- Cook Time: 50min
- Total Time: 3h 10min
- Yield: 16 bars 1x
- Category: dessert
- Method: baking
- Cuisine: American
Ingredients
- For the Shortbread Crust:
- 1 cup (226g) unsalted butter, softened
- 1/2 cup (100g) granulated sugar
- 2 cups (250g) all-purpose flour
- 1/4 teaspoon fine sea salt
- For the Lemon Filling:
- 4 large eggs, at room temperature
- 1 1/2 cups (300g) granulated sugar
- 1/2 cup (65g) all-purpose flour
- 2/3 cup (160ml) fresh lemon juice (from 4–5 lemons)
- Zest of 2 large lemons
- 1/3 cup (80ml) whole milk or heavy cream
- For the Raspberry Swirl:
- 1/3 cup (about 100g) seedless raspberry jam or preserves
Instructions
- Preheat oven to 350°F (175°C). Line an 8×8 or 9×9 inch baking pan with parchment paper, leaving an overhang on two sides.
- Make the crust: In a bowl, cream the softened butter and sugar until light and fluffy. Add the flour and salt, mixing just until combined. Press the dough firmly and evenly into the prepared pan. Bake for 18-20 minutes until edges are lightly golden. Let cool slightly.
- Make the filling: In a large bowl, whisk eggs and sugar until combined and slightly pale. Whisk in the flour until smooth. Slowly whisk in the fresh lemon juice and zest, then the milk or cream, until the mixture is smooth.
- Assemble: Pour the lemon filling over the warm crust. Dollop small spoonfuls of raspberry jam evenly over the filling. Use a knife or toothpick to gently swirl the jam into the lemon layer, creating a marbled effect.
- Bake: Return the pan to the oven and bake for 25-30 minutes, until the filling is set (the center should have a slight jiggle).
- Cool and chill: Place the pan on a wire rack to cool completely to room temperature. Then, transfer to the refrigerator to chill for at least 2 hours, or overnight.
- Serve: Use the parchment paper to lift the bars from the pan. Place on a cutting board and slice into 16 bars. For clean cuts, wipe the knife with a damp cloth between slices. Dust with powdered sugar before serving if desired.
Notes
Using fresh lemon juice and zest is crucial for the best flavor. Do not skip chilling the bars, as this is essential for clean slicing. The bars can be made ahead and stored in the refrigerator for up to 5 days or frozen for up to 3 months.
Nutrition
- Serving Size: 1
- Calories: 280
- Sugar: 29
- Sodium: 50
- Fat: 12
- Saturated Fat: 7
- Unsaturated Fat: 4
- Trans Fat: 0
- Carbohydrates: 41
- Fiber: 1
- Protein: 3
- Cholesterol: 75
Ingredients List
Lemon Raspberry Bars start with a short list of simple, quality ingredients that work together to create something truly special. Here’s what you’ll need, broken down by component.
For the Shortbread Crust:
- 1 cup (2 sticks / 226g) unsalted butter, softened to room temperature
- 1/2 cup (100g) granulated sugar
- 2 cups (250g) all-purpose flour
- 1/4 teaspoon fine sea salt
For the Lemon Filling:
- 4 large eggs, at room temperature
- 1 1/2 cups (300g) granulated sugar
- 1/2 cup (65g) all-purpose flour
- 2/3 cup (160ml) fresh lemon juice (from about 4-5 large lemons)
- Zest of 2 large lemons
- 1/3 cup (80ml) whole milk or heavy cream
For the Raspberry Swirl:
- 1/3 cup (about 100g) seedless raspberry jam or preserves
Smart Substitutions & Swaps:
- Gluten-Free: Use a 1:1 gluten-free all-purpose flour blend for both the crust and filling. I’ve had great success with brands like Bob’s Red Mill.
- Dairy-Free: For the crust, use a high-quality vegan butter stick. For the filling, swap the milk for full-fat canned coconut milk or a plain, unsweetened almond milk.
- Flour in the Filling: This is crucial for structure. Don’t omit it, but you can use the same gluten-free blend mentioned above.
- Raspberry Jam: Any seedless red jam works beautifully. Strawberry, cherry, or even a mixed berry jam would be lovely. For a fresh twist, you can gently mash 1/2 cup of fresh raspberries with a tablespoon of sugar and use that instead of jam.
Timing
One of the best parts of this recipe is that most of the time is hands-off, letting the oven do the work while you tidy up or simply enjoy the incredible citrusy aroma filling your kitchen.
- Prep Time: 20 minutes
- Cook Time: 45-50 minutes
- Cooling/Chilling Time: 2+ hours (essential for clean cuts!)
- Total Time (Active): About 1 hour 10 minutes
While these Lemon Raspberry Bars do require a bit of patience for cooling, the active work is minimal. Compared to many layered desserts or cakes, this is a wonderfully straightforward process. You can have these mixed, baked, and cooling in under an hour of active kitchen time.
Step-by-Step Instructions
Follow these simple steps for perfect, swoon-worthy bars every time.
Step 1: Make the Shortbread Crust
Preheat your oven to 350°F (175°C). Line an 8×8 or 9×9 inch baking pan with parchment paper, leaving an overhang on two sides for easy removal later. In a medium bowl, use a hand mixer or stand mixer to cream the softened butter and sugar together until light and fluffy, about 2 minutes. Add the flour and salt, and mix on low speed just until the dough comes together and no dry streaks remain. It will be crumbly but should hold together when pinched. Press this dough firmly and evenly into the bottom of your prepared pan. I like to use the bottom of a measuring cup to really press it down and smooth it out. Bake for 18-20 minutes, or until the edges are just barely starting to turn golden. Remove from the oven and let it cool slightly while you make the filling. Pro Tip: Don’t skip pre-baking the crust! This step ensures a crisp, sturdy base that won’t get soggy under the wet lemon filling.
Step 2: Whisk the Lemon Filling
In a large bowl, whisk the eggs and sugar together vigorously until well combined and slightly pale. Whisk in the flour until smooth. Then, slowly stream in the fresh lemon juice and zest while whisking constantly. Finally, whisk in the milk or cream until the mixture is homogenous and smooth. Take a moment to smell it—that’s the promise of your finished Lemon Raspberry Bars right there.
Step 3: Create the Raspberry Swirl
Pour the lemon filling over the warm crust. Dollop the raspberry jam in small spoonfuls evenly across the surface of the lemon filling. Use a knife or a toothpick to gently swirl the jam into the lemon layer. Don’t over-swirl! Just a few figure-eight motions will create a beautiful marbled effect. If you mix it too much, the colors will muddy.
Step 4: Bake to Perfection
Carefully transfer the pan back to the oven. Bake for 25-30 minutes, or until the filling is set. The center should have a slight, gentle jiggle—like set gelatin—and the edges will be lightly golden. Avoid over-baking, as this can make the filling rubbery. Place the pan on a wire rack to cool completely to room temperature, then transfer to the refrigerator to chill for at least 2 hours, or preferably overnight. This chilling step is non-negotiable for getting those clean, sharp cuts on your Lemon Raspberry Bars.
Step 5: Slice and Serve
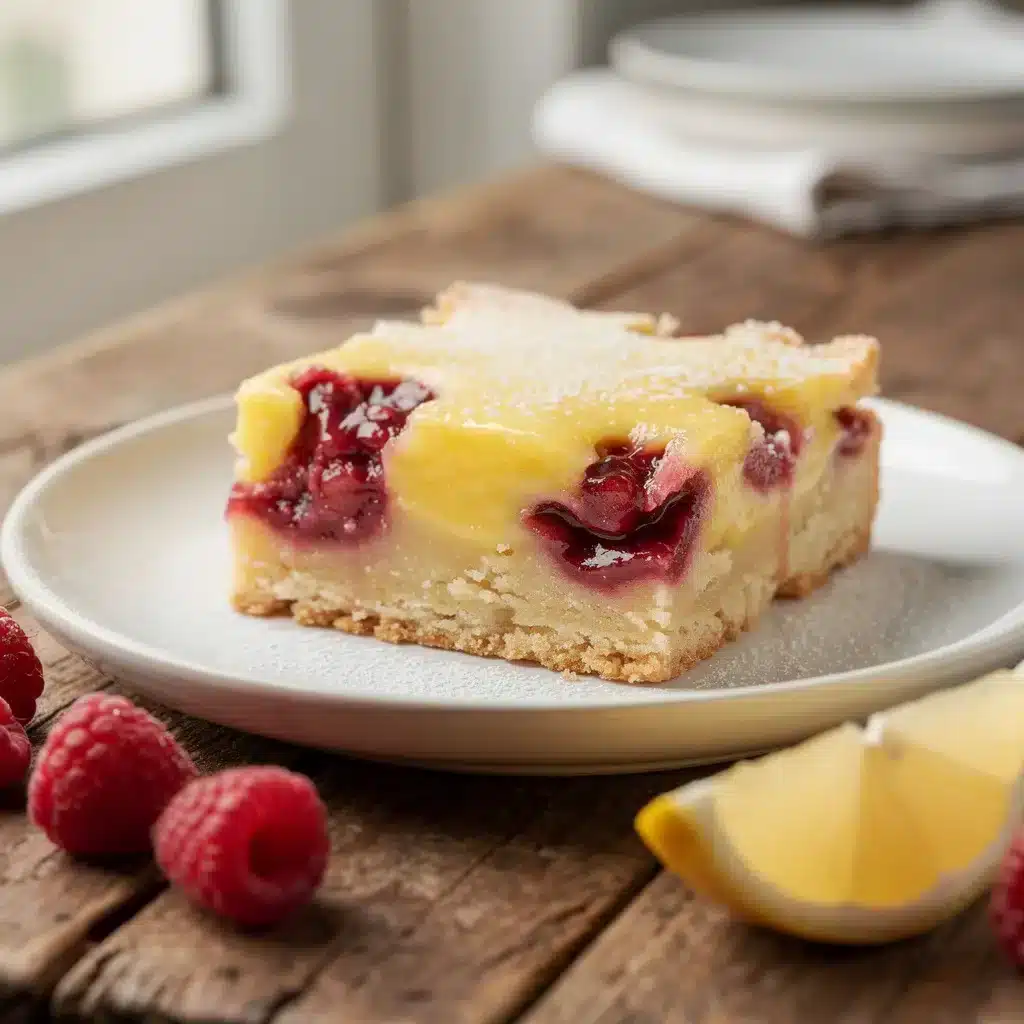
Once thoroughly chilled, use the parchment paper overhang to lift the entire slab of bars out of the pan. Place it on a cutting board. For the cleanest slices, wipe your knife clean with a damp cloth between each cut. Slice into 9 large squares or 16 smaller rectangles. A light dusting of powdered sugar right before serving adds a beautiful finishing touch.
Nutritional Information
While these are certainly a treat, it’s helpful to know what you’re enjoying. Per serving (based on 16 bars):
- Calories: ~280
- Fat: 12g
- Carbohydrates: 41g
- Sugar: 29g
- Protein: 3g
- Vitamin C: A significant amount from the fresh lemon juice!
The fresh lemon juice provides a boost of vitamin C and antioxidants, and using real fruit ingredients like raspberry jam is always a better choice than artificial flavors. For those looking for more healthy dessert recipes, you can explore swaps in the next section. Remember, balance is key—enjoying a homemade treat like these Lemon Raspberry Bars is part of a joyful, well-rounded approach to food.
Equipment Needed
You don’t need any specialty tools for these dessert recipes easy to love. Your standard kitchen gear will do perfectly:
- 8×8 or 9×9 inch Baking Pan: I prefer metal for even browning.
- Parchment Paper: For easy removal and cleanup.
- Mixing Bowls: One medium for the crust, one large for the filling.
- Hand Mixer or Stand Mixer: Helpful for creaming the butter and sugar for the crust, but a sturdy wooden spoon and some elbow grease will work too.
- Whisk: Essential for creating a smooth, lump-free lemon filling.
- Zester or Microplane: For getting that beautiful, fragrant lemon zest.
- Juicer: A simple handheld juicer makes quick work of the lemons.
- Knife & Cutting Board: For slicing the chilled bars.
Why You’ll Love This Recipe
These Lemon Raspberry Bars have earned a permanent spot in my recipe box for so many reasons.
- The Perfect Flavor Balance: The tangy, bright lemon curd plays beautifully against the sweet raspberry and the rich, buttery shortbread. It’s a symphony in every bite.
- Make-Ahead Magic: They need to chill, which makes them the ultimate make-ahead dessert. Bake them the day before a gathering for zero day-of stress.
- Impressively Simple: They look like they came from a fancy bakery, but the process is straightforward and forgiving—a true hallmark of dessert recipes easy enough for any baker.
- Crowd-Pleasing Versatility: Perfect for spring brunches, summer picnics, holiday cookie trays, or just because it’s Tuesday. They please both kids and adults alike.
- A Taste of Sunshine: Especially in the colder months, the vibrant citrus flavor is an instant mood-lifter. It’s comfort food in a bright, cheerful package.
Healthier Alternatives for the Recipe
Want to tweak these Lemon Raspberry Bars to fit different dietary needs? Here are some simple, effective swaps that keep the spirit of the recipe intact.
- Gluten-Free: As mentioned, use a reliable 1:1 gluten-free flour blend. The texture will be nearly identical.
- Dairy-Free: Substitute the butter in the crust with a plant-based butter stick (I recommend one that comes in stick form for baking). In the filling, use canned coconut milk for the richest result, or an unsweetened oat milk.
- Reduced Sugar: You can reduce the sugar in the lemon filling by 1/4 cup (50g) without major textural issues. The bars will be more tart. For the crust, I don’t recommend reducing the sugar, as it affects texture.
- Whole Wheat: For a nuttier crust, you can replace up to half of the all-purpose flour in the crust with whole wheat pastry flour.
- Lower-Fat Filling: You can use 2% milk in the filling instead of whole milk or cream, though the filling will be slightly less rich and creamy.
The beauty of this base recipe is its adaptability. Whether you’re serving these alongside peach dessert recipes in the summer or apple dessert recipes in the fall, having a versatile bar recipe in your arsenal is a game-changer.
Serving Suggestions
While these bars are stunning all on their own, a little extra flourish never hurts.
- Classic: A simple dusting of powdered sugar is elegant and traditional.
- With Berries: Serve each bar with a few fresh raspberries, blueberries, or a mix on the side. It reinforces the fruity flavors beautifully.
- A Dollop of Cream: A spoonful of lightly sweetened whipped cream or a scoop of vanilla bean ice cream turns it into a decadent plate dessert.
- For a Brunch Spread: Pair them with savory quiches, fresh fruit, and a pot of coffee. They’re a lighter dessert option that fits a daytime menu perfectly.
- Gift Them: These bars package and travel wonderfully. Stack them in a clear treat box tied with a ribbon for a heartfelt homemade gift.
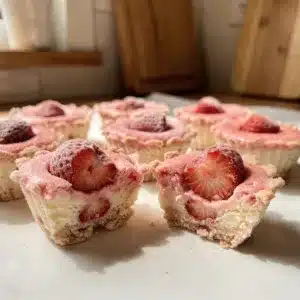
If you love the combination of fruit and creamy filling, you must try my Mixed Berry Cheesecake Crumb Bars for another spectacular layered dessert option.
Common Mistakes to Avoid
A few small missteps can change the texture of your bars. Here’s how to steer clear.
- Using Cold Ingredients: Room temperature eggs and butter incorporate more easily and create a smoother, more emulsified filling and a better-creamed crust. Take them out about an hour before you start.
- Over-mixing the Crust Dough: Once you add the flour, mix just until combined. Over-mixing can make the crust tough instead of tender and crumbly.
- Skipping the Chill: I cannot stress this enough. Cutting into warm or even room-temperature bars will result in a gooey, messy situation. The filling needs time to fully set for clean slices. Patience is key.
- Over-baking the Filling: The center should still have a slight jiggle when you take it out. It will continue to set as it cools. An over-baked filling becomes eggy and rubbery.
- Forgetting the Parchment Paper Lining: Greasing the pan is not enough. The parchment paper sling is what allows you to lift the entire batch out for pristine, crumb-free slicing.
Storing Tips for the Recipe
Proper storage keeps your bars fresh and delicious for days.
- Refrigerator: Store the sliced Lemon Raspberry Bars in a single layer in an airtight container in the refrigerator for up to 5 days. They actually taste even better on day two or three as the flavors meld.
- Freezer: These bars freeze exceptionally well! Place the completely cooled and chilled bars in a single layer on a parchment-lined baking sheet and freeze until solid (about 2 hours). Then, transfer the frozen bars to a freezer-safe bag or container, separating layers with parchment paper. They will keep for up to 3 months. Thaw overnight in the refrigerator before serving.
- Room Temperature: For serving, they can sit out for a few hours. However, I don’t recommend leaving them out all day, as the filling can soften and become messy.
If you find yourself with extra raspberry jam, it would be perfect for making a batch of my Heart Jam Thumbprint Cookies, another simple and delightful treat.
Conclusion
At the end of the day, these Lemon Raspberry Bars are about more than just dessert. They’re about creating a little moment of brightness, of sharing something made with care, and of enjoying the simple, profound pleasure of a perfect flavor combination. From the crisp shortbread base to the tangy-sweet swirl on top, every element has a purpose, and every bite delivers. It’s food that feels like home, with a sunny, citrusy twist.
I hope this recipe brings as much joy to your kitchen as it has to mine. It’s a testament to the idea that with a few good ingredients and a little time, you can create something truly special. Comfort food, made easy.
If you give these Lemon Raspberry Bars a try, I’d love to hear how they turned out for you! Leave a comment below or tag me on Pinterest @HarmonyMeal so I can see your beautiful creations. And if you’re looking for more fruity, lemony inspiration, my Blueberry Lemon Overnight Oats are a fantastic make-ahead breakfast, and my Strawberry Cream Puffs Recipe is a show-stopping dessert for your next special occasion. Happy baking.
FAQs about Lemon Raspberry Bars
Can you freeze lemon raspberry bars?
Yes, lemon raspberry bars freeze well. Allow them to cool completely, cut them into squares, and wrap them individually or in small batches in plastic wrap. Then, place them in an airtight container or freezer bag. They can be stored in the freezer for up to 2-3 months. Thaw in the refrigerator before serving.
How do you keep lemon bars from being soggy?
To prevent soggy lemon raspberry bars, ensure the crust is fully baked before adding the filling. Also, bake the bars until the filling is just set but still slightly jiggly in the center. Avoid overbaking. Letting the bars cool completely before cutting also helps.
Why are my lemon bars gooey?
Gooey lemon raspberry bars are often a result of underbaking. The filling needs to be properly set. Another possible cause is using too much liquid in the filling.
How long do lemon raspberry bars last?
Lemon raspberry bars will last for 3-4 days when stored in an airtight container in the refrigerator. They can also be kept at room temperature for up to 2 days, but refrigeration is recommended for optimal freshness and to prevent spoilage.
What makes a good lemon bar?
A good lemon raspberry bar has a buttery, crisp shortbread crust and a bright, tangy, and slightly sweet lemon filling that’s smooth and creamy. The raspberry swirl adds a burst of fruity flavor and visual appeal. The balance of sweet and tart is key.
What is the best way to cut lemon bars?
The best way to cut lemon raspberry bars cleanly is to let them cool completely. Use a sharp knife and wipe it clean between each cut. For extra clean cuts, you can run the knife under hot water before each slice.
💬 Let’s Stay Connected!
For daily recipes, kitchen tips, and exclusive content, follow me on:
👉 Facebook for behind-the-scenes & community fun
👉 Pinterest for visual inspiration & meal ideas
👉 X (Twitter) for quick tips & trending recipes
📲 Join the flavor journey, your next favorite recipe is just a follow away!