Introduction
The classic key lime pie has a rich history tied to Florida’s coastal groves. My version honors that tradition in a portable, shareable bar perfect for any gathering. I remember the first time I had a real key lime pie on a family trip to the Keys—the perfect balance of sweet, tart, and creamy, with that buttery graham cracker crunch. It was pure sunshine on a plate. But let’s be honest, making a whole pie can feel like a project. That’s where these easy Key Lime Pie Bars come in. They capture every bit of that nostalgic, tropical flavor in a no-fuss, sliceable format that’s ideal for picnics, potlucks, or just satisfying a sudden citrus craving on a Tuesday afternoon. Simple ingredients, warm memories, all baked into one pan.
Table of Contents
PrintKey Lime Pie Bars

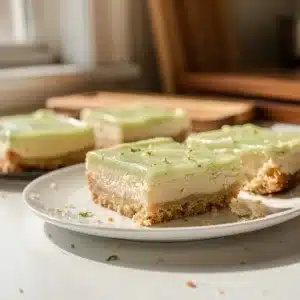
These easy Key Lime Pie Bars capture the classic sweet-tart flavor of the Florida Keys in a portable, no-fuss format. With a buttery graham cracker crust and a creamy, tangy lime filling, they are perfect for picnics, potlucks, or a simple treat. Simple ingredients and minimal hands-on time yield a dessert that feels both special and comforting.
- Prep Time: 15min
- Cook Time: 22min
- Total Time: 3h 40min
- Yield: 12 bars 1x
- Category: dessert
- Method: baking
- Cuisine: American
Ingredients
- 1 1/2 cups graham cracker crumbs (about 10-12 full sheets)
- 1/3 cup granulated sugar
- 6 tablespoons unsalted butter, melted
- 4 large egg yolks
- 1 (14-ounce) can sweetened condensed milk
- 1/2 cup fresh key lime juice (about 20-25 key limes, or use bottled)
- 1 tablespoon key lime zest (optional, but recommended)
Instructions
- Preheat oven to 350°F (175°C). Line an 8×8-inch baking pan with parchment paper, leaving an overhang on two sides to form a sling.
- In a medium bowl, combine graham cracker crumbs and sugar. Pour melted butter over and stir until mixture resembles wet sand and all crumbs are moistened.
- Press crumb mixture firmly and evenly into the bottom of the prepared pan. Use the bottom of a flat measuring cup to compact it well. Bake for 8-10 minutes until fragrant. Let cool slightly.
- In a large bowl, whisk egg yolks until smooth and slightly pale. Whisk in sweetened condensed milk until completely smooth.
- Gradually whisk in key lime juice and zest (if using) until filling thickens slightly. Pour filling over the warm crust.
- Bake for 18-22 minutes, until edges are set but the center still has a slight jiggle when the pan is tapped. Do not overbake.
- Let cool completely on a wire rack. Then cover and refrigerate for at least 3 hours, or ideally overnight, until fully set.
- Use parchment sling to lift bars from pan. Cut into 12 squares. Serve chilled, optionally with whipped cream or lime garnish.
Notes
For a gluten-free version, use certified gluten-free graham crackers. Bottled key lime juice (like Nellie & Joe’s) is a great shortcut; adding fresh zest boosts flavor. The bars must chill thoroughly for clean slicing. Store covered in the refrigerator for up to 5 days, or freeze for up to 2 months.
Nutrition
- Serving Size: 12
- Calories: 280
- Sugar: 32
- Sodium: 150
- Fat: 12
- Saturated Fat: 7
- Unsaturated Fat: 4
- Trans Fat: 0
- Carbohydrates: 38
- Fiber: 0
- Protein: 5
- Cholesterol: 95
Ingredients List for Key Lime Pie Bars

Key Lime Pie Bars come together with a short list of simple ingredients, most of which you might already have in your pantry. The magic is in their balance.
For the Graham Cracker Crust:
- 1 ½ cups graham cracker crumbs (about 10-12 full sheets)
- ⅓ cup granulated sugar
- 6 tablespoons unsalted butter, melted
For the Key Lime Filling:
- 4 large egg yolks
- 1 (14-ounce) can sweetened condensed milk
- ½ cup fresh key lime juice (about 20-25 key limes, or use bottled Nellie & Joe’s)
- 1 tablespoon key lime zest (optional, but highly recommended for fragrance)
Smart Swaps & Notes:
- Graham Crackers: For a gluten-free version, use certified gluten-free graham-style crackers.
- Key Limes: Fresh is fantastic, but bottled key lime juice is a wonderful, consistent shortcut. Regular Persian lime juice works in a pinch, though the flavor will be slightly different.
- Butter: Salted butter is fine; just omit any added salt in the crust.
- Sweetened Condensed Milk: This is the non-negotiable base for the creamy, set filling. There’s no direct dairy-free substitute that will yield the same texture, but for a lighter version, you could experiment with a lower-fat variety.
Timing for Key Lime Desserts
One of the best parts of these Easy Citrus Bars is how little hands-on time they require. You get maximum tropical flavor with minimal effort.
- Prep Time: 15 minutes
- Cook Time: 18-22 minutes
- Chill Time: 3 hours (minimum)
- Total Time: About 3 hours 40 minutes (mostly hands-off chilling)
Compared to chilling a full pie, these bars set faster and are ready to share sooner—a real win for Summer Bar Recipes.
Step-by-Step Instructions for Key Lime Pie Bars
Follow these simple steps for perfect, creamy bars every time.
1. Prep and Preheat. Start by preheating your oven to 350°F (175°C). Line an 8×8-inch baking pan with parchment paper, leaving an overhang on two sides. This “sling” will make lifting the entire slab of Key Lime Pie Bars out of the pan a breeze for clean cutting.
2. Make the Crust. In a medium bowl, combine the graham cracker crumbs and sugar. Pour the melted butter over the mixture and stir until every crumb is evenly moistened and the mixture resembles wet sand. Press this firmly and evenly into the bottom of your prepared pan. I like to use the bottom of a flat measuring cup to really compact it. Bake for 8-10 minutes, just until fragrant. Let it cool slightly while you make the filling.
3. Whisk the Filling. In a large bowl, whisk the egg yolks until they are smooth and slightly pale. Whisk in the sweetened condensed milk until the mixture is completely smooth and uniform. This is your creamy base. Now, slowly whisk in the key lime juice and zest (if using). The acid will cause the mixture to thicken slightly almost immediately—this is exactly what you want! Pour this luscious filling over your warm crust.
4. Bake and Cool. Bake for 18-22 minutes. The filling should be set around the edges but still have a slight, gentle jiggle in the very center when you tap the pan. It will firm up dramatically as it chills. Overbaking is the enemy of a creamy texture, so err on the side of underdone. Let the pan cool completely on a wire rack.
5. Chill Thoroughly. This is the most important step for perfect slicing. Once at room temperature, cover the pan and refrigerate for at least 3 hours, or ideally overnight. The long chill allows the flavors to meld and the filling to become beautifully sliceable.
Nutritional Information for Fresh Lime Baking
While these are a treat, it’s helpful to know what you’re enjoying. Per bar (assuming 12 bars):
- Calories: ~280
- Fat: 12g
- Carbohydrates: 38g
- Protein: 5g
- Sugar: 32g
The egg yolks provide protein and essential vitamins like B12, while the fresh lime juice offers a boost of vitamin C. As with all good things, enjoy in moderation as part of a balanced diet.
Equipment Needed for Tropical Dessert Ideas
You don’t need any fancy gadgets for this recipe. A regular kitchen will have everything:
- 8×8-inch baking pan
- Parchment paper
- Mixing bowls (medium and large)
- Whisk
- Measuring cups and spoons
- Zester or fine grater (for zest)
- Citrus juicer (a handheld reamer works great)
Why You’ll Love This Key Lime Pie Bars Recipe
- Portable Perfection. Unlike a delicate pie, these bars travel without a worry. They’re the ultimate shareable dessert for barbecues, beach days, or office parties.
- Foolproof Process. No water baths, no tempering eggs. The filling comes together in one bowl with a whisk. It’s an accessible recipe that builds kitchen confidence.
- Bright, Balanced Flavor. The tangy lime cuts through the sweetness of the condensed milk, creating that iconic flavor profile that’s neither too sour nor too cloying.
- Make-Ahead Magic. They need that long chill, which makes them the perfect dessert to prepare a day ahead, freeing up your time when guests arrive.
Healthier Alternatives for the Recipe

You can make a few simple tweaks to suit different dietary needs without losing the soul of the dessert.
- Gluten-Free: Use certified gluten-free graham crackers or gluten-free shortbread cookies for the crust.
- Dairy-Light/Lower Sugar: Use a reduced-fat or a “less sugar” variety of sweetened condensed milk. The texture will be slightly less firm but still delicious.
- Lower Carb: For the crust, swap graham crackers for a mixture of almond flour, a little sweetener, and melted butter. For the filling, a sugar-free sweetened condensed milk alternative can be used, though results will vary.
Serving Suggestions for Easy Citrus Bars
The beauty of these Key Lime Pie Bars is that they shine all on their own. But a little garnish never hurts!
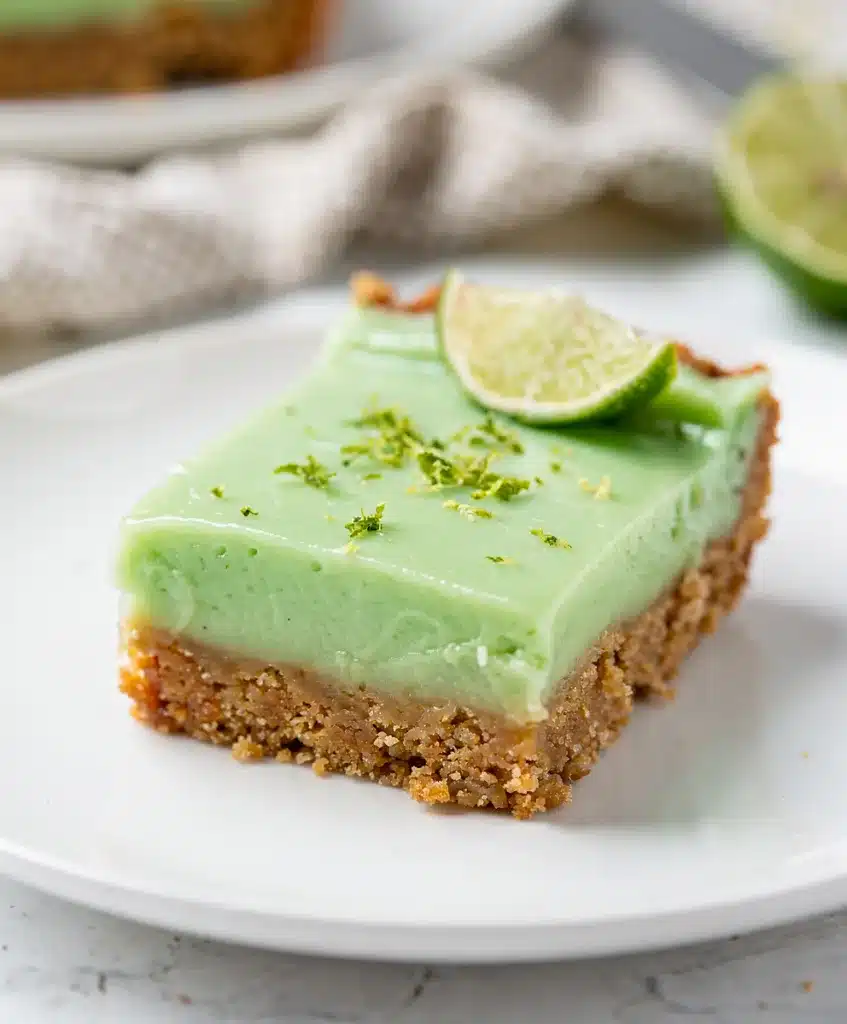
- Classic: A simple dollop of lightly sweetened whipped cream and a thin slice of lime.
- Elegant: A sprinkle of toasted coconut or finely chopped pistachios adds wonderful texture and color.
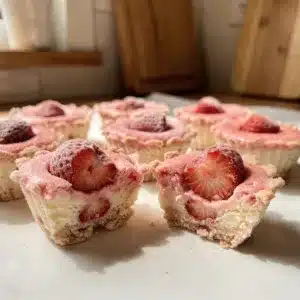
- Fun: Serve with a side of fresh berries like raspberries or strawberries for a pop of contrast.
- For a Crowd: Cut them into small, bite-sized squares and arrange on a platter for a party—they pair wonderfully with other bar desserts like my Classic Fudgy Brownies or Peanut Butter Chocolate Bars.
Common Mistakes to Avoid with Key Lime Desserts
A few small missteps can change your bar experience. Here’s how to steer clear.
- Skipping the Chill. Cutting into warm bars will result in a gooey, messy slice. Patience is key for that clean, creamy texture.
- Overbaking the Filling. Remember, the center should still jiggle slightly when it comes out. It sets in the fridge. An overbaked filling can become rubbery or develop a “weeping” layer.
- A Soggy Crust. Make sure to press the crust mixture very firmly into the pan. A loose crust won’t hold up to the creamy filling. Also, letting it pre-bake for the full 8-10 minutes helps it stay crisp.
- Using Only Bottled Juice Without Zest. If you’re using bottled key lime juice, try to find a way to add a little fresh lime zest. The zest contains aromatic oils that bottled juice lacks, giving your Key Lime Pie Bars a much brighter, fresher flavor.
Storing Tips for the Recipe

These bars keep beautifully, making them a fantastic make-ahead treat.
- Refrigerator: Store covered tightly in the baking pan or in an airtight container for up to 5 days.
- Freezer: For longer storage, freeze the whole slab or individual bars. Wrap tightly in plastic wrap and then aluminum foil, or place in a freezer-safe container. They will keep for up to 2 months. Thaw overnight in the refrigerator before serving.
- Serving Note: For the best texture and flavor, let the bars sit at room temperature for about 10 minutes after removing them from the fridge before serving.
Conclusion
These Key Lime Pie Bars are everything I love about home baking: familiar flavors, a straightforward process, and a result that feels both special and comforting. They prove you don’t need a complicated recipe to create a stunning Tropical Dessert Idea that will have everyone asking for seconds. Whether you’re craving a taste of summer or need a reliable, crowd-pleasing sweet, this recipe delivers. Comfort food, made easy.
I’d love to hear how your Fresh Lime Baking turns out! Did you add a twist with coconut or a different crust? Let me know in the comments below. And if you’re looking for more creamy, no-fuss desserts, try my No Bake Oreo Cheesecake for another cool treat, or my Vanilla Bean Cheesecake Bars for a different take on the bar dessert. Don’t forget to tag @HarmonyMeal on Pinterest so I can see your beautiful creations.
FAQs about Key Lime Pie Bars
What are Key Lime Pie Bars?
Key Lime Pie Bars are a dessert made with a buttery crust and a tangy, creamy key lime-flavored filling, cut into bar shapes for easy serving and eating.
How do you make Key Lime Pie Bars?
To make Key Lime Pie Bars, prepare a graham cracker crust, bake it lightly, then pour a mixture of sweetened condensed milk, egg yolks, and key lime juice over the crust. Bake again until set, then chill before cutting into bars.
Can I use regular lime juice instead of key lime juice?
Yes, regular lime juice can be used as a substitute for key lime juice, but it may alter the flavor slightly since key limes have a distinct tartness and aroma that is unique to this dessert.
How long do Key Lime Pie Bars last?
When stored in an airtight container in the refrigerator, Key Lime Pie Bars typically last about 3 to 5 days. For longer storage, they can be frozen for up to 1 month.
Do Key Lime Pie Bars need to be refrigerated?
Yes, Key Lime Pie Bars should be refrigerated to keep the filling firm and safe to eat. Refrigeration helps maintain the texture and prevents spoilage due to the dairy and eggs in the filling.
What toppings go well with Key Lime Pie Bars?
Popular toppings for Key Lime Pie Bars include whipped cream, lime zest, fresh berries, or a sprinkle of toasted coconut for added flavor and texture enhancement.
💬 Let’s Stay Connected!
For daily recipes, kitchen tips, and exclusive content, follow me on:
👉 Facebook for behind-the-scenes & community fun
👉 Pinterest for visual inspiration & meal ideas
👉 X (Twitter) for quick tips & trending recipes
📲 Join the flavor journey, your next favorite recipe is just a follow away!