Introduction
This pudding pairs beautifully with a cup of strong black coffee, the bitter notes cutting through the sweet creaminess in the most satisfying way. It’s also fantastic alongside fresh summer berries when you want to add a bright, tart contrast to your make ahead banana pudding.
I think we can all agree that the best desserts are the ones that do the work for you. The ones that sit quietly in the fridge, getting better and better, while you go about your day. That’s the magic of a truly great make ahead banana pudding. It’s not just a dessert; it’s a promise of ease. A guarantee that when the moment comes for something sweet, you’re already prepared. No last-minute scrambling, no oven to watch. Just a spoon and a bowl of pure, creamy comfort waiting for you. This recipe is my love letter to that feeling. It’s the classic, nostalgic banana pudding we all crave—layers of vanilla wafers, ripe bananas, and a lush, homemade pudding—but designed for real life. It’s the dessert you can assemble on a quiet Wednesday afternoon and serve with pride at a Saturday barbecue. Simple ingredients, warm memories. Let’s make dessert a breeze.
Table of Contents
PrintMake Ahead Banana Pudding

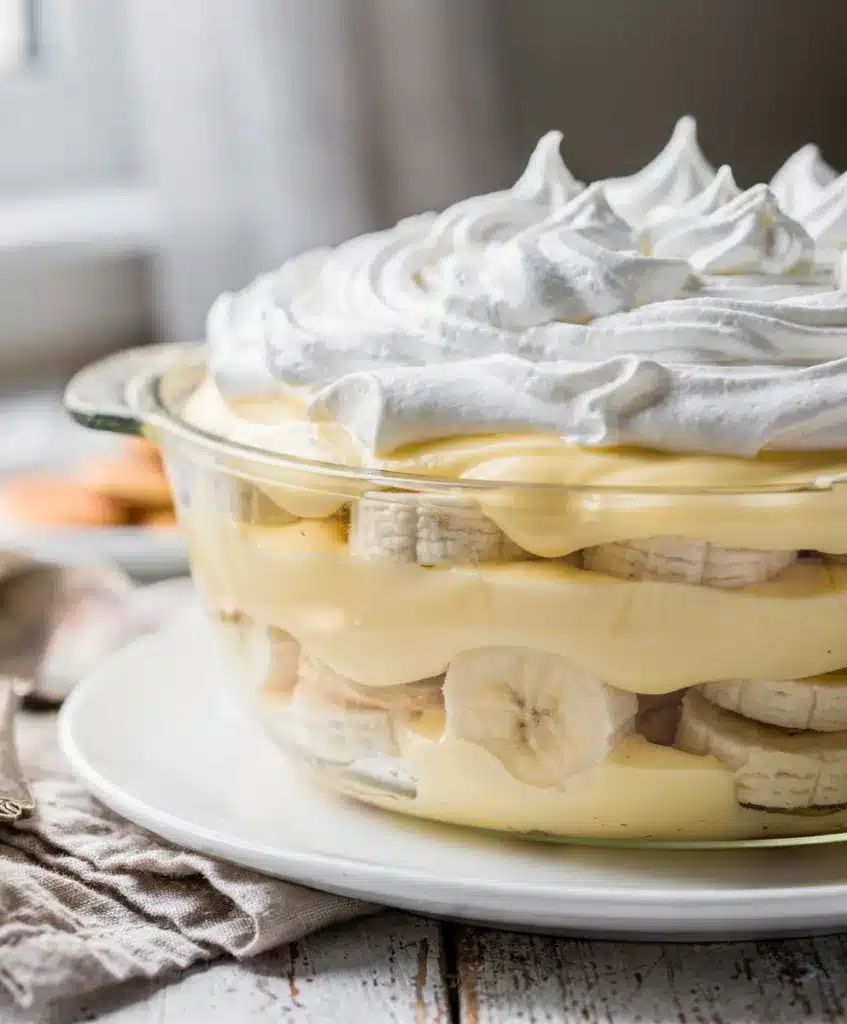
This is the ultimate dessert for easy entertaining. Layers of vanilla wafers, ripe bananas, and a rich homemade pudding are assembled ahead of time and chilled, allowing the flavors to meld and the wafers to soften perfectly. Top with fresh whipped cream just before serving for a classic, crowd-pleasing treat.
- Prep Time: 25min
- Cook Time: 12min
- Total Time: 4h 35min
- Yield: 12 servings 1x
- Category: dessert
- Method: stovetop, no-bake
- Cuisine: American
Ingredients
- 1 cup granulated sugar
- 1/3 cup all-purpose flour
- 1/4 teaspoon salt
- 3 large egg yolks
- 2 cups whole milk
- 1 (14-ounce) can sweetened condensed milk
- 3 tablespoons unsalted butter
- 2 teaspoons pure vanilla extract
- 1 (11-ounce) box vanilla wafers
- 4-5 medium ripe bananas, sliced
- 1 cup heavy whipping cream
- 2 tablespoons powdered sugar
- 1/2 teaspoon vanilla extract
Instructions
- Make the pudding base: In a medium saucepan, whisk together sugar, flour, and salt. In a separate bowl, whisk egg yolks with whole milk until smooth. Gradually whisk the milk mixture into the dry ingredients in the saucepan.
- Cook the pudding: Place saucepan over medium heat. Cook, stirring constantly, until mixture thickens and begins to bubble gently, about 10-12 minutes. It should coat the back of a spoon. Remove from heat.
- Finish the pudding: Immediately stir in sweetened condensed milk, butter, and 2 teaspoons vanilla extract until butter is melted and fully incorporated. Let cool for 15-20 minutes, stirring occasionally.
- Assemble the first layers: In a 9×13 inch dish or large trifle bowl, spread a thin layer of the slightly cooled pudding. Top with a single layer of vanilla wafers, then a layer of sliced bananas.
- Repeat layers: Continue layering pudding, wafers, and bananas, ending with a final, thick layer of pudding. Press gently to settle the layers.
- Chill: Cover the surface of the pudding directly with plastic wrap to prevent a skin. Refrigerate for at least 4 hours, ideally overnight.
- Add topping: Just before serving, whip heavy cream with powdered sugar and 1/2 teaspoon vanilla extract until soft peaks form. Spread or pipe over the chilled pudding.
Notes
Use ripe but firm bananas (yellow with a few speckles) to prevent mushiness. Ensure pudding cools slightly before assembling to avoid immediate sogginess. For best texture and flavor, chill overnight. The pudding can be made and assembled (without whipped cream) up to 3-4 days ahead.
Nutrition
- Serving Size: 12
- Calories: 420
- Sugar: 45
- Sodium: 200
- Fat: 18
- Saturated Fat: 10
- Unsaturated Fat: 6
- Trans Fat: 0
- Carbohydrates: 58
- Fiber: 1
- Protein: 6
- Cholesterol: 95
Ingredients List for Make Ahead Banana Pudding

This make ahead banana pudding recipe is built on humble, classic ingredients that come together to create something truly special. You likely have most of these in your pantry right now.
- 1 cup granulated sugar
- 1/3 cup all-purpose flour
- 1/4 teaspoon salt
- 3 large egg yolks (save the whites for another use!)
- 2 cups whole milk
- 1 (14-ounce) can sweetened condensed milk
- 3 tablespoons unsalted butter
- 2 teaspoons pure vanilla extract
- 1 (11-ounce) box vanilla wafers (like Nilla Wafers)
- 4-5 medium ripe (but not mushy) bananas, sliced
- For the topping: 1 cup heavy whipping cream, 2 tablespoons powdered sugar, 1/2 teaspoon vanilla extract
Smart Swaps & Notes:
- Dairy-Free? Use full-fat canned coconut milk and a dairy-free sweetened condensed coconut milk. The flavor will be slightly different but still delicious.
- Gluten-Free: Swap the all-purpose flour for a 1:1 gluten-free baking blend and use gluten-free vanilla cookies.
- Lighter Option: You can use 2% milk, but the pudding won’t be quite as luxuriously creamy. For a lighter topping, fold in a container of thawed frozen whipped topping instead of making fresh whipped cream.
Timing for Your Banana Pudding
One of the greatest joys of this make ahead banana pudding is how the timeline works in your favor.
- Prep Time: 25 minutes (for pudding and assembly)
- Cook Time: 10-12 minutes (for the stovetop pudding)
- Chill Time: Minimum 4 hours, ideally overnight
- Total Time (with chilling): 4 hours 35 minutes
While some banana pudding recipes require immediate serving, this one actually benefits from a long, slow chill. The vanilla wafers soften into cake-like layers, the bananas mellow, and the flavors marry beautifully. Planning ahead is the secret ingredient here.
Step-by-Step Instructions
Let’s walk through the process. It’s simple, but a few key steps ensure perfect results every time.
1. Make the Pudding Base
In a medium saucepan, whisk together the sugar, flour, and salt. This dry mix prevents lumps. In a separate bowl, whisk the egg yolks with the regular milk until smooth. Gradually whisk the milk mixture into the dry ingredients in the saucepan. This gradual addition is crucial for a smooth texture.
2. Cook to Perfection
Place the saucepan over medium heat. Cook, stirring constantly with a wooden spoon or silicone spatula, until the mixture thickens and begins to bubble gently, about 10-12 minutes. It should coat the back of the spoon. Remove from heat and immediately stir in the sweetened condensed milk, butter, and vanilla. The butter will melt into the hot pudding, adding incredible richness. Let this cool for about 15-20 minutes, stirring occasionally to prevent a skin from forming.
3. Assemble the Layers
In a 9×13 inch dish or a large trifle bowl, spread a thin layer of the warm pudding. Top with a single layer of vanilla wafers, then a layer of sliced bananas. Repeat the layers—pudding, wafers, bananas—ending with a final, thick layer of pudding. Press gently to help the layers settle. This layered structure is what makes a classic banana pudding so delightful.
4. Chill and Top
Cover the surface directly with plastic wrap to prevent a skin. Refrigerate for at least 4 hours, but overnight is truly best for that perfect make ahead banana pudding texture. Just before serving, whip the heavy cream with powdered sugar and vanilla until soft peaks form. Spread it over the top of the chilled pudding. For a stunning presentation reminiscent of a banana pudding cake, you can pipe the whipped cream on top.
Nutritional Information
A serving of this homemade banana pudding (about 1 cup) provides approximately 420 calories, 6g of protein, 58g of carbohydrates, and 18g of fat. It’s a rich dessert, with calcium and potassium from the dairy and bananas. Remember, this is a treat meant to be savored and shared—comfort food, made easy.
Equipment Needed
You don’t need any fancy gadgets for this make ahead banana pudding recipe. A medium saucepan, a sturdy whisk, a mixing bowl, a 9×13 inch baking dish or trifle bowl, and an electric mixer for the whipped cream (though a whisk and strong arm will work!) are all you need. Regular kitchen, regular time, great results.
Why You’ll Love This Make Ahead Banana Pudding
- The Ultimate Time-Saver: Assemble it today, enjoy it tomorrow (or later today!). It frees up your precious time when you have guests or a busy schedule.
- Flavor That Deepens: Unlike desserts that fade, this banana pudding’s flavor improves as it chills. The wafers soften perfectly, and every bite is harmonious.
- Feeds a Crowd Beautifully: It’s the perfect potluck or family reunion dessert. Transport it easily and watch it disappear.
- Nostalgic & Crowd-Pleasing: It’s a timeless classic that appeals to all ages. It tastes like home.
- Customizable: Like my Bakery Style Banana Pudding, you can tweak it—add a sprinkle of cinnamon, a drizzle of caramel, or use different cookies.
Healthier Alternatives for the Recipe

If you’re looking for a lighter twist on this classic, here are a few easy swaps that keep the spirit of the dessert alive.
- Reduced Sugar: You can decrease the granulated sugar in the pudding by 1/4 cup. The sweetened condensed milk will still provide plenty of sweetness.
- Higher Protein: Use Fairlife milk or another high-protein milk alternative. You could also blend a scoop of vanilla protein powder into the cooled pudding, but add a splash more milk to maintain consistency.
- Dairy-Free/Vegan: As mentioned, use full-fat coconut milk and vegan sweetened condensed coconut milk. For the topping, chill a can of coconut cream and whip the solid part with a little maple syrup.
- Gluten-Free: Simply use a certified gluten-free flour blend and your favorite gluten-free vanilla cookies.
Serving Suggestions
This make ahead banana pudding is glorious all on its own, but a few simple additions can make it extra special.
- For a Crowd: Serve it straight from the trifle bowl for a beautiful, layered presentation. It’s a showstopper.
- Individual Portions: Layer the components in clear cups or mason jars for adorable, grab-and-go desserts. This method is similar to how I assemble my Make Ahead No Bake Cheesecake Cups.
- Toppings Galore: A sprinkle of crushed vanilla wafers or toffee bits adds crunch. A drizzle of salted caramel or chocolate sauce takes it over the top. Fresh mint is always a pretty garnish.
- Perfect Pairings: It’s the ideal ending to a summer cookout or a cozy winter meal. For another fantastic make-ahead dessert option, check out my Make Ahead Fruit Pizza Sugar Cookie.
Common Mistakes to Avoid
A few small missteps can change your pudding’s texture. Here’s how to steer clear.
- Using Overripe Bananas: Bananas that are too soft and sweet will turn mushy and brown too quickly. Use ripe bananas that are yellow with just a few brown speckles.
- Not Letting the Pudding Cool Slightly: If you pour boiling hot pudding directly onto the wafers and bananas, it will start to cook them and make everything soggy immediately. A 15-minute cool-down is perfect.
- Skipping the Plastic Wrap Touch: Placing plastic wrap directly on the surface of the warm pudding is non-negotiable. It prevents a rubbery skin from forming.
- Undercooking the Pudding: The pudding must come to a gentle bubble and thicken sufficiently on the stove. If it’s too thin, it won’t set properly in the fridge. Patience here pays off.
- Making the Whipped Cream Too Early: If you top the pudding with whipped cream before chilling, it will deflate and weep. Always add the fresh whipped cream right before serving.
Storing Tips for the Recipe

Proper storage is key to enjoying your make ahead banana pudding at its best.
- Refrigerator: Once assembled (without the whipped cream topping), cover tightly. It will keep beautifully for 3-4 days. The bananas will soften and brown slightly, which is part of the charm, but the flavor will be incredible.
- Freezing: I don’t recommend freezing the fully assembled pudding, as the dairy and banana texture will suffer. However, you can freeze the plain pudding base in an airtight container for up to 2 months. Thaw overnight in the fridge and re-whisk before assembling fresh with new wafers and bananas.
- Leftovers: Cover any leftovers with plastic wrap. The whipped cream will soften but is still delicious for a day or two. For a different but equally sweet banana treat, you might enjoy my Sweet Banana Pudding or a Seasonal Banana Pudding variation.
Conclusion
This make ahead banana pudding is more than just a recipe; it’s a strategy for joyful, stress-free hosting and everyday treats. It delivers all the creamy, nostalgic comfort of the classic dessert while giving you the gift of time. Food that feels like home shouldn’t be complicated. With a little planning, you can have a spectacular dessert ready and waiting, its flavors mingling and deepening until the moment you lift the lid to delighted smiles. I hope this recipe becomes a trusted friend in your kitchen, a reliable path to something sweet and satisfying.
I’d love to hear how your make ahead banana pudding turns out! Did your family go back for seconds? Did you add your own special twist? Share your stories in the comments below. And if you snap a photo of your beautiful creation, don’t forget to tag @HarmonyMeal on Pinterest—I love seeing your kitchen wins.
FAQs about Make Ahead Banana Pudding
Can you make banana pudding the day before?
Yes, banana pudding can be made the day before. In fact, allowing it to chill overnight helps the flavors meld and the pudding to set perfectly, making it taste even better.
How long does banana pudding last in the fridge?
Banana pudding typically lasts 3 to 4 days in the refrigerator when stored in an airtight container. For the best texture and freshness, consume it within this timeframe.
Will the bananas turn brown if I make banana pudding ahead?
Bananas may brown slightly over time due to oxidation, but layering them with pudding and covering the dish tightly helps minimize browning. Using fresh bananas and properly storing the pudding can keep it looking fresh longer.
Do you need to refrigerate banana pudding if you make it ahead?
Yes, banana pudding should always be refrigerated if prepared ahead of time. Refrigeration prevents spoilage and helps maintain the pudding’s texture and flavor.
Can I freeze banana pudding for later?
Freezing banana pudding is not recommended because the texture of the pudding and slices of banana will change and become mushy upon thawing. It’s best enjoyed fresh or within a few days refrigerated.
What is the best way to store make ahead banana pudding?
The best way to store make ahead banana pudding is in an airtight container or covered tightly with plastic wrap in the refrigerator. This prevents moisture loss and absorption of odors, keeping the pudding fresh and delicious.
💬 Let’s Stay Connected!
For daily recipes, kitchen tips, and exclusive content, follow me on:
👉 Facebook for behind-the-scenes & community fun
👉 Pinterest for visual inspiration & meal ideas
👉 X (Twitter) for quick tips & trending recipes
📲 Join the flavor journey, your next favorite recipe is just a follow away!