The humble egg yolk, when treated right, transforms into a silky, luxurious base that carries flavor beautifully. In this recipe, that yolk becomes the heart of the most perfectly seasoned classic deviled eggs you’ll ever taste. I can’t tell you how many times I’ve watched a platter of these disappear in minutes at a family reunion or a casual backyard picnic. There’s something about that creamy, tangy filling and the pop of paprika that feels like a hug from your grandma’s kitchen. Yet, for such a simple dish, it’s surprisingly easy to end up with bland, rubbery, or watery eggs. After years of perfecting my method, I’ve landed on a foolproof recipe for classic deviled eggs that balances richness, acidity, and seasoning in every single bite. This isn’t just a recipe; it’s the secret handshake for potlucks, holiday spreads, and weeknight snacks that feel special. Let’s make the best deviled eggs, the kind that always, always vanish first.
Table of Contents
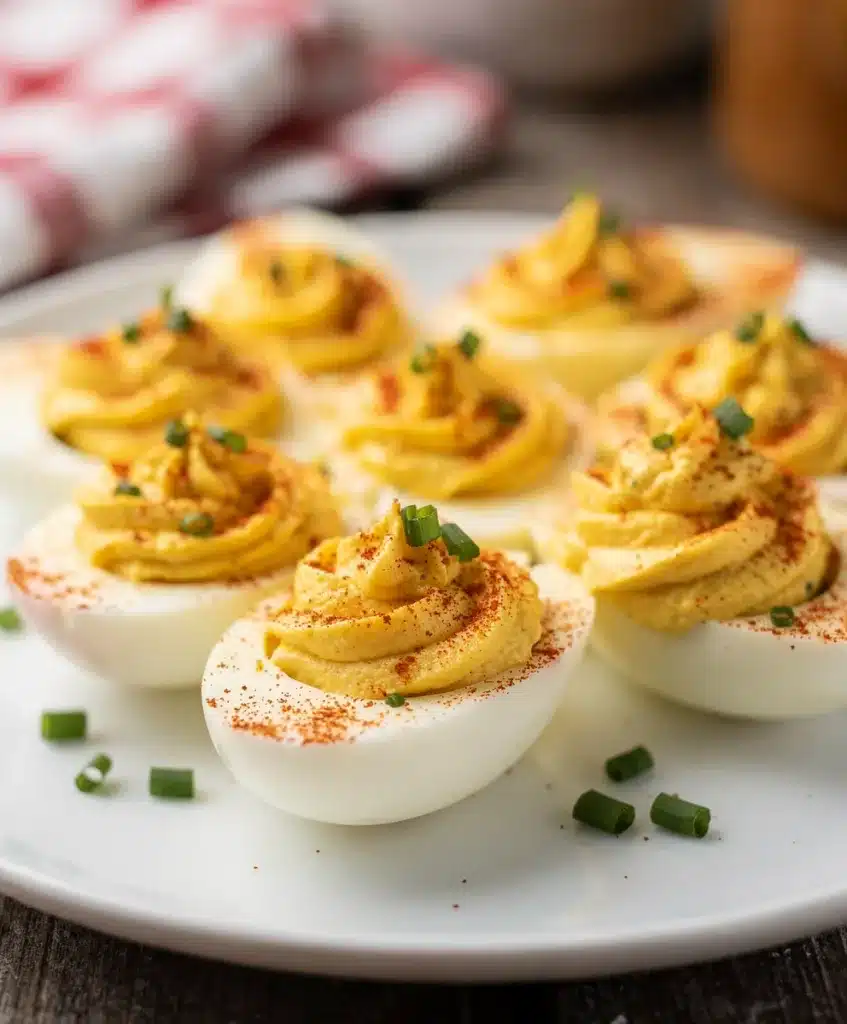
Classic Deviled Eggs

This recipe transforms humble egg yolks into a silky, luxurious filling for the perfect classic deviled eggs. Balanced with tangy mustard and vinegar, they are a foolproof crowd-pleaser for any gathering.
- Prep Time: 20min
- Cook Time: 12min
- Total Time: 32min
- Yield: 24 deviled egg halves 1x
- Category: snack
- Method: boiling
- Cuisine: American
Ingredients
- 12 large eggs
- 1/2 cup mayonnaise
- 2 teaspoons yellow mustard
- 1 teaspoon white vinegar
- 1/4 teaspoon kosher salt
- 1/4 teaspoon freshly ground black pepper
- Paprika, for garnish
Instructions
- Place eggs in a single layer in a large pot. Cover with cold water by 1 inch. Add a pinch of salt. Bring to a full boil over high heat.
- Once boiling, immediately cover the pot and remove from heat. Let stand, covered, for 12 minutes.
- Transfer eggs to a bowl of ice water using a slotted spoon. Cool completely, about 15 minutes.
- Peel the eggs under cool running water. Slice each egg in half lengthwise.
- Gently remove yolks and place them in a medium bowl. Arrange egg white halves on a serving platter.
- To the yolks, add mayonnaise, mustard, vinegar, salt, and pepper. Mash with a fork until smooth.
- For an extra-smooth filling, press the mixture through a fine-mesh sieve or mix with a hand mixer for 30 seconds.
- Spoon or pipe the yolk mixture into the egg white halves. Sprinkle with paprika just before serving.
Notes
For easier peeling, ensure eggs are completely cooled in ice water. The filling can be made smoother by sieving. Garnish just before serving to keep paprika vibrant. Store assembled eggs in the fridge for up to 2 days.
Nutrition
- Serving Size: 4
- Calories: 140
- Sugar: 1
- Sodium: 180
- Fat: 12
- Saturated Fat: 3
- Unsaturated Fat: 8
- Trans Fat: 0
- Carbohydrates: 1
- Fiber: 0
- Protein: 6
- Cholesterol: 190
Classic Deviled Eggs Ingredients List
Classic deviled eggs start with a short list of humble ingredients, but their quality and balance make all the difference. You likely have most of these in your kitchen right now.
- 12 large eggs
- 1/2 cup mayonnaise (I prefer a full-fat, real mayo for the best texture)
- 2 teaspoons yellow mustard
- 1 teaspoon white vinegar or apple cider vinegar
- 1/4 teaspoon kosher salt, plus more for boiling water
- 1/4 teaspoon freshly ground black pepper
- Paprika, for garnish
- Optional garnishes: Fresh chives, chopped dill, a sprinkle of cayenne, or crispy bacon bits
Smart Swaps & Notes:
For a lighter touch, you can swap half the mayo for Greek yogurt. Dijon mustard adds a lovely, sophisticated sharpness if you prefer it over yellow mustard. If you’re making these for a spooky spread, those Halloween deviled eggs you see online often just use black olive slices and chives for a cute spider garnish—so fun for kids!
Classic Deviled Eggs Timing
- Prep Time: 20 minutes
- Cook Time: 12 minutes (for boiling and cooling)
- Total Time: 32 minutes (plus optional chilling time)
The active hands-on time is minimal. The real secret is giving the eggs time to cool properly so they peel easily. This entire process is about 20% faster than methods that call for steaming or baking the eggs.
Step-by-Step Instructions for Classic Deviled Eggs
Follow these simple steps for perfectly cooked eggs and a flawlessly smooth filling every time.
- Perfectly Boil the Eggs: Place your eggs in a single layer in a large pot. Cover with cold water by about an inch. Add a big pinch of salt to the water—this actually makes peeling easier. Bring to a full, rolling boil over high heat. Once boiling, immediately cover the pot and remove it from the heat. Let it sit, covered, for exactly 12 minutes. This gentle cooking method prevents that dreaded green ring around the yolk.
- Shock and Peel: After 12 minutes, use a slotted spoon to transfer the eggs to a large bowl of ice water. Let them cool completely, about 15 minutes. The rapid cooling stops the cooking and contracts the egg inside the shell, creating a gap that makes peeling a breeze. Gently tap each egg on the counter and roll it to crackle the shell, then peel under cool running water.
- Halve and Separate: Slice each peeled egg in half lengthwise. Gently pop the yolks out into a medium bowl. Arrange the empty white halves on your serving platter.
- Create the Filling: To the yolks, add the mayonnaise, mustard, vinegar, salt, and pepper. Mash everything together with a fork until it’s mostly smooth. For the absolute silkiest filling, press the mixture through a fine-mesh sieve or use a hand mixer on low for 30 seconds. This is the pro tip that takes your deviled eggs recipe best from good to legendary.
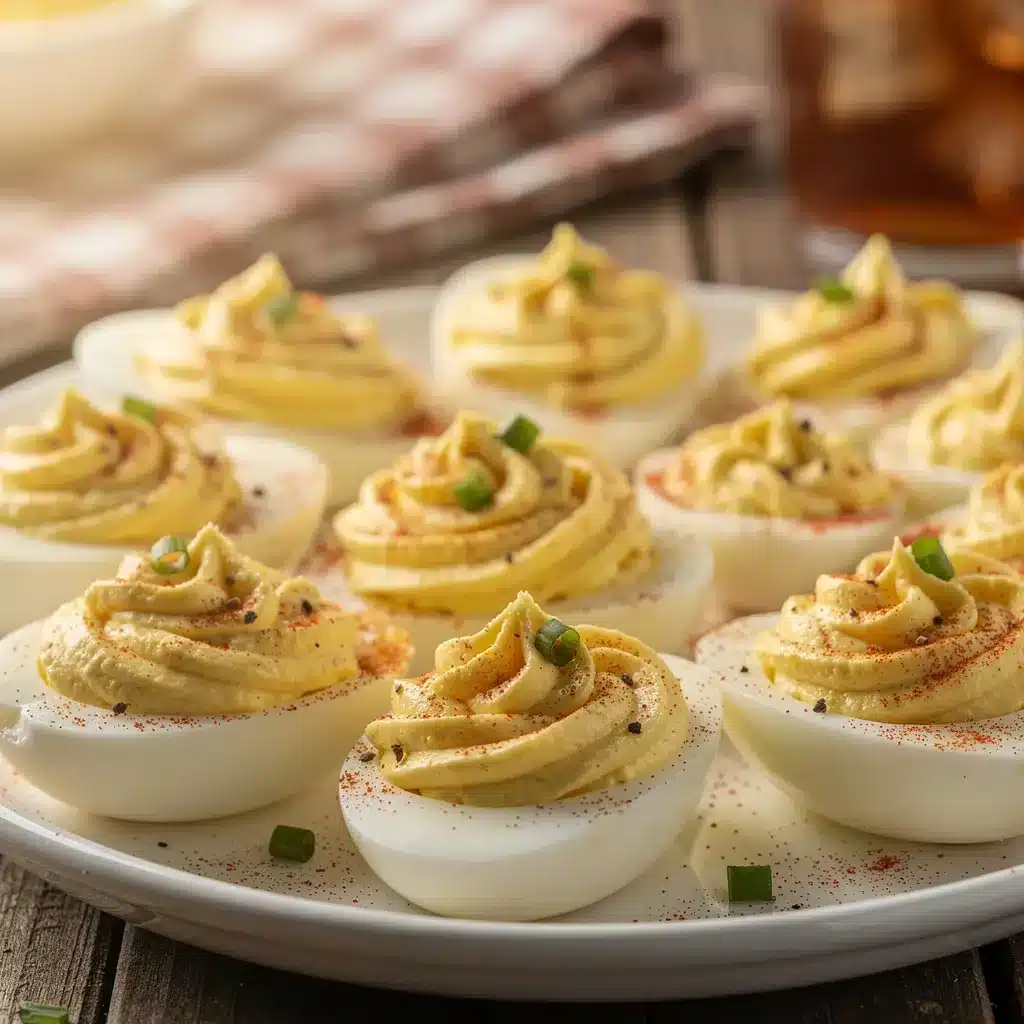
- Fill and Garnish: You can spoon the filling into the egg white cups, but for a beautiful presentation, pipe it. Simply spoon the yolk mixture into a zip-top bag, snip off a corner, and pipe away. Sprinkle generously with paprika just before serving. The paprika isn’t just for color; it adds a subtle, smoky sweetness.
Nutritional Information for Classic Deviled Eggs
Per serving (2 halves/1 whole egg):
- Calories: ~140
- Protein: 6g
- Carbs: 1g
- Fat: 12g
Eggs are a fantastic source of high-quality protein and essential nutrients like choline, which supports brain health. The fats from the mayo and egg yolk help your body absorb the fat-soluble vitamins present. It’s a satisfying, nutrient-dense snack or side.
Equipment Needed for Classic Deviled Eggs
You don’t need any fancy gadgets. A large pot, a bowl for ice water, a slotted spoon, and a mixing bowl are the essentials. For the smoothest filling, a fine-mesh sieve or a hand mixer is helpful but not mandatory. A piping bag (or a simple plastic bag with the corner cut off) will give you that beautiful, professional look.
Why You’ll Love This Classic Deviled Eggs Recipe
- Potluck Perfection: They are the undisputed champion of any shared meal table, from Easter brunch to a summer barbecue.
- Make-Ahead Magic: You can boil the eggs up to 3 days in advance and store them peeled in the fridge. Assemble a few hours before your event for peak freshness.
- Endlessly Adaptable: This creamy base is a canvas. Add relish, hot sauce, horseradish, or crumbled bacon to make them your own.
- Crowd-Pleasing & Budget-Friendly: Eggs are inexpensive, and this recipe turns them into an elegant, beloved appetizer that feeds many.
- Simple Ingredients, Warm Memories: This is comfort food, made easy. It’s a recipe that connects generations.
Healthier Alternatives for Classic Deviled Eggs
- Lighter Creaminess: Substitute half or all of the mayonnaise with plain Greek yogurt or mashed avocado for a protein or healthy-fat boost.
- Lower Sodium: Use a low-sodium mayo and season carefully with herbs like dill or chives instead of extra salt.
- Sugar-Free: Most mayos and mustards are already sugar-free, but always check labels if you’re monitoring sugar intake. This classic recipe is naturally low-carb and keto-friendly as written.
Serving Suggestions for Classic Deviled Eggs
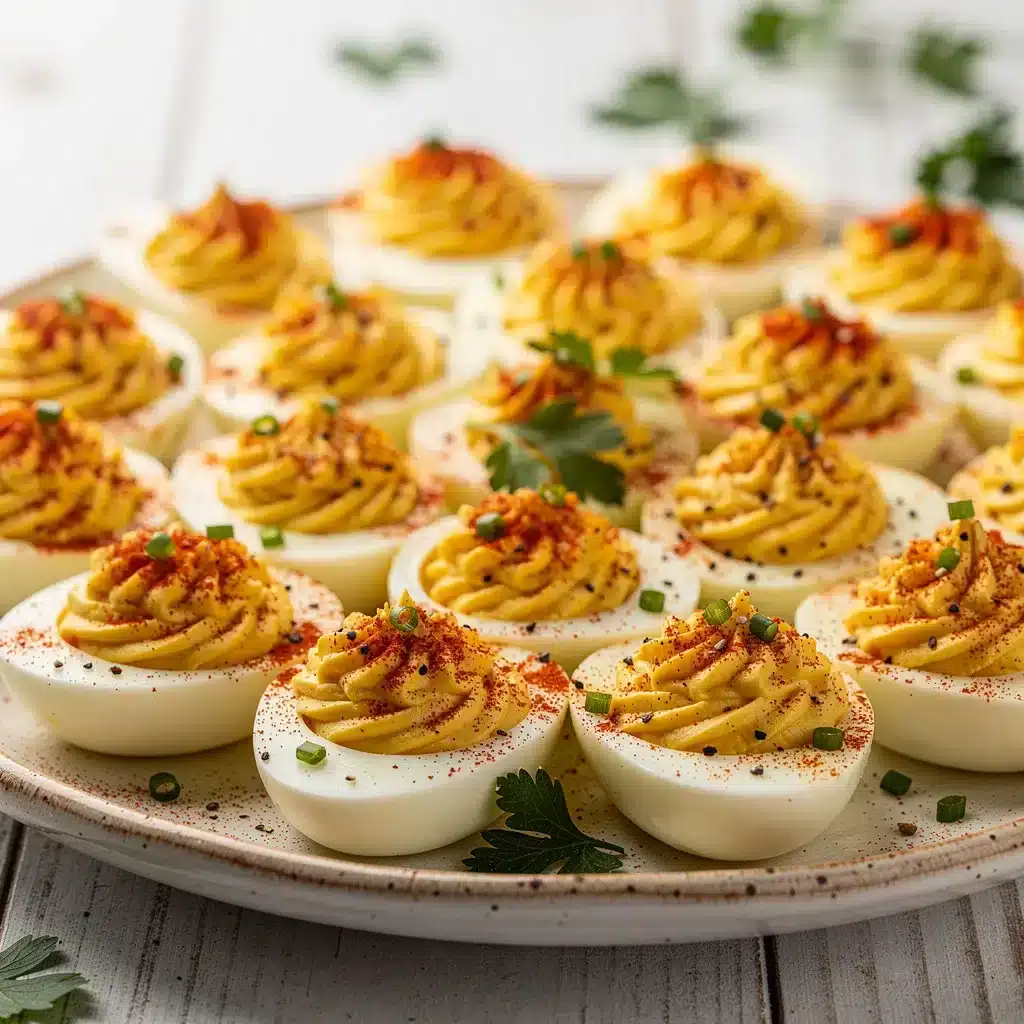
These are the ultimate versatile side. Serve them on a platter with other finger foods for a party. They’re a must-have for holiday dinners, picnics, and baby or bridal showers. For a fun twist, try turning them into Halloween deviled eggs with olive spiders, or a deviled eggs recipe best for spring with a sprinkle of fresh dill and edible flowers. They pair wonderfully with other make-ahead sides like my vibrant Summer Pasta Salad or this hearty Make-Ahead Pasta Salad. For a full picnic spread, add my Picnic Pasta Salad and a Bright Pasta Salad for a colorful, satisfying meal.
Common Mistakes to Avoid with Classic Deviled Eggs
- Overcooking the Eggs: This leads to dry, chalky yolks and that unappetizing green sulfur ring. The “boil, cover, and steep” method outlined above is foolproof.
- Using Warm Yolks: If your yolk mixture is even slightly warm, the mayo can break and become greasy. Ensure everything is completely cooled before mixing.
- Underseasoning the Filling: The filling should be bold, as it’s nestled inside the plain egg white. Taste and adjust the salt, pepper, and acidity (vinegar/mustard) after mixing. It should make your taste buds sing.
- Watery Filling: If your boiled eggs are still warm when you mix, or if you add too much mayo/vinegar, the filling can become loose. If this happens, a 15-minute chill in the fridge will firm it right up.
- Garnishing Too Early: If you sprinkle on the paprika or fresh herbs hours ahead, they can wilt or bleed color. Garnish just before serving for the prettiest presentation.
Storing Tips for Classic Deviled Eggs

Store assembled classic deviled eggs in a single layer in an airtight container in the refrigerator for up to 2 days. The whites may soften slightly, but they’ll still taste great. For best results, I recommend storing the peeled egg whites and the yolk filling separately for up to 2 days, then assembling an hour before serving. These do not freeze well, as the texture of the whites becomes rubbery. For longer storage, you can keep hard-boiled, unpeeled eggs in the fridge for up to a week.
Conclusion for Classic Deviled Eggs
At the end of the day, the best deviled eggs are the ones shared with people you love. This recipe gives you the confidence to create a timeless dish that’s always met with smiles and empty plates. It’s regular kitchen, regular time, great results. I hope this becomes your new go-to method for the most irresistible classic deviled eggs. Food that feels like home doesn’t have to be complicated.
I’d love to hear how yours turn out. What’s your favorite garnish or mix-in? Let me know in the comments below. And if you’re looking for more perfect picnic and potluck ideas, don’t forget to check out my recipe for a Fresh Pasta Salad that’s always a hit. Happy cooking.
FAQs about Classic Deviled Eggs
How long are deviled eggs good for?
Deviled eggs are best consumed within 2 days. Store them in an airtight container in the refrigerator to maintain their quality and prevent bacterial growth.
What is the secret to perfect deviled eggs?
The secret to perfect deviled eggs lies in a few key areas: perfectly cooked eggs (not overcooked!), a smooth and creamy yolk mixture, and balanced flavors. Don’t overcook the eggs, use good quality mayonnaise, and taste as you go!
What kind of mustard is best for deviled eggs?
Yellow mustard is the classic choice for deviled eggs, providing a tangy and slightly acidic flavor. Dijon mustard can also be used for a more complex and slightly spicier flavor. Experiment to find your preference!
Why are my deviled eggs watery?
Watery deviled eggs are usually caused by excess moisture in the yolk mixture. This can be due to too much mayonnaise, or the yolks not being completely dry after cooking. Try blotting the yolks with a paper towel before mixing.
How do you keep deviled eggs from turning gray?
To prevent deviled eggs from turning gray, avoid overcooking the eggs in the first place, and after boiling, immediately transfer them to an ice bath to stop the cooking process. This helps prevent the formation of ferrous sulfide, which causes the gray/green discoloration.
Can you freeze deviled eggs?
It’s not recommended to freeze deviled eggs. Freezing can change the texture of the egg whites and the yolk filling, making them watery and unappetizing upon thawing. It’s best to make them fresh.
💬 Let’s Stay Connected!
For daily recipes, kitchen tips, and exclusive content, follow me on:
👉 Facebook for behind-the-scenes & community fun
👉 Pinterest for visual inspiration & meal ideas
👉 X (Twitter) for quick tips & trending recipes
📲 Join the flavor journey, your next favorite recipe is just a follow away!