This dessert has roots in the American South, but its charm lies in how every family adds their own signature twist. My take on Bakery Style Banana Pudding builds on that tradition with a texture that’s both cloud-like and satisfyingly rich. I remember my grandmother’s version, always served in a big glass bowl with a mountain of meringue that seemed to touch the ceiling. It was the star of every family reunion, a dessert that promised comfort in every spoonful. My goal with this recipe was to capture that same magic, but with a focus on that impossibly creamy, dreamy texture you find in the best bakeries. It’s a dessert that feels like a hug, transforming simple ingredients into something truly special. This Bakery Style Banana Pudding recipe is for those moments when you want to create a little joy, to share something made with care that tastes like a memory. It’s comfort food, made easy, for your regular kitchen and your regular time.
Table of Contents
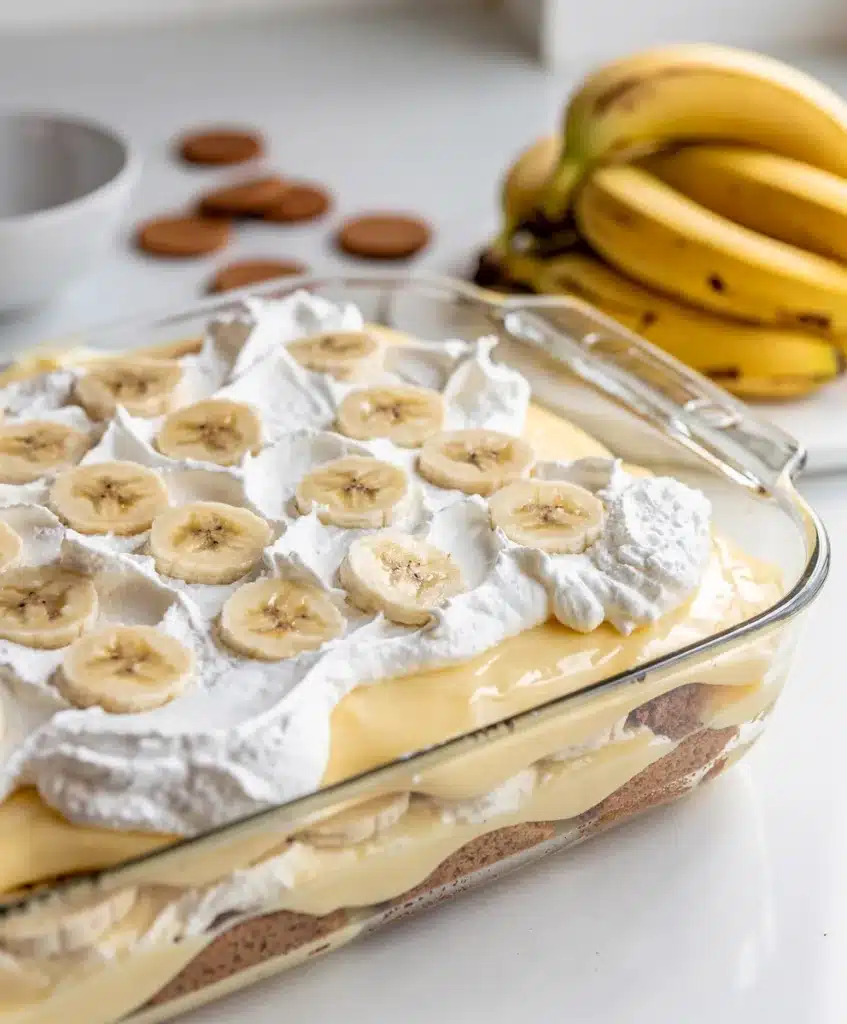
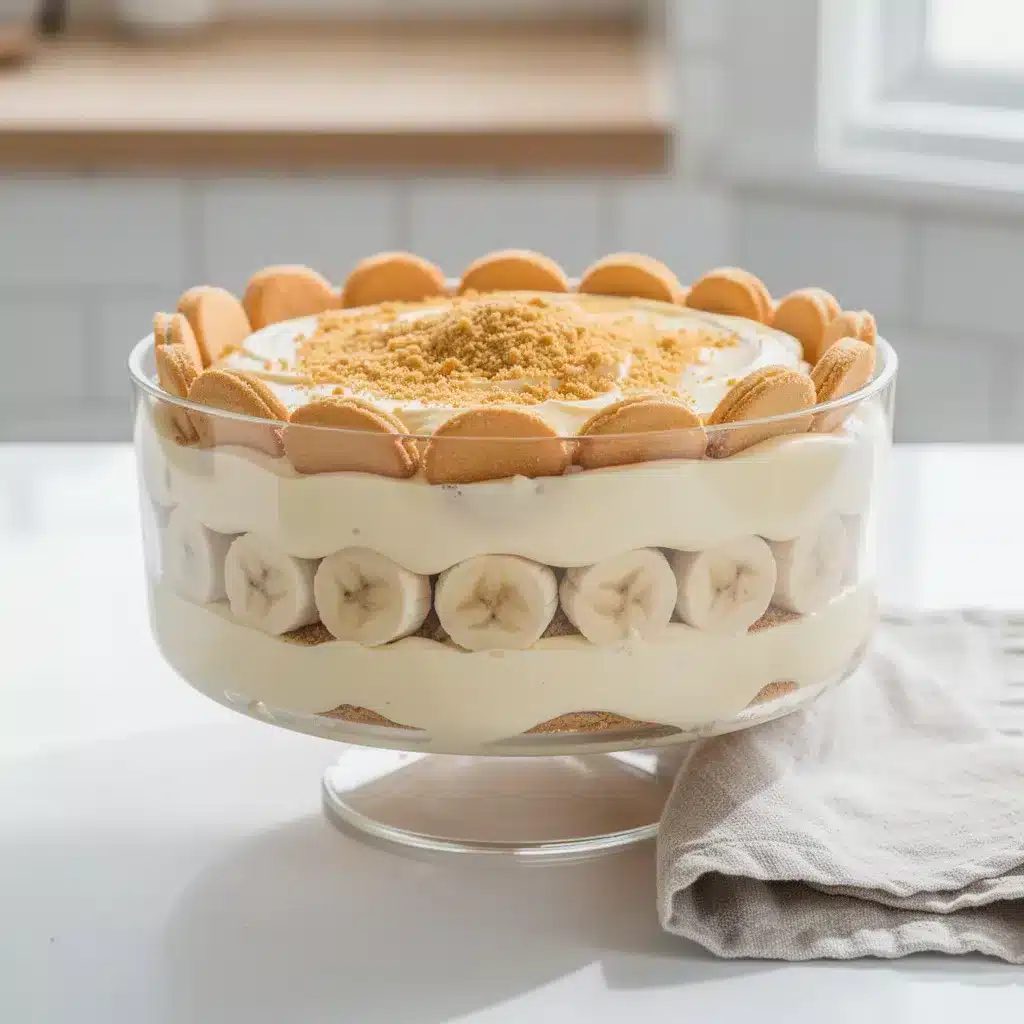
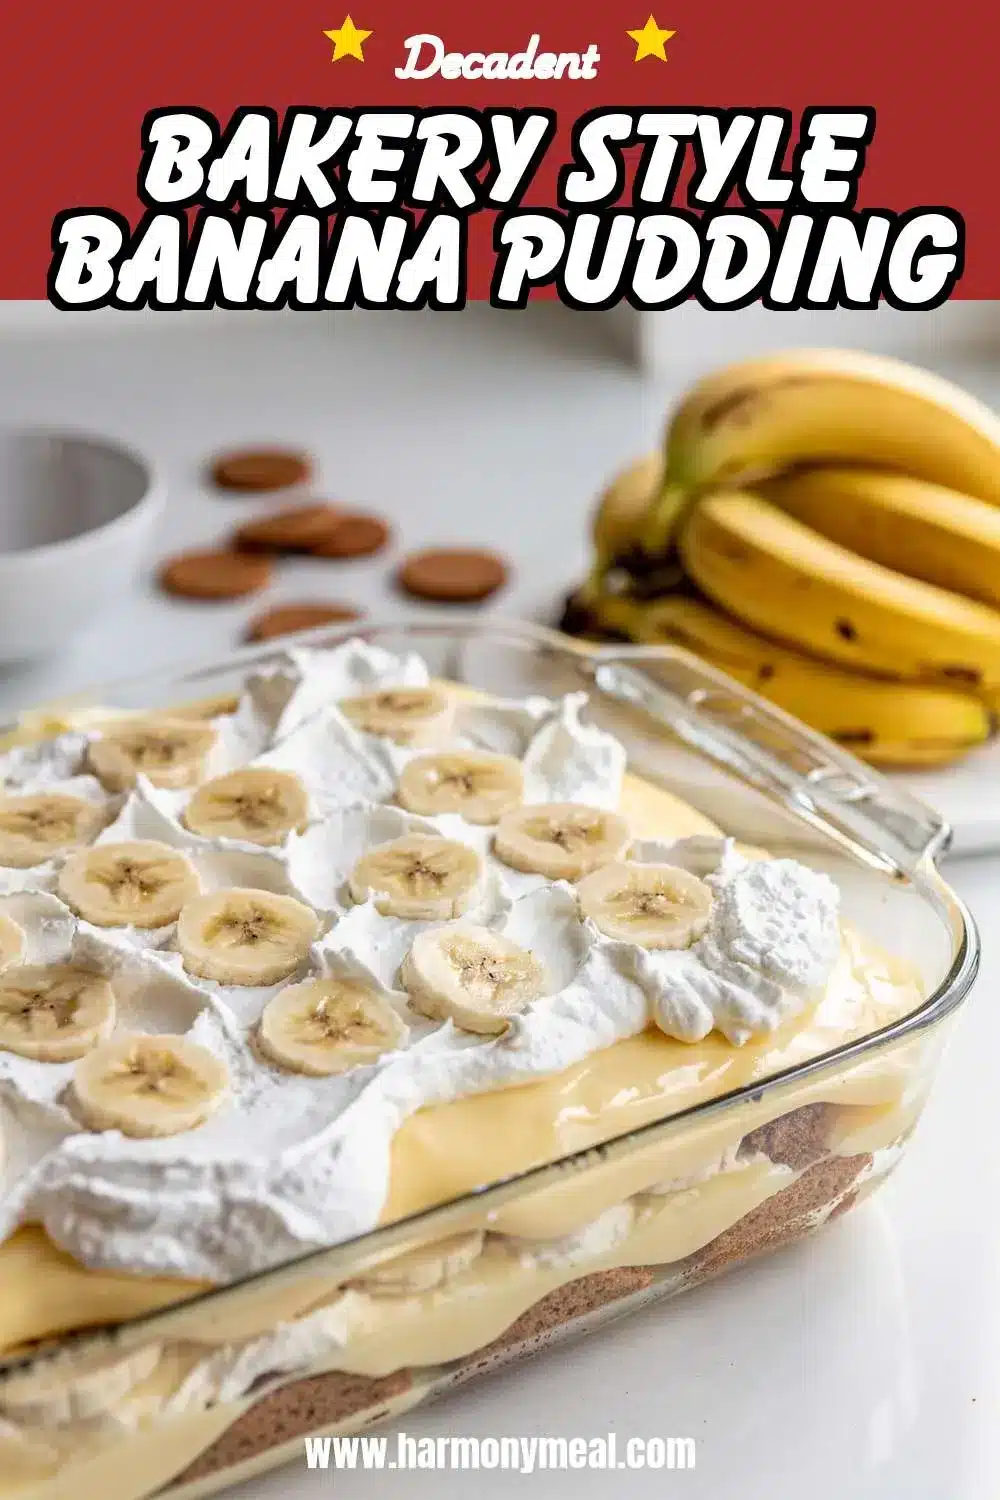
Bakery Style Banana Pudding

This dessert captures the iconic creamy, cloud-like texture of classic Southern banana pudding. It’s a no-cook, make-ahead treat that transforms simple ingredients into a comforting, crowd-pleasing dessert.
- Prep Time: 25min
- Cook Time: 0min
- Total Time: 4h 25min
- Yield: One 9x13 inch dish 1x
- Category: dessert
- Method: no-cook, assembling
- Cuisine: American
Ingredients
- 1 (14 oz) can sweetened condensed milk
- 1 1/2 cups ice-cold water
- 1 (3.4 oz) box instant vanilla pudding mix
- 3 cups heavy whipping cream
- 1 tablespoon pure vanilla extract
- 1 (11 oz) box vanilla wafer cookies (like Nilla Wafers)
- 4–5 large ripe bananas, sliced
- 1 pinch fine sea salt
Instructions
- In a large bowl, whisk sweetened condensed milk and ice-cold water until smooth. Add pudding mix and whisk vigorously for 2 minutes. Let set for 5 minutes.
- In a separate chilled bowl, beat heavy cream, vanilla, and salt with a mixer until stiff peaks form.
- Gently fold the whipped cream into the pudding base until no white streaks remain.
- In a 9×13 inch dish, spread a thin layer of the cream mixture. Top with a single layer of vanilla wafers, then a layer of sliced bananas, then one-third of the cream mixture. Repeat layers two more times, ending with cream.
- Cover tightly and refrigerate for at least 4 hours, or overnight, before serving.
Notes
Use bananas that are ripe with speckles but not mushy. Ensure bowls and beaters are chilled for best whipping results. For a decorative finish, crush extra wafers and sprinkle on top before serving.
Nutrition
- Serving Size: 12
- Calories: 450
- Sugar: 32
- Sodium: 200
- Fat: 28
- Saturated Fat: 17
- Unsaturated Fat: 9
- Trans Fat: 1
- Carbohydrates: 45
- Fiber: 2
- Protein: 6
- Cholesterol: 85
Ingredients List
Bakery Style Banana Pudding starts with humble ingredients, but their quality and combination make all the difference. You’ll need:
- 1 (14 oz) can sweetened condensed milk
- 1 ½ cups ice-cold water
- 1 (3.4 oz) box instant vanilla pudding mix
- 3 cups heavy whipping cream
- 1 tablespoon pure vanilla extract
- 1 (11 oz) box vanilla wafer cookies (like Nilla Wafers)
- 4-5 large, ripe bananas, sliced
- A pinch of fine sea salt
Smart Swaps & Notes:
- Dairy-Free: Use full-fat coconut cream in place of the heavy whipping cream and seek out a dairy-free sweetened condensed coconut milk.
- Lighter Option: For a slightly lighter version, you can substitute one cup of the heavy cream with whole milk, though the texture will be less decadent.
- Bananas: Use bananas that are ripe with speckles but not mushy. They should be sweet and hold their shape when sliced. If you love banana-forward recipes, you might also enjoy my classic Chocolate Chip Banana Bread for another way to use up ripe fruit.
Timing
This Bakery Style Banana Pudding is wonderfully forgiving on timing. While it needs a chill to set perfectly, the active work is minimal.
- Prep Time: 25 minutes
- Chill Time: 4 hours (or ideally overnight)
- Total Time: 4 hours 25 minutes
The beauty of this banana pudding recipe is that you can make it a day ahead, making it a stress-free choice for gatherings. It’s about 30% faster than many cooked pudding versions, with no stovetop stirring required.
Step-by-Step Instructions
Creating this layered masterpiece is a simple, satisfying process. Follow these steps for perfect results every time.
Build the Pudding Base: In a large mixing bowl, whisk together the sweetened condensed milk and ice-cold water until smooth. Add the box of instant pudding mix and whisk vigorously for 2 full minutes. It will thicken noticeably. Set this aside for 5 minutes to let it set further.
Whip the Cream: In a separate chilled bowl, using a hand mixer or stand mixer, beat the heavy whipping cream, vanilla extract, and pinch of salt on medium-high speed until stiff peaks form. This means when you lift the beaters, the cream stands up straight and doesn’t droop.
Fold it All Together: Gently fold the whipped cream into the pudding base. Use a large spatula and a light hand, turning the mixture over from the bottom until no white streaks remain. This is the secret to that irresistible, airy creaminess.
Assemble the Layers: In a 9×13 inch dish or a large trifle bowl, spread a thin layer of the cream mixture on the bottom. Add a single layer of vanilla wafers. Top with a layer of sliced bananas. Spoon about one-third of the cream mixture over the bananas and spread gently. Repeat the layers—wafers, bananas, cream—two more times, ending with a final layer of cream.
Chill and Serve: Cover tightly with plastic wrap and refrigerate for at least 4 hours, or overnight. This crucial step allows the wafers to soften into cake-like layers and the flavors to meld into the iconic Bakery Style Banana Pudding we all love.
Nutritional Information
A serving of this rich dessert (approximately 1 cup) provides roughly 450 calories. It contains about 6g of protein, 45g of carbohydrates, and 28g of fat. Bananas offer a boost of potassium and vitamin B6, while the dairy provides calcium. As with any indulgent treat, it’s best enjoyed in moderation as part of a balanced diet.
Equipment Needed
You don’t need any fancy tools to make this Bakery Style Banana Pudding. A few basics will do:
- Large mixing bowls (2)
- Whisk
- Electric hand mixer or stand mixer
- Large rubber spatula
- 9×13 inch baking dish or a large glass trifle bowl
- Measuring cups and spoons
Why You’ll Love This Recipe
This banana pudding recipe earns its place in your regular rotation for so many reasons.
- Foolproof & No-Cook: No tempering eggs or worrying about a curdled custard. The instant pudding method is incredibly reliable.
- Make-Ahead Magic: It actually gets better as it sits, making it the ultimate stress-free dessert for parties and potlucks.
- Crowd-Pleasing Comfort: It’s a universally loved dessert that appeals to all ages, from kids to grandparents.
- Texture Perfection: The layered vanilla wafers soften into a delightful cake-like texture, distinct from other banana pudding cakes.
- Simple Ingredients, Warm Memories: It turns basic pantry staples into a showstopping treat that feels nostalgic and special.
Healthier Alternatives for the Recipe
You can adapt this Bakery Style Banana Pudding to fit different dietary needs without sacrificing too much flavor.
- Gluten-Free: Use your favorite gluten-free vanilla cookies in place of Nilla Wafers.
- Dairy-Free: As noted in the ingredients, swap in coconut cream and dairy-free condensed milk. Be sure to use a dairy-free pudding mix.
- Reduced Sugar: Opt for a sugar-free instant pudding mix and look for a lower-sugar vanilla wafer option. The bananas will still provide natural sweetness.
- Higher Protein: Fold in ½ cup of plain Greek yogurt into the pudding base before adding the whipped cream for a tangy protein boost.
Serving Suggestions
This Bakery Style Banana Pudding is glorious all on its own, but a few simple touches can make it extra special.
- Classic Finish: Just before serving, crush a few extra vanilla wafers and sprinkle them over the top for a bit of crunch.
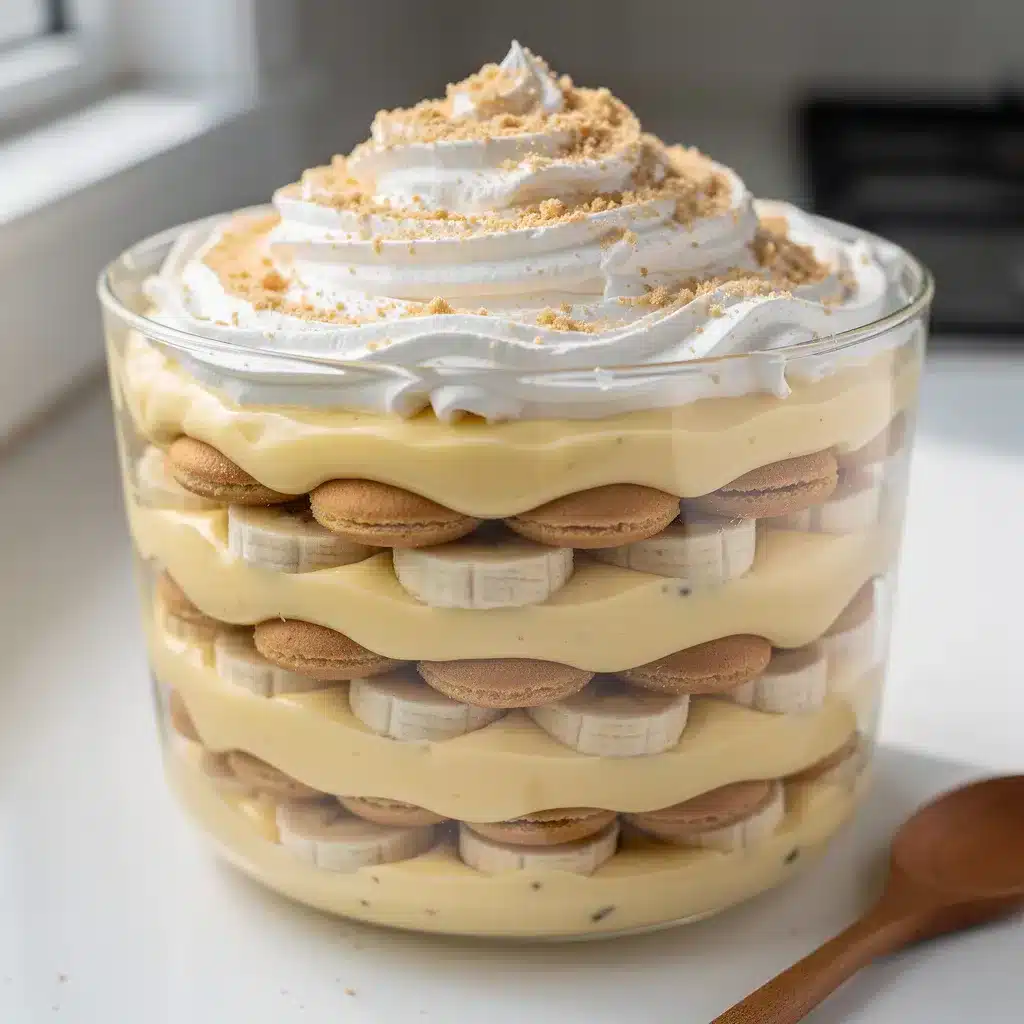
- For a Party: Serve in individual clear cups or mason jars for a beautiful, portable presentation.
- Coffee Pairing: A cup of strong coffee or a latte is the perfect bitter complement to the sweet, creamy pudding.
- Seasonal Twist: In the fall, add a sprinkle of cinnamon to the cream mixture. In summer, garnish with a few fresh berries on the side.
Common Mistakes to Avoid
A few small missteps can change your pudding’s texture. Here’s how to avoid them.
- Using Warm Ingredients: The water must be ice-cold, and your bowl and beaters for the cream should be chilled. Warmth prevents the whipped cream from achieving stiff peaks, leading to a runny pudding.
- Overmixing the Cream & Pudding: When folding the whipped cream into the pudding base, be gentle. Overmixing deflates the air you just whipped in, resulting in a denser, less cloud-like texture.
- Using Overripe or Underripe Bananas: Brown, mushy bananas will turn soggy and can make the whole dessert watery. Green bananas lack sweetness. Aim for yellow with brown speckles.
- Skipping the Chill Time: This is non-negotiable. The pudding needs time for the layers to settle and the wafers to soften properly. Serving it too soon means you’ll miss out on the perfect, cohesive texture of a true Bakery Style Banana Pudding.
Storing Tips for the Recipe
Proper storage keeps your banana pudding delicious for days.
- Refrigerator: Keep covered tightly with plastic wrap or in an airtight container. It will stay fresh for 3-4 days. The bananas will continue to soften but remain tasty.
- Freezer: I do not recommend freezing this pudding, as the dairy and banana layers will separate and become watery upon thawing.
- Make-Ahead: This is the ultimate make-ahead dessert. Assemble it completely the day before you need it. The flavors deepen and the texture becomes even more harmonious overnight.
Conclusion
This Bakery Style Banana Pudding is more than just a dessert; it’s a bowl of comfort, a shareable joy, and a testament to how a few simple steps can create something extraordinary. It delivers that iconic, creamy texture and layered goodness that makes you feel like you brought the bakery home. I hope this recipe becomes a new favorite in your home, a dish you turn to for celebrations, weeknight treats, or just because. Remember, it’s all about regular kitchen, regular time, great results.
If you give this banana pudding recipe a try, I’d love to hear how it turned out for you. Share your creations and tag @HarmonyMeal on Pinterest so I can see your beautiful dishes. And if you’re looking for more delicious ways to use ripe bananas, be sure to check out my Greek Yogurt Banana Bread for a healthier breakfast option, or my Peanut Butter Banana Overnight Oats for a make-ahead morning treat. For a cozy weekend breakfast, my Banana Oat Pancakes or Banana Oatmeal Pancakes are always a family hit. Happy cooking.
FAQs about Bakery Style Banana Pudding
What makes banana pudding bakery style?
Bakery-style banana pudding typically distinguishes itself with a richer, more decadent flavor and texture compared to traditional recipes. This often involves using a cooked custard base instead of instant pudding, incorporating high-quality ingredients like real vanilla extract and freshly whipped cream, and layering it meticulously for an appealing presentation. It often also features homemade vanilla wafers or a similar high-quality cookie.
How do you keep banana pudding from getting soggy?
To prevent soggy banana pudding, ensure your vanilla wafers are slightly crisp before assembling. Layer the pudding carefully, preventing direct contact between the bananas and the wafers for extended periods. You can also lightly brush the wafers with melted chocolate or a sugar syrup to create a moisture barrier. Serving it soon after assembly is also key.
Can you make banana pudding ahead of time?
Yes, you can make banana pudding ahead of time, but it’s best enjoyed within 24-48 hours of assembly to prevent the bananas from browning and the wafers from becoming too soft. If making ahead, consider layering the bananas just before serving for optimal freshness.
What is the best type of banana to use for banana pudding?
The best bananas for banana pudding are ripe but firm. You want them to be sweet and flavorful but not mushy. Avoid overripe bananas, as they will make the pudding too soft and can have an overly fermented flavor.
What can I use instead of vanilla wafers in banana pudding?
If you don’t have vanilla wafers, you can substitute them with other cookies like shortbread cookies, graham crackers, or even ladyfingers. Some recipes also use pound cake cubes. The key is to choose a cookie that complements the banana and pudding flavors.
How do you store leftover banana pudding?
Store leftover banana pudding in an airtight container in the refrigerator. It’s best consumed within 2-3 days, as the bananas will continue to soften and may discolor. The wafers will also soften over time.
💬 Lets Stay Connected!
For daily recipes, kitchen tips, and exclusive content, follow me on:
👉 Facebook for behind the scenes & community fun
👉 Pinterest for visual inspiration & meal ideas
👉 X (Twitter) for quick tips & trending recipes
📲 Join the flavor journey, your next favorite recipe is just a follow away!