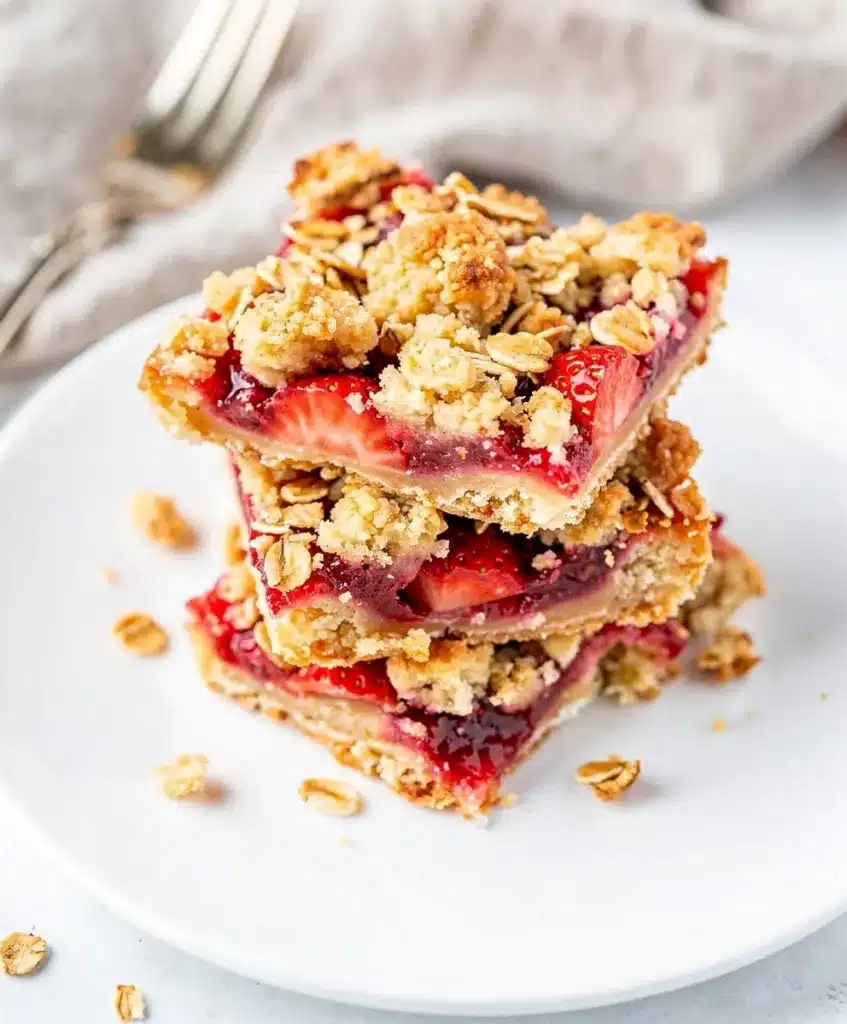
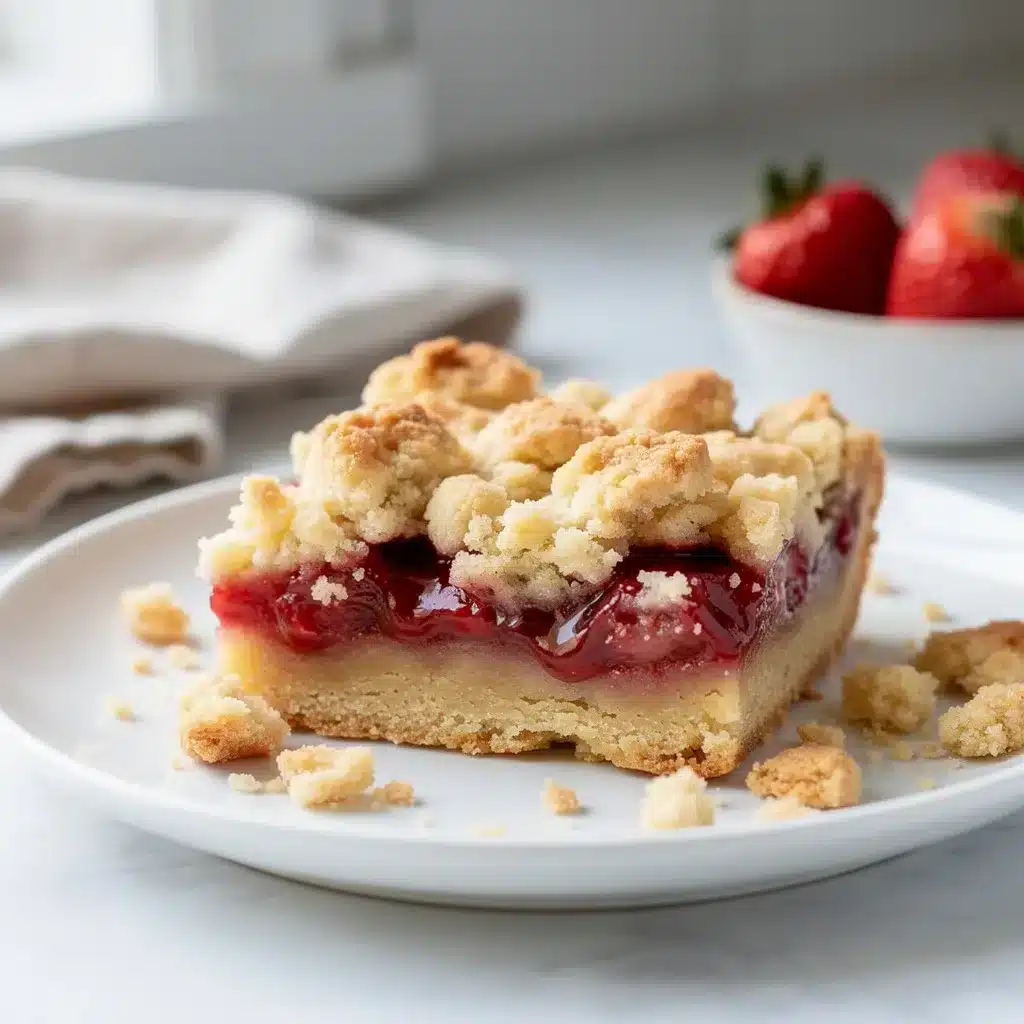
The scent of ripe strawberries bubbling under a buttery oat crust always transports me back to my grandmother’s summer kitchen. Today, I’m sharing my perfected recipe for Strawberry Crumble Bars, a dessert that captures that same nostalgic warmth with a healthier twist. It’s the kind of treat that feels like a hug from the oven, perfect for picnics, potlucks, or a quiet afternoon with a cup of tea. These bars are the ultimate easy dessert idea, striking that perfect balance between a tender, jammy filling and a crisp, crumbly topping that’s impossible to resist. Simple ingredients, warm memories. This recipe is all about celebrating summer’s best fruit in a no-fuss, handheld form. Whether you’re a seasoned baker or just starting out, these Strawberry Crumble Bars promise great results with minimal effort. Let’s make something delicious.
Table of Contents
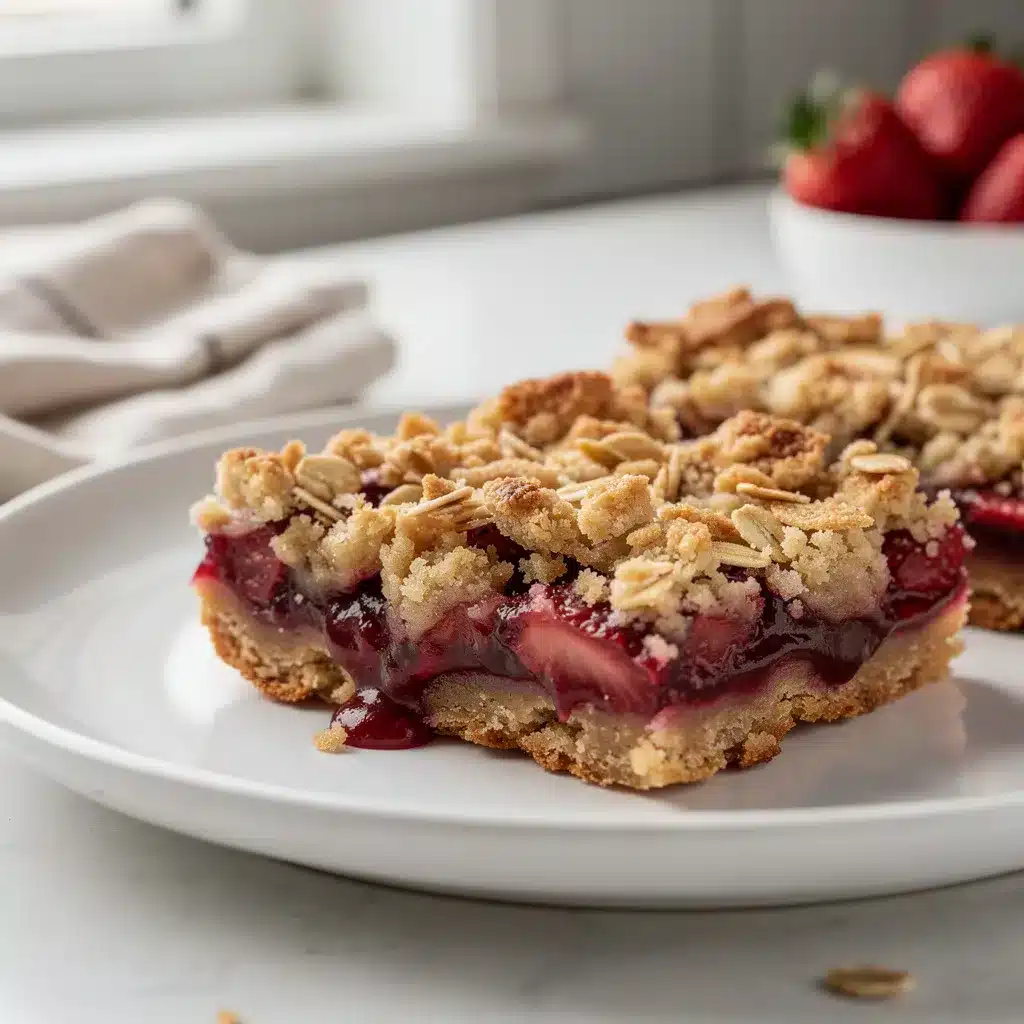
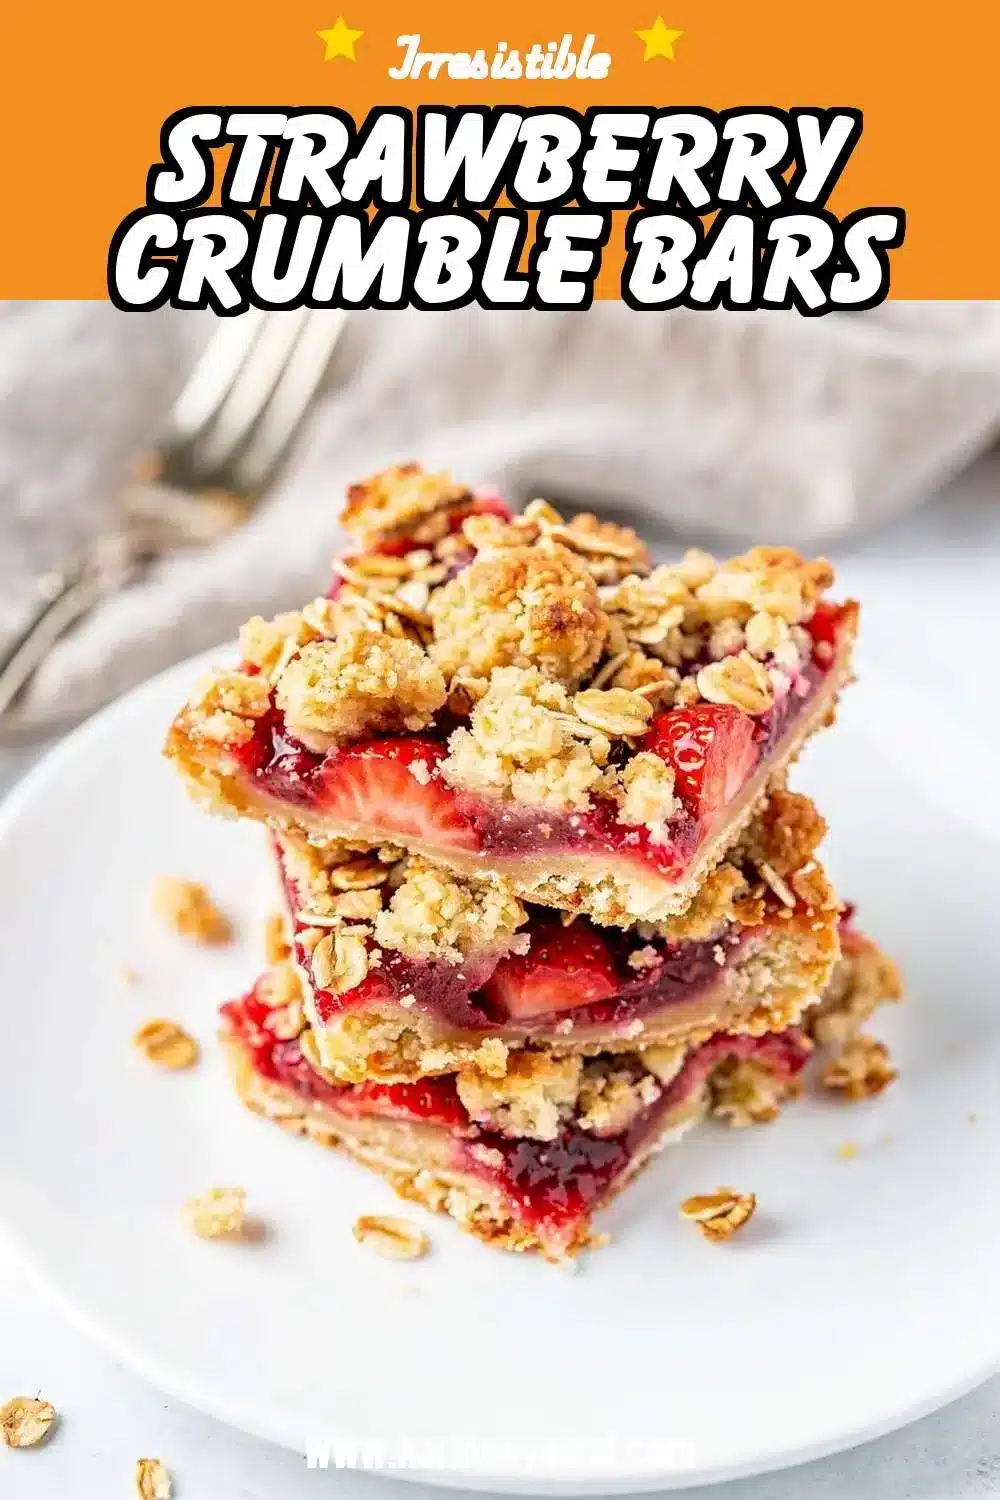
Strawberry Crumble Bars

These Strawberry Crumble Bars are a nostalgic and comforting dessert featuring a jammy strawberry filling between a buttery oat crust and crumble topping. They are simple to make with pantry staples and fresh fruit, perfect for summer gatherings or a sweet treat. This easy recipe yields handheld bars that are both delicious and versatile.
- Prep Time: 20min
- Cook Time: 40min
- Total Time: 1h (plus cooling)
- Yield: 9 bars 1x
- Category: dessert
- Method: baking
- Cuisine: American
Ingredients
- 2 cups all-purpose flour
- 1 cup old-fashioned rolled oats
- 1 cup packed light brown sugar
- 1/2 teaspoon baking soda
- 1/2 teaspoon salt
- 1 cup (2 sticks) cold unsalted butter, cubed
- 3 cups fresh strawberries, hulled and diced
- 1/3 cup granulated sugar
- 2 tablespoons cornstarch
- 1 tablespoon fresh lemon juice
- 1 teaspoon vanilla extract
Instructions
- Preheat oven to 350°F (175°C). Line an 8×8 or 9×9 inch baking pan with parchment paper, leaving an overhang on two sides.
- In a large bowl, whisk together flour, oats, brown sugar, baking soda, and salt. Add cold, cubed butter. Use a pastry cutter, fork, or fingers to work butter into dry ingredients until mixture resembles coarse, pebbly sand with some clumps.
- Reserve about 1 1/2 cups of the crumble mixture for the topping. Press remaining mixture firmly and evenly into the bottom of the prepared pan. Bake for 15 minutes.
- While crust bakes, prepare filling. In a medium bowl, gently toss diced strawberries with granulated sugar, cornstarch, lemon juice, and vanilla extract.
- Spread strawberry filling evenly over the hot, par-baked crust. Sprinkle reserved crumble topping evenly over strawberries, covering completely. Do not press down.
- Bake for 35-40 minutes, until topping is golden brown and strawberry filling is bubbling around the edges.
- Let pan cool completely on a wire rack for at least 2 hours before slicing into bars.
Notes
For clean slices, allow bars to cool completely. Use cold butter for a crumbly texture. Frozen strawberries can be used; add an extra tablespoon of cornstarch. Bars can be stored at room temperature for 2 days, refrigerated for 5 days, or frozen for up to 3 months.
Nutrition
- Serving Size: 1
- Calories: 320
- Sugar: 26
- Sodium: 180
- Fat: 14
- Saturated Fat: 9
- Unsaturated Fat: 4
- Trans Fat: 0
- Carbohydrates: 47
- Fiber: 2
- Protein: 3
- Cholesterol: 35
Ingredients List
Strawberry Crumble Bars come together with a short list of pantry staples and fresh fruit, making them one of the most approachable homemade desserts you can bake. Here’s what you’ll need.
For the Crust and Crumble Topping:
- 2 cups all-purpose flour
- 1 cup old-fashioned rolled oats
- 1 cup packed light brown sugar
- 1/2 teaspoon baking soda
- 1/2 teaspoon salt
- 1 cup (2 sticks) cold unsalted butter, cubed
For the Strawberry Filling:
- 3 cups fresh strawberries, hulled and diced
- 1/3 cup granulated sugar
- 2 tablespoons cornstarch
- 1 tablespoon fresh lemon juice
- 1 teaspoon vanilla extract
Smart Swaps:
- Gluten-Free: Use a 1:1 gluten-free flour blend and certified gluten-free oats.
- Dairy-Free: Substitute the butter with a high-quality vegan butter stick.
- Sugar Adjustment: For a less sweet bar, reduce the brown sugar in the crust to 3/4 cup.
- Berry Swap: Frozen strawberries work perfectly here; no need to thaw, just add an extra tablespoon of cornstarch to account for the extra liquid.
Timing
One of the best parts of this easy dessert idea is how quickly it comes together. You can have these bars ready from start to finish in about an hour, with most of that time being hands-off baking.
- Prep Time: 20 minutes
- Cook Time: 40 minutes
- Total Time: 1 hour (plus cooling time)
- Compared to many from-scratch desserts, these Strawberry Crumble Bars are about 30% faster because the same mixture forms both the crust and the topping.
Step-by-Step Instructions
Follow these simple steps for perfect Strawberry Crumble Bars every single time. The process is straightforward and deeply satisfying.
- Prep and Preheat. Start by preheating your oven to 350°F (175°C). Line an 8×8 or 9×9 inch baking pan with parchment paper, leaving an overhang on two sides for easy removal. This little trick is a game-changer for clean slices.
- Make the Crumble Base. In a large bowl, whisk together the flour, oats, brown sugar, baking soda, and salt. Add the cold, cubed butter. Using a pastry cutter, your fingers, or a fork, work the butter into the dry ingredients until the mixture resembles coarse, pebbly sand. You should have some larger clumps—that’s perfect for the crumble!
- Par-Bake the Crust. Reserve about 1 1/2 cups of the crumble mixture for the topping. Press the remaining mixture firmly and evenly into the bottom of your prepared pan. I like to use the bottom of a measuring cup to really pack it down. Bake this crust for 15 minutes. This step ensures a firm base that won’t get soggy.
- Prepare the Filling. While the crust bakes, make the strawberry filling. In a medium bowl, gently toss the diced strawberries with granulated sugar, cornstarch, lemon juice, and vanilla extract. The cornstarch is key—it thickens the juicy berries into a perfect, sliceable jam.
- Assemble the Bars. Once the crust is out of the oven (it will look pale and set), spread the strawberry filling evenly over the hot crust. Sprinkle the reserved crumble topping over the strawberries, covering them completely. Don’t press it down.
- Bake to Perfection. Return the pan to the oven and bake for another 35-40 minutes, or until the topping is golden brown and the strawberry filling is visibly bubbling around the edges. That bubbling is your signal that the cornstarch has activated.
- The Crucial Cool. This is the hardest part! Let the pan of Strawberry Crumble Bars cool completely on a wire rack before slicing—at least 2 hours. This allows the filling to fully set, so you get neat, beautiful bars instead of a delicious, messy crumble (which is also good, but not what we’re after today!).
Nutritional Information
A serving (one bar from a 9×9 pan cut into 9 squares) provides approximately:
- Calories: ~320
- Fat: 14g
- Carbohydrates: 47g
- Fiber: 2g
- Sugar: 26g
- Protein: 3g
Strawberries bring a boost of vitamin C and antioxidants to these comforting bars. Using whole oats adds beneficial fiber to the crust and crumble, making these a more wholesome choice among simple dessert recipes.
Equipment Needed
You don’t need any fancy gadgets to make these Strawberry Crumble Bars. A regular kitchen with basic tools is all you need.
- 8×8 or 9×9 inch baking pan
- Parchment paper
- Mixing bowls
- Whisk
- Pastry cutter, fork, or clean hands
- Measuring cups and spoons
- Wire cooling rack
Why You’ll Love This Recipe
These Strawberry Crumble Bars are a forever favorite for so many reasons.
- One-Bowl Wonder: The crust and topping come from the same simple mixture, minimizing dishes.
- Freezer-Friendly: They freeze beautifully, so you can stash a batch for a future sweet craving or unexpected guests.
- Crowd-Pleasing: They are the definition of easy desserts for a crowd—portable, universally loved, and simple to serve.
- Seasonally Flexible: While perfect for summer strawberries, this formula works with almost any fruit you have on hand.
- Comfort in Every Bite: They deliver that classic, home-baked flavor and texture that feels instantly comforting and special.
Healthier Alternatives for the Recipe
Love the idea but want to tweak it? Here are some easy swaps that keep the spirit of these homemade desserts intact.
- Gluten & Dairy-Free: Use gluten-free flour, certified GF oats, and vegan butter sticks. The texture remains wonderfully crumbly.
- Lower Sugar: Reduce the brown sugar in the crust to 3/4 cup and use a natural sugar substitute like coconut sugar or monk fruit blend in the filling. The natural sweetness of ripe berries will shine.
- Whole Grain Boost: Substitute up to half of the all-purpose flour with whole wheat flour for added fiber and a nuttier flavor.
- Nutty Addition: Stir 1/2 cup of chopped almonds or pecans into the crumble topping for extra crunch and healthy fats.
Serving Suggestions
A warm Strawberry Crumble Bar is a delight on its own, but a little embellishment never hurts.
- A La Mode: Serve a bar slightly warmed with a scoop of vanilla bean ice cream. The contrast of warm crumble and cold cream is sublime.
- Whipped Cream Cloud: A dollop of freshly whipped cream or a drizzle of homemade custard takes it over the top.
- Brunch Worthy: These bars are perfect for a weekend brunch spread alongside a pot of coffee.
- Garnish: A light dusting of powdered sugar or a few fresh mint leaves makes for a beautiful, simple presentation. If you love the combination of strawberries and creamy elements, you must try my Strawberry Cheesecake Overnight Oats for a breakfast version of those flavors.
Common Mistakes to Avoid
A few small missteps can change the texture of your Strawberry Crumble Bars. Here’s how to avoid them.
- Using Melted Butter: Your butter must be cold. Melted butter will create a greasy, dense crust instead of a light, crumbly one.
- Skipping the Cornstarch: This is the thickening agent for the juicy berries. Without it, your filling will be runny and the bars won’t hold their shape.
- Cutting While Warm: I know it’s tempting, but cutting into warm bars guarantees a messy, saucy slice. Patience is key for clean edges.
- Overworking the Dough: When mixing the butter into the flour, stop once it’s crumbly. Over-mixing can lead to a tough crust.
- Uneven Crust Press: Take a moment to press the base layer firmly and evenly. A thin or uneven spot can become soggy under the berry filling.
Storing Tips for the Recipe
Proper storage keeps your Strawberry Crumble Bars tasting fresh.
- Room Temperature: Store cooled bars in an airtight container at room temperature for up to 2 days.
- Refrigerator: For longer storage, keep them in the fridge for up to 5 days. The chilled filling becomes delightfully firm.
- Freezer: These bars freeze exceptionally well. Wrap individual bars tightly in plastic wrap and place them in a freezer bag for up to 3 months. Thaw at room temperature or warm gently in the oven.
- Reheating: To recapture that fresh-from-the-oven warmth, place a bar on a baking sheet in a 300°F oven for 5-10 minutes.
Conclusion
At the end of the day, these Strawberry Crumble Bars are about more than just a tasty treat. They’re about creating a moment of simple joy, of filling your kitchen with a wonderful aroma, and of sharing something made with love. This recipe proves that the best homemade desserts don’t have to be complicated. They just have to be good. Comfort food, made easy. I hope this recipe becomes a staple in your summer baking rotation, just as it has in mine. If you’re looking for other ways to use summer berries, try my classic Strawberry Shortcake Cups for individual servings, or my incredibly easy Strawberry White Chocolate Dump Cake for a crowd-pleasing dessert with minimal effort. For another fantastic crumble bar variation, my Rhubarb Crumble Bars are a must-try when rhubarb is in season.
I’d love to hear how your Strawberry Crumble Bars turn out! Leave a comment below and don’t forget to tag @HarmonyMeal on Pinterest so I can see your beautiful creations. Happy baking.
FAQs about Strawberry Crumble Bars
Can strawberry crumble bars be frozen?
Yes, strawberry crumble bars freeze well! Allow them to cool completely, then cut them into squares. Wrap individually in plastic wrap or place in a freezer-safe container for up to 2-3 months. Thaw at room temperature before serving.
How do you keep crumble topping from getting soggy?
To prevent a soggy crumble topping, ensure the fruit filling isn’t overly juicy by using the right amount of thickener (like cornstarch or flour). Also, bake the bars until the topping is golden brown and crisp, which helps to seal it.
What can I use instead of oats in crumble topping?
If you don’t have or want to use oats, try using other nuts like chopped almonds, pecans, or walnuts. You can also use shredded coconut or even more flour for a different texture.
How do you store strawberry crumble bars?
Store strawberry crumble bars at room temperature in an airtight container for up to 3 days or in the refrigerator for up to 5 days to maintain freshness.
What is the best way to cut crumble bars?
For clean cuts, let the strawberry crumble bars cool completely before cutting. Using a sharp knife and wiping it clean between each cut will also help prevent the crumble from falling apart.
Can I use frozen strawberries in strawberry crumble bars?
Yes, you can use frozen strawberries. Thaw them slightly and drain any excess juice before mixing them into the filling to prevent a soggy crumble.
💬 Let’s Stay Connected!
For daily recipes, kitchen tips, and exclusive content, follow me on:
👉 Facebook for behind-the-scenes & community fun
👉 Pinterest for visual inspiration & meal ideas
👉 X (Twitter) for quick tips & trending recipes
📲 Join the flavor journey, your next favorite recipe is just a follow away!